


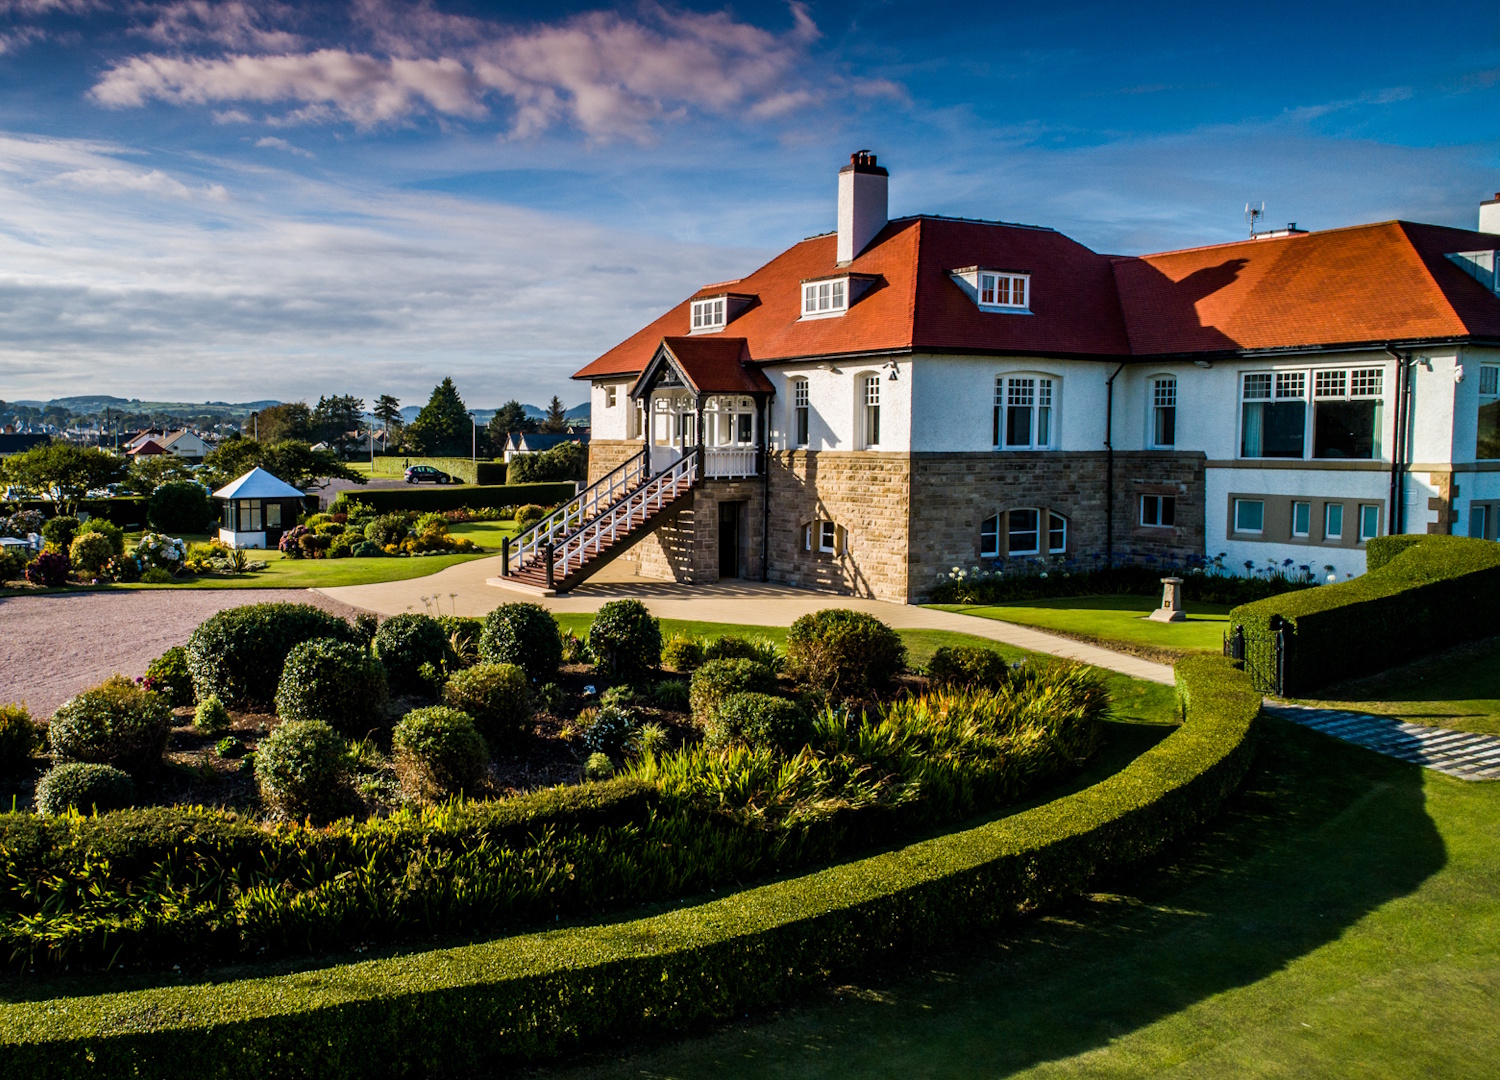

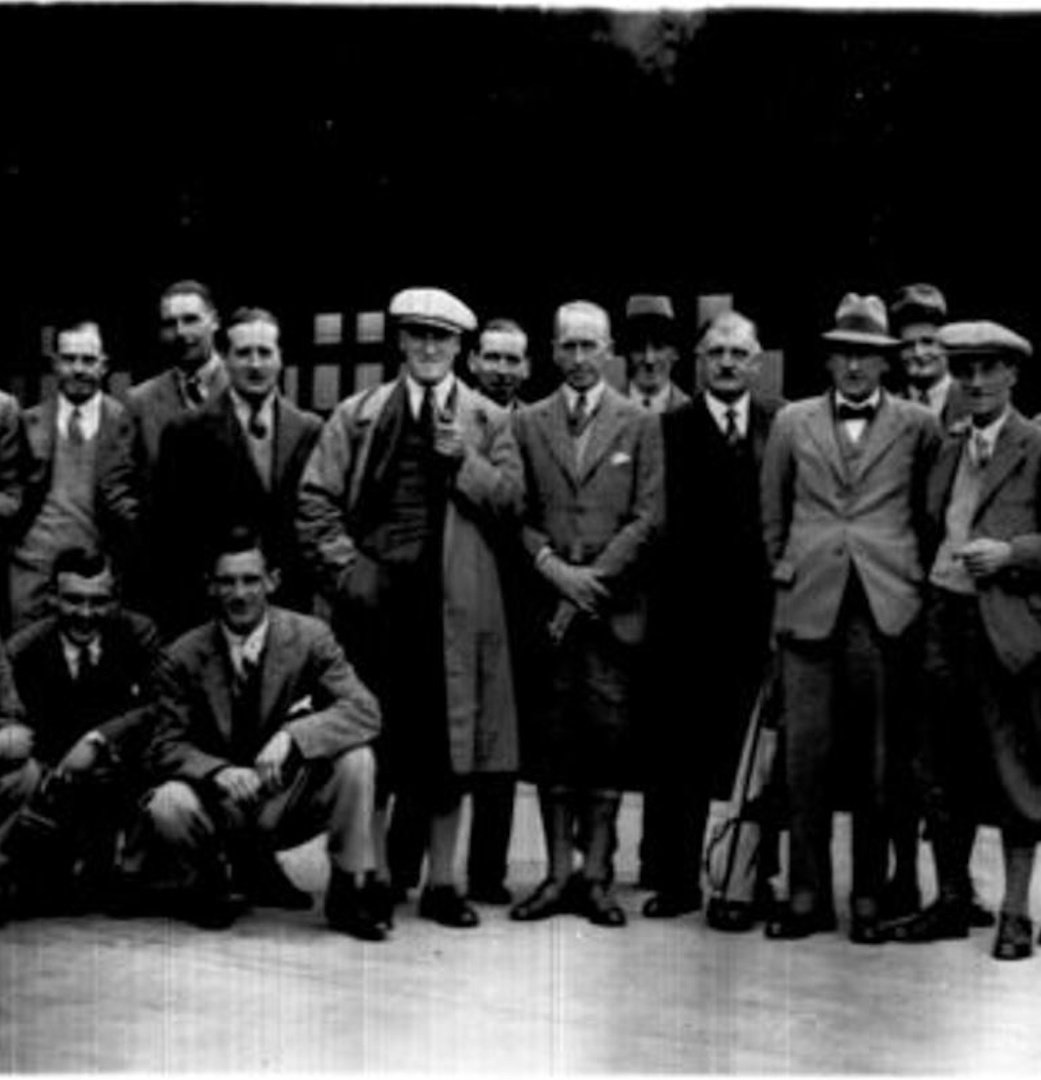

- Gallery
- Flyover
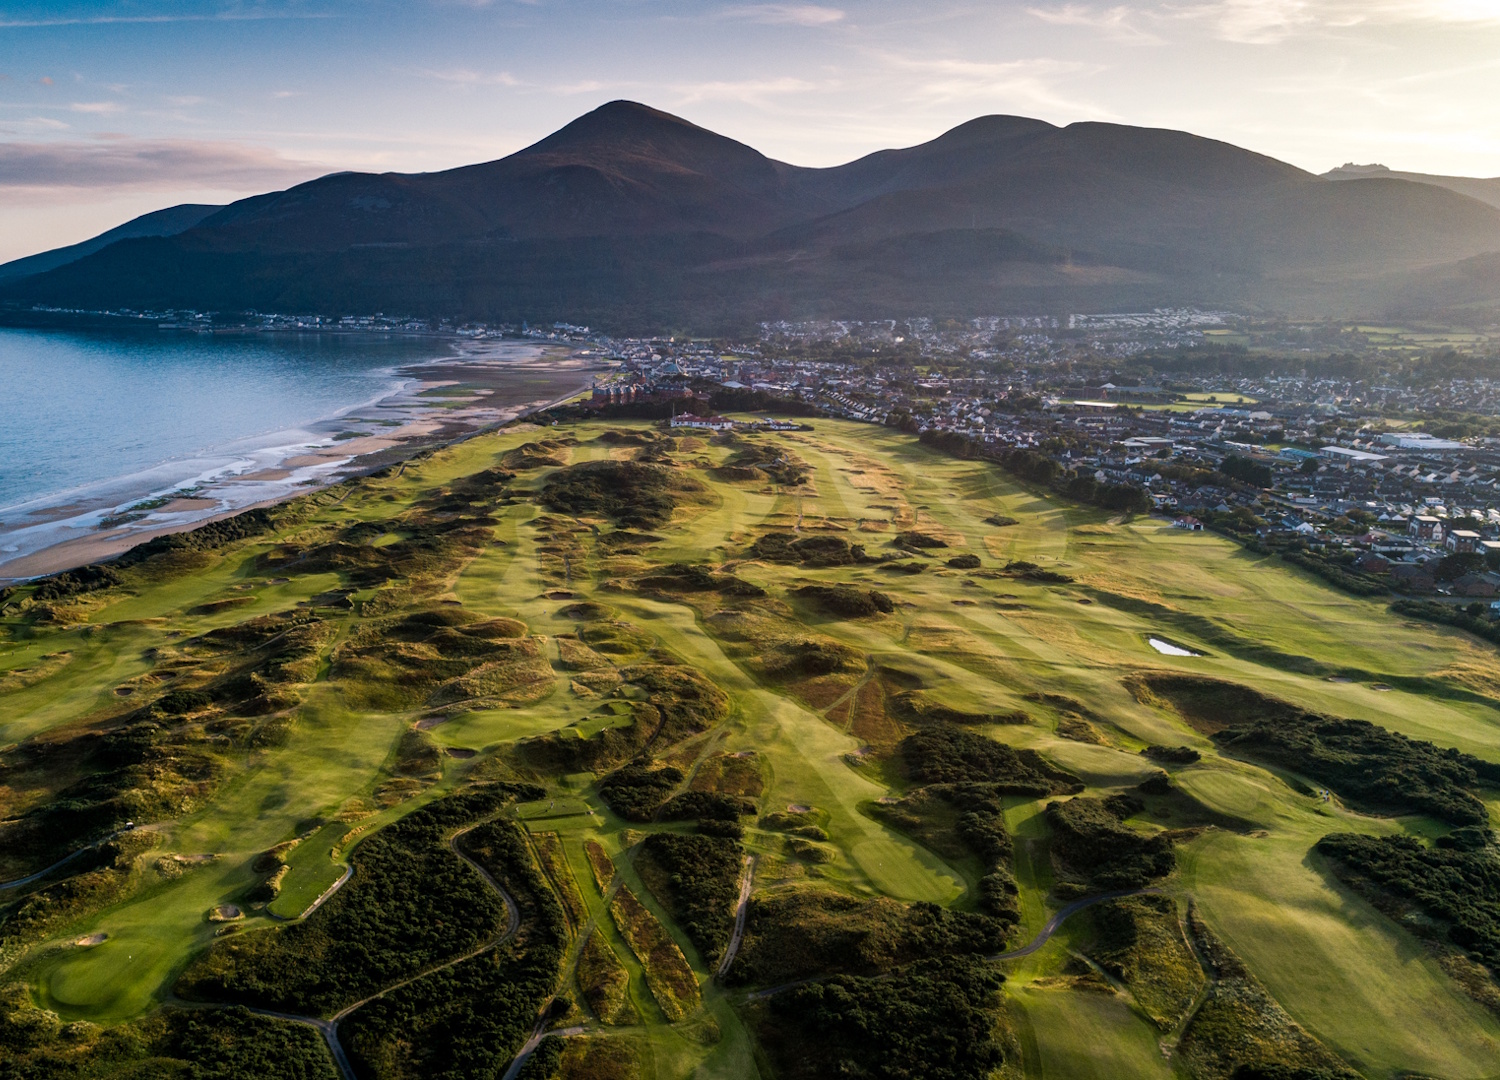
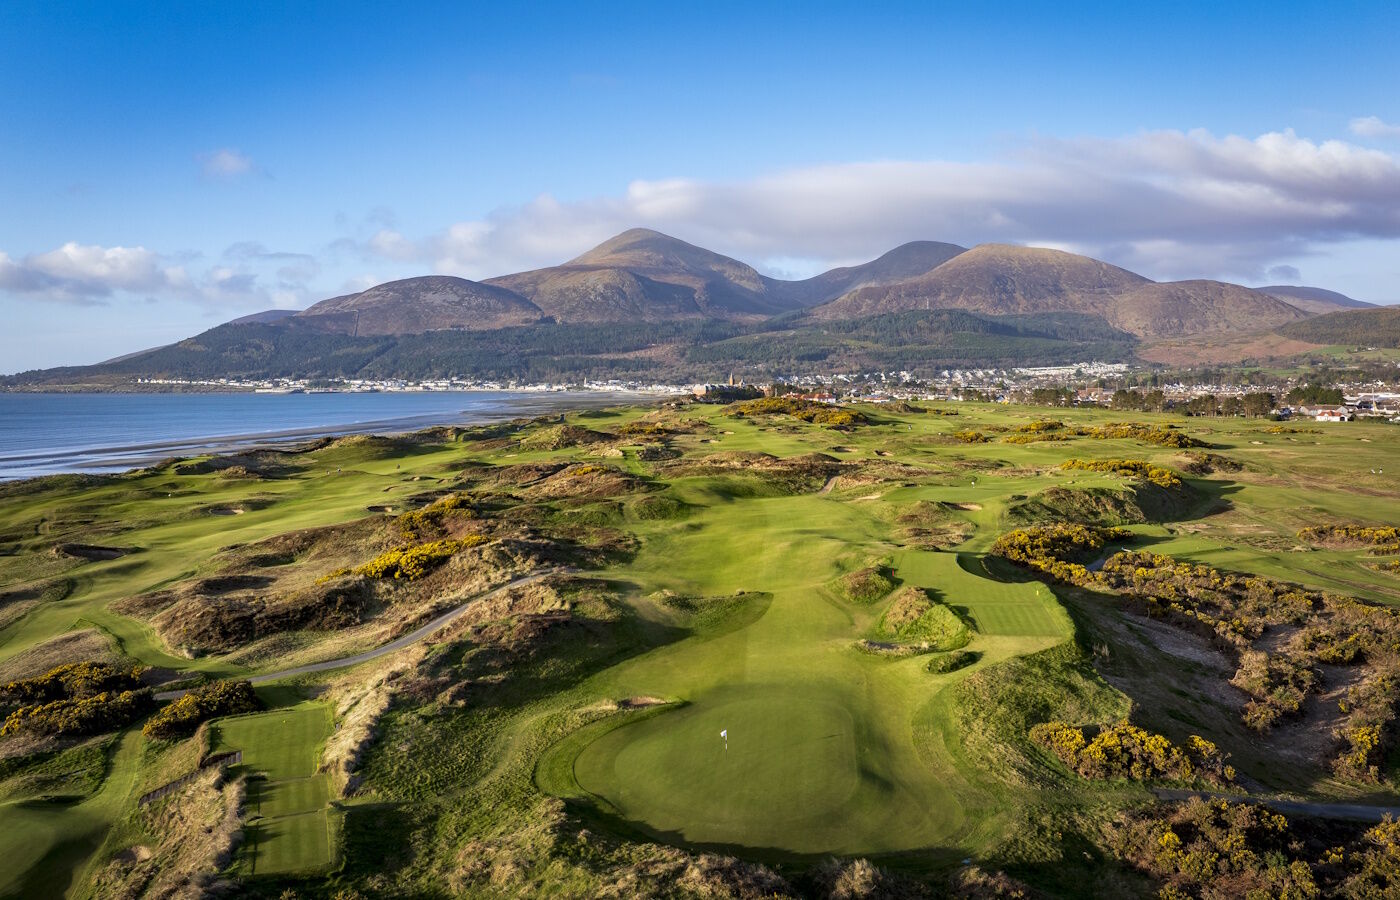
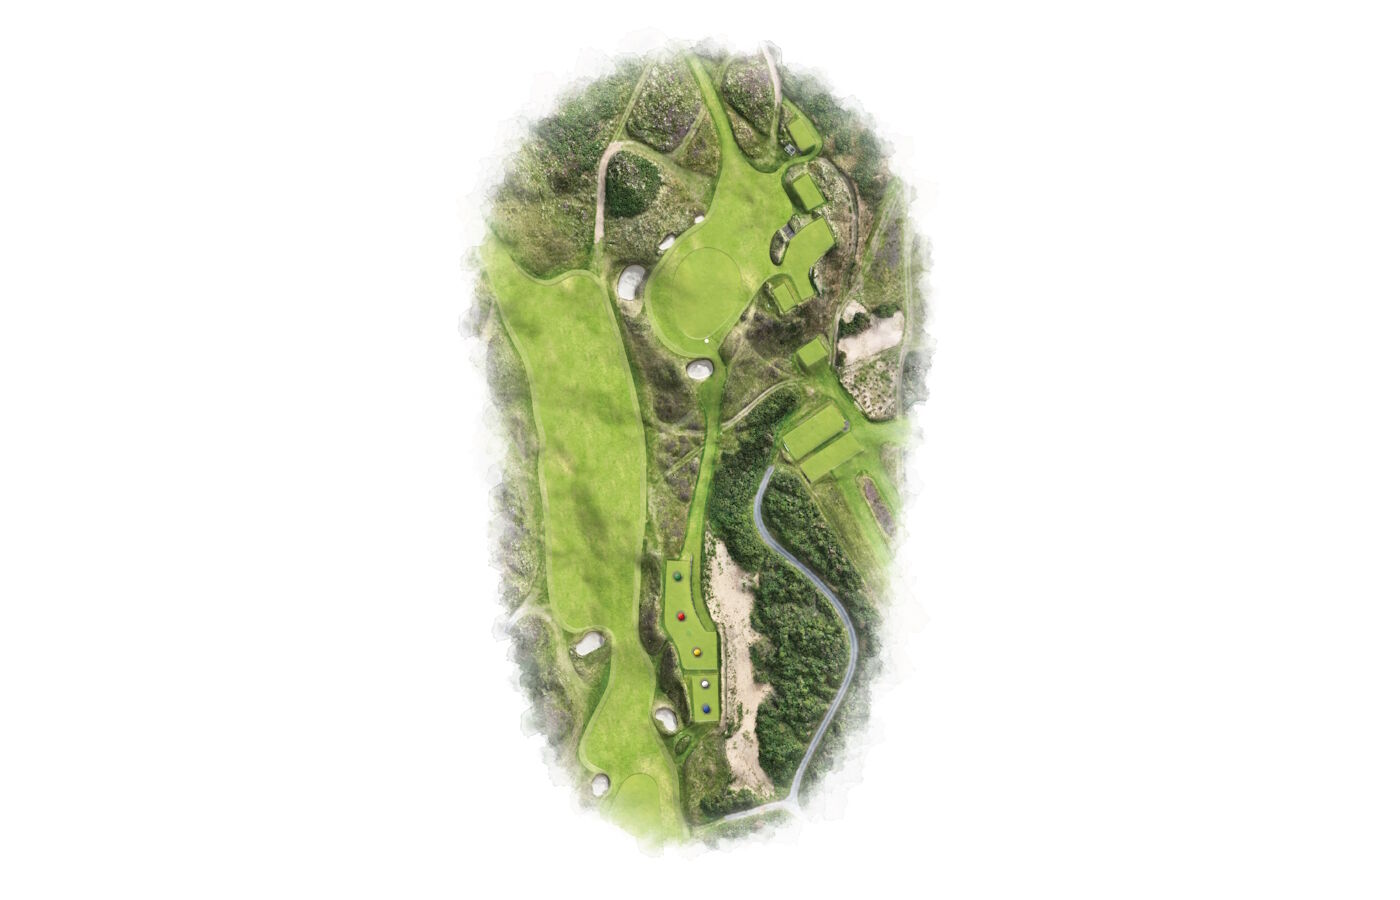
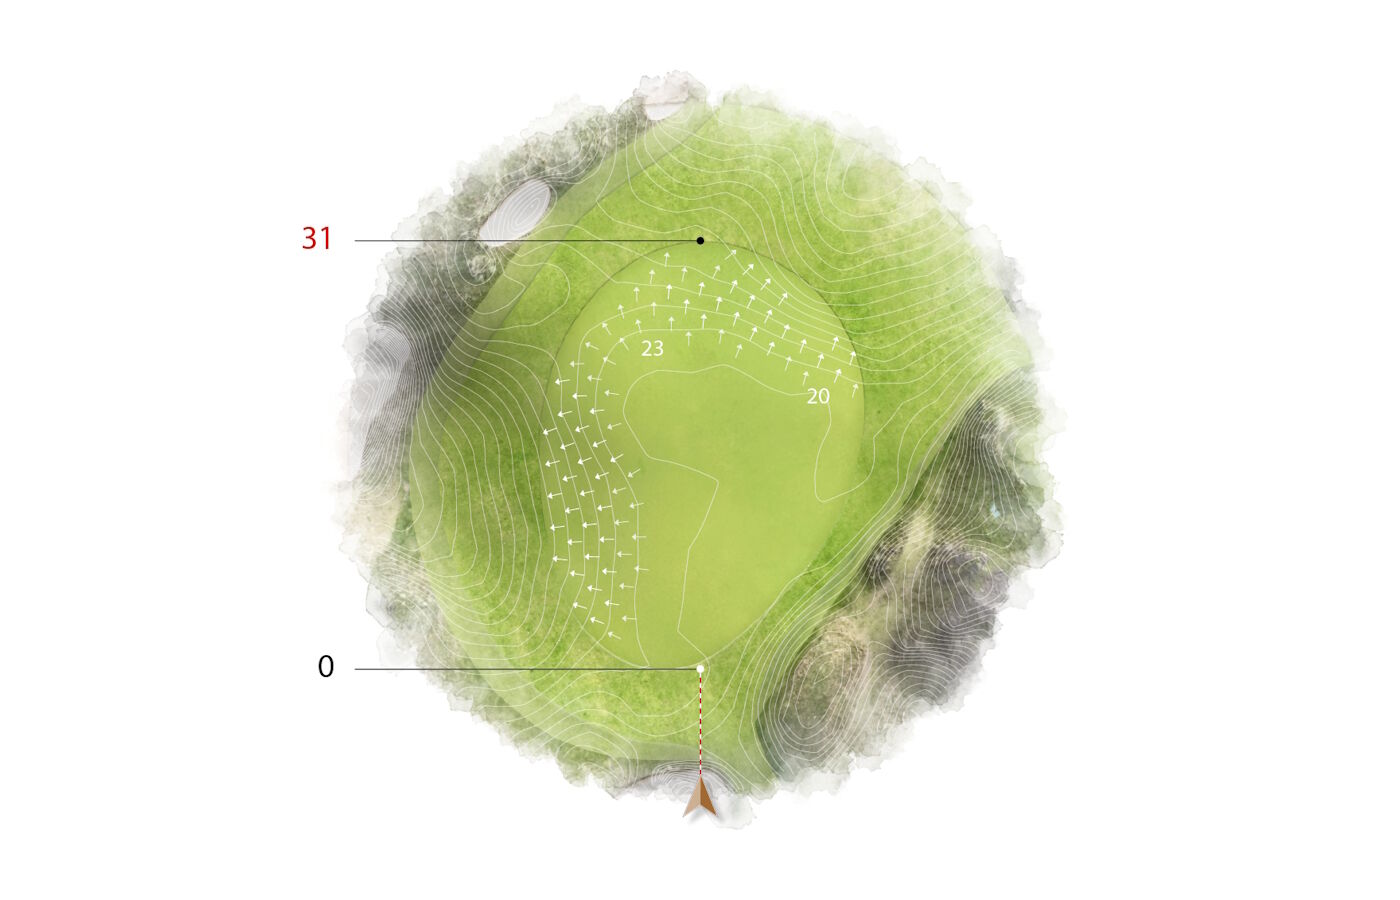
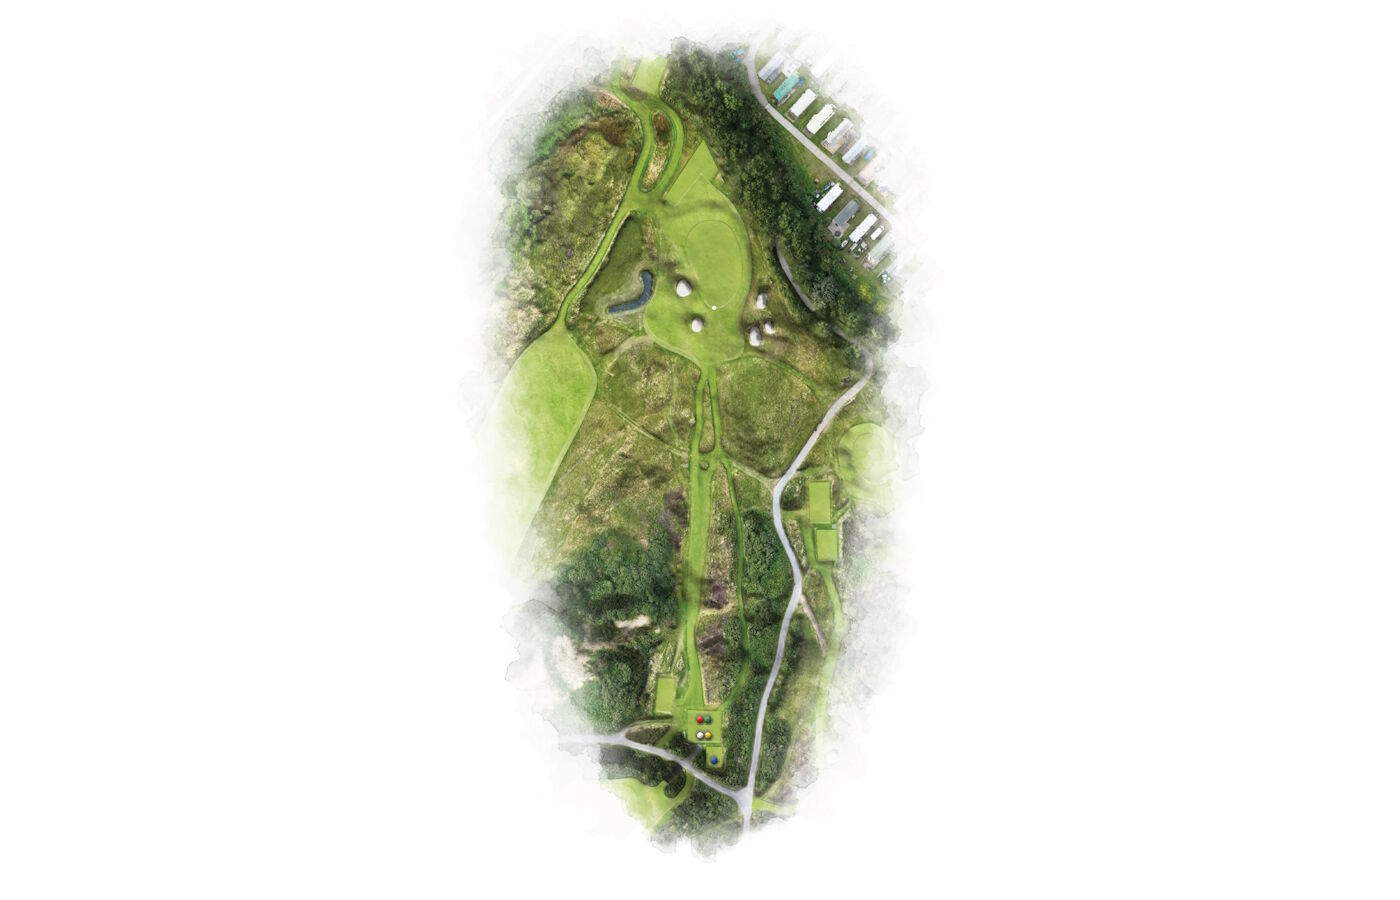
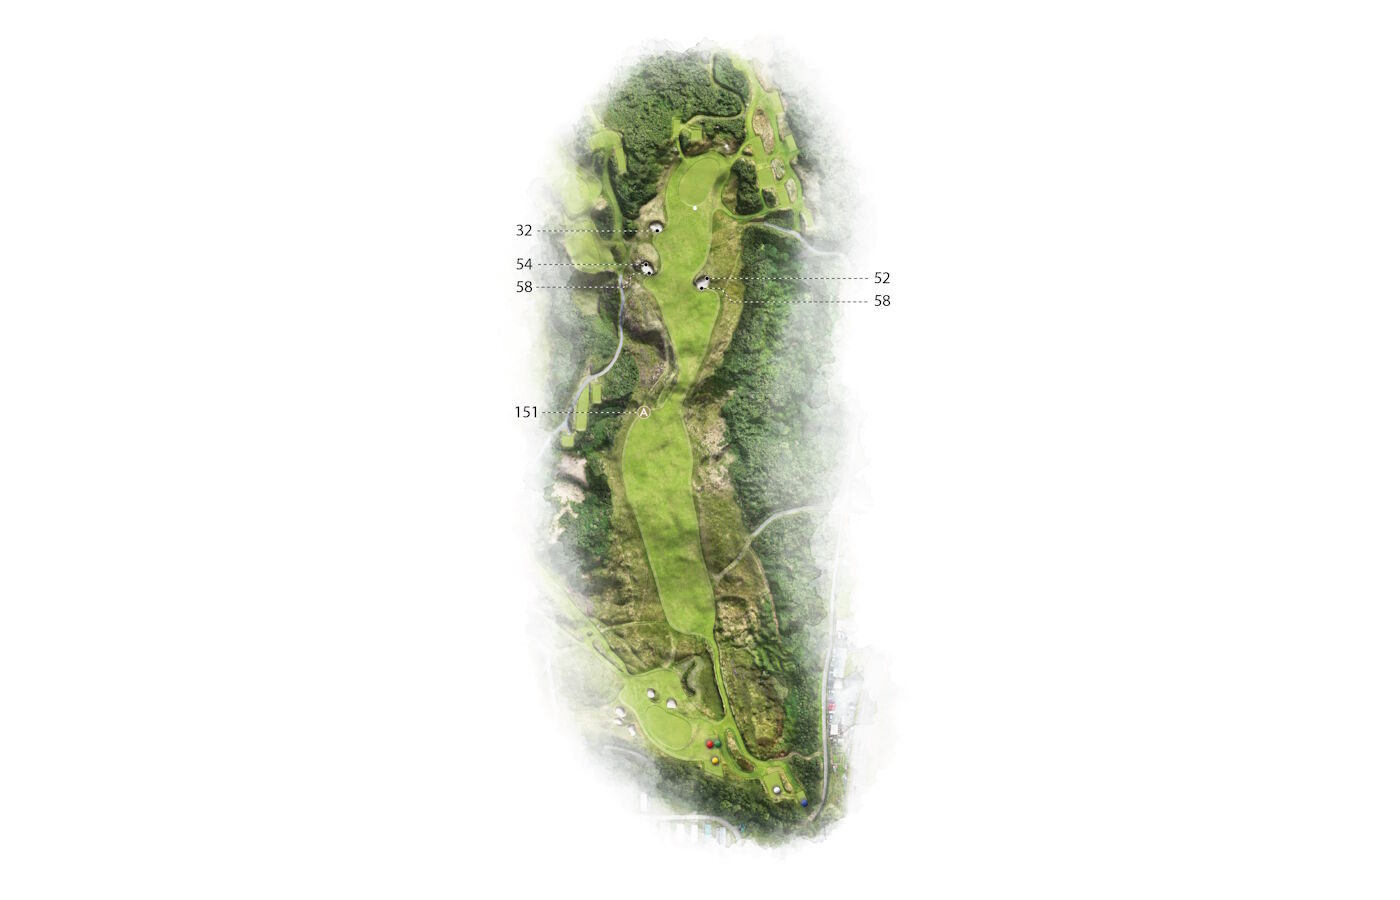
- Layout
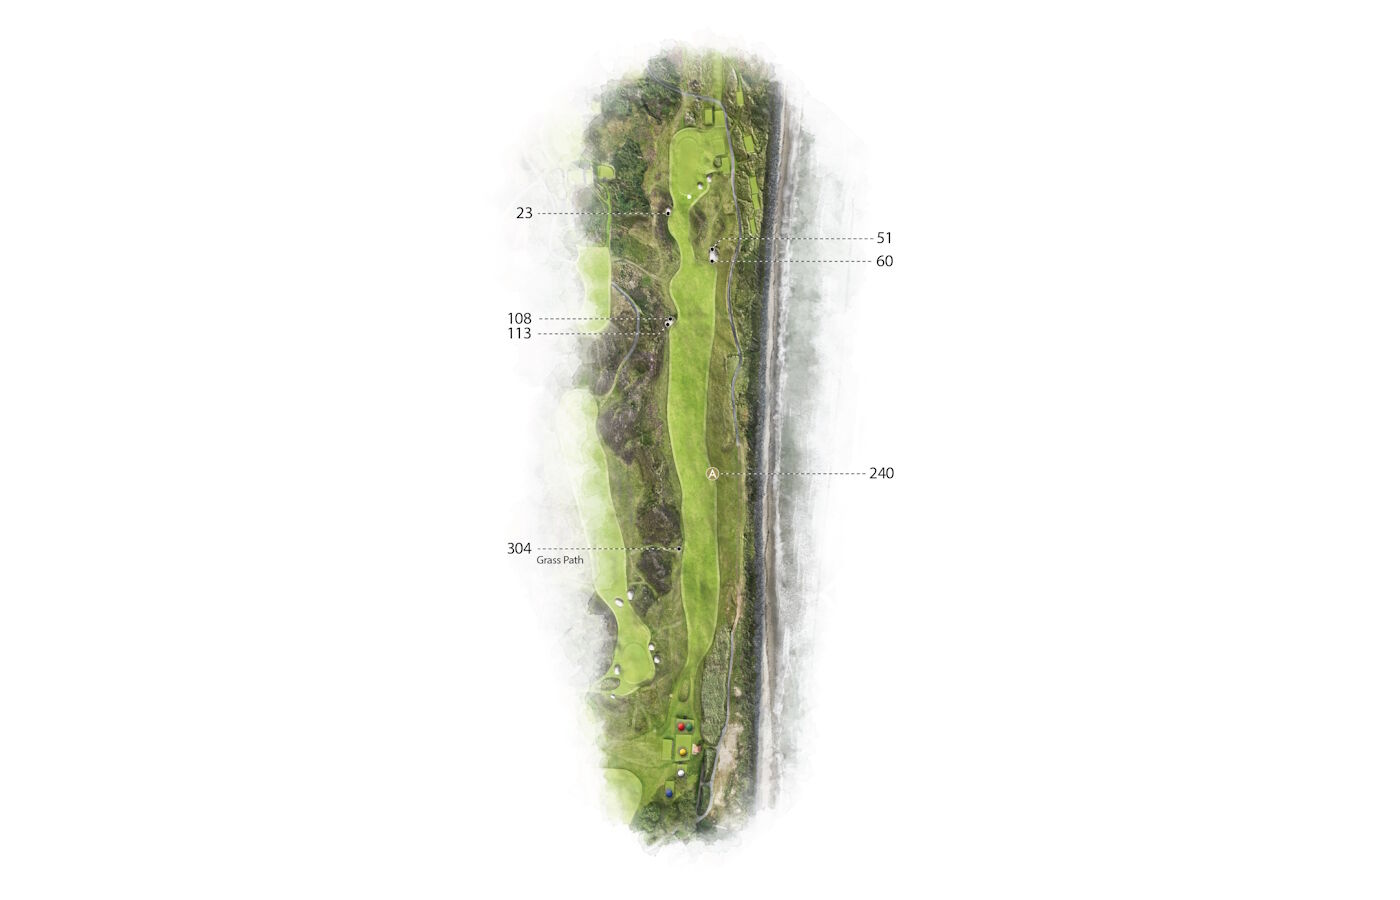
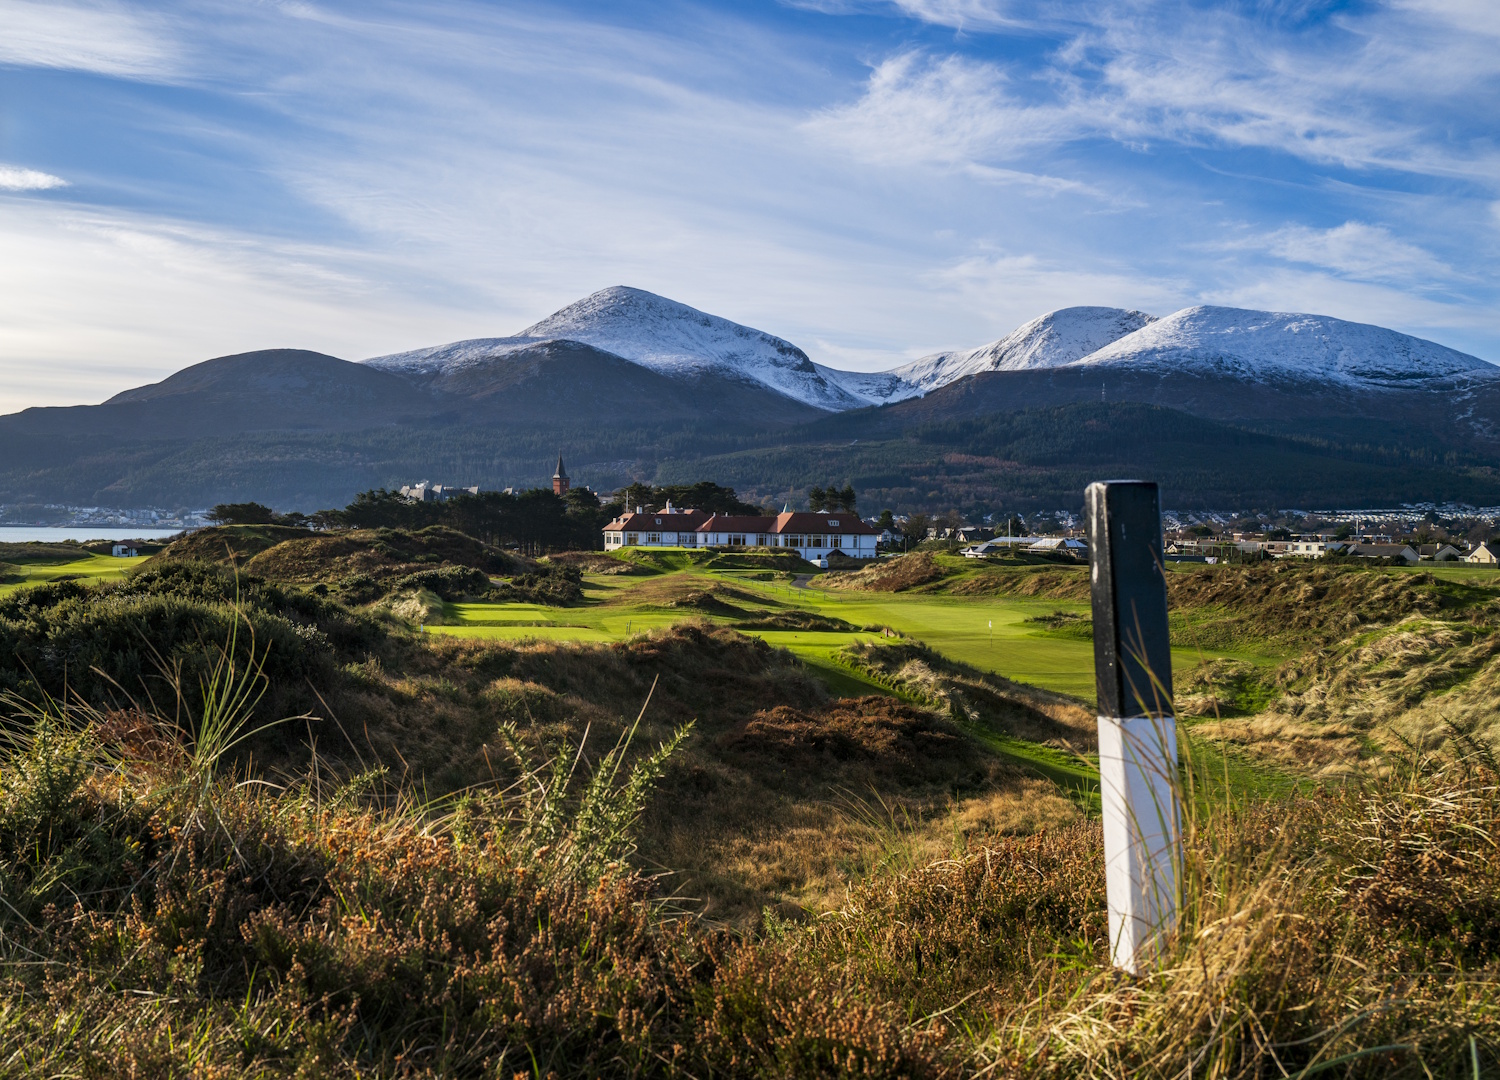
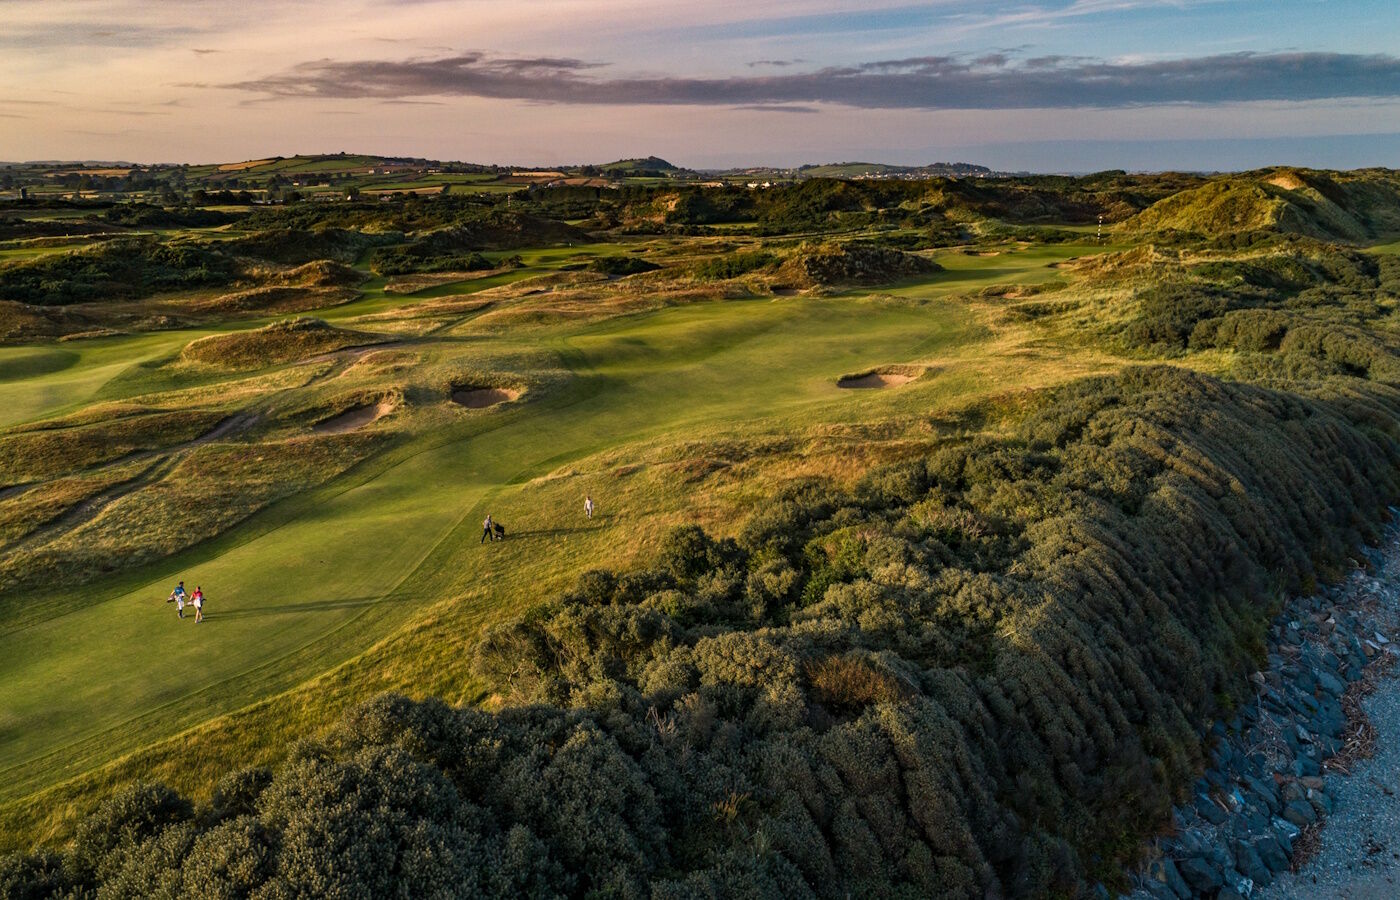
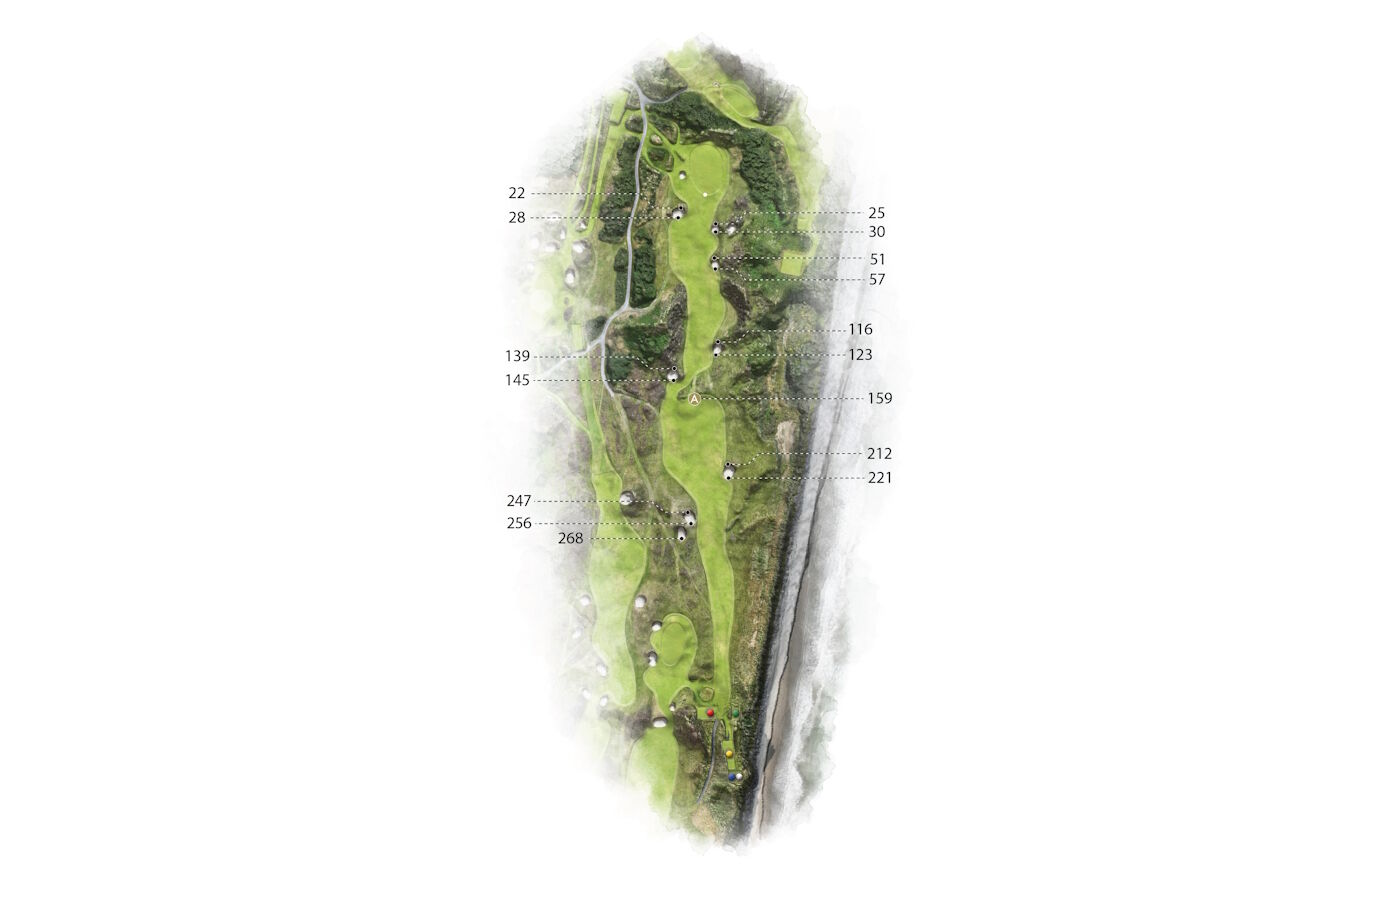
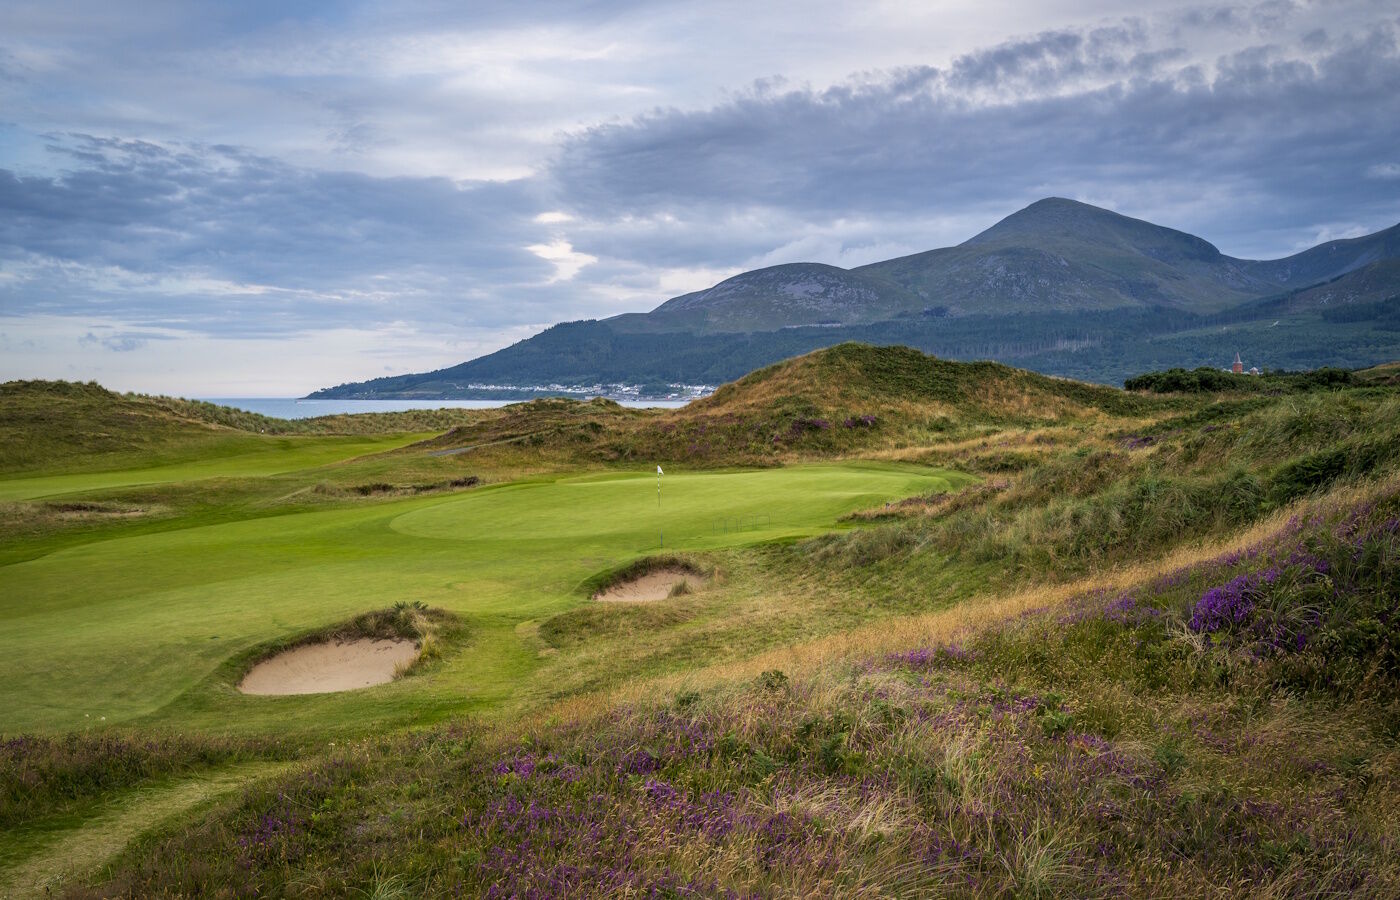
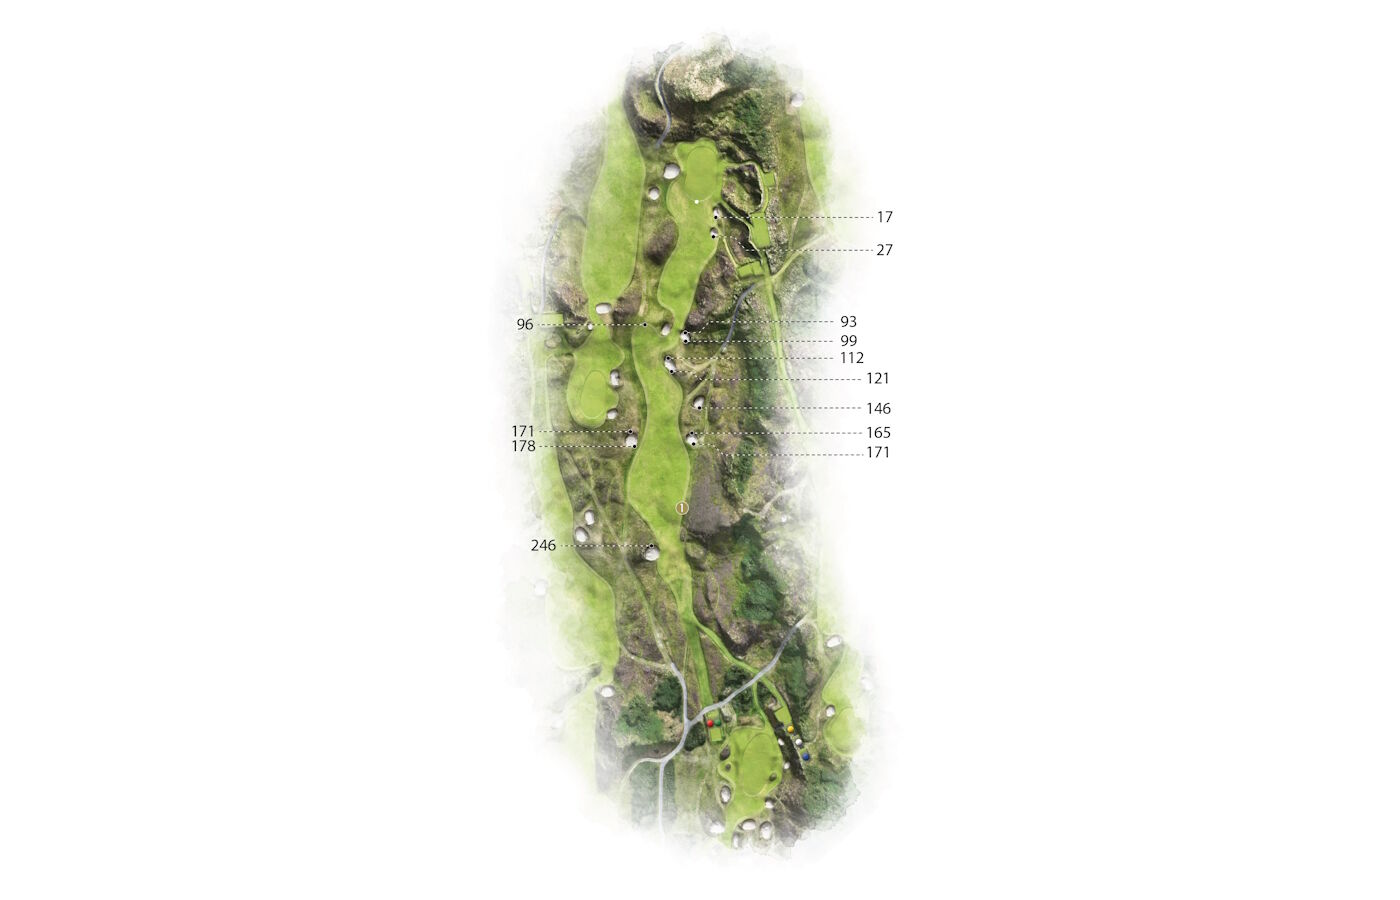
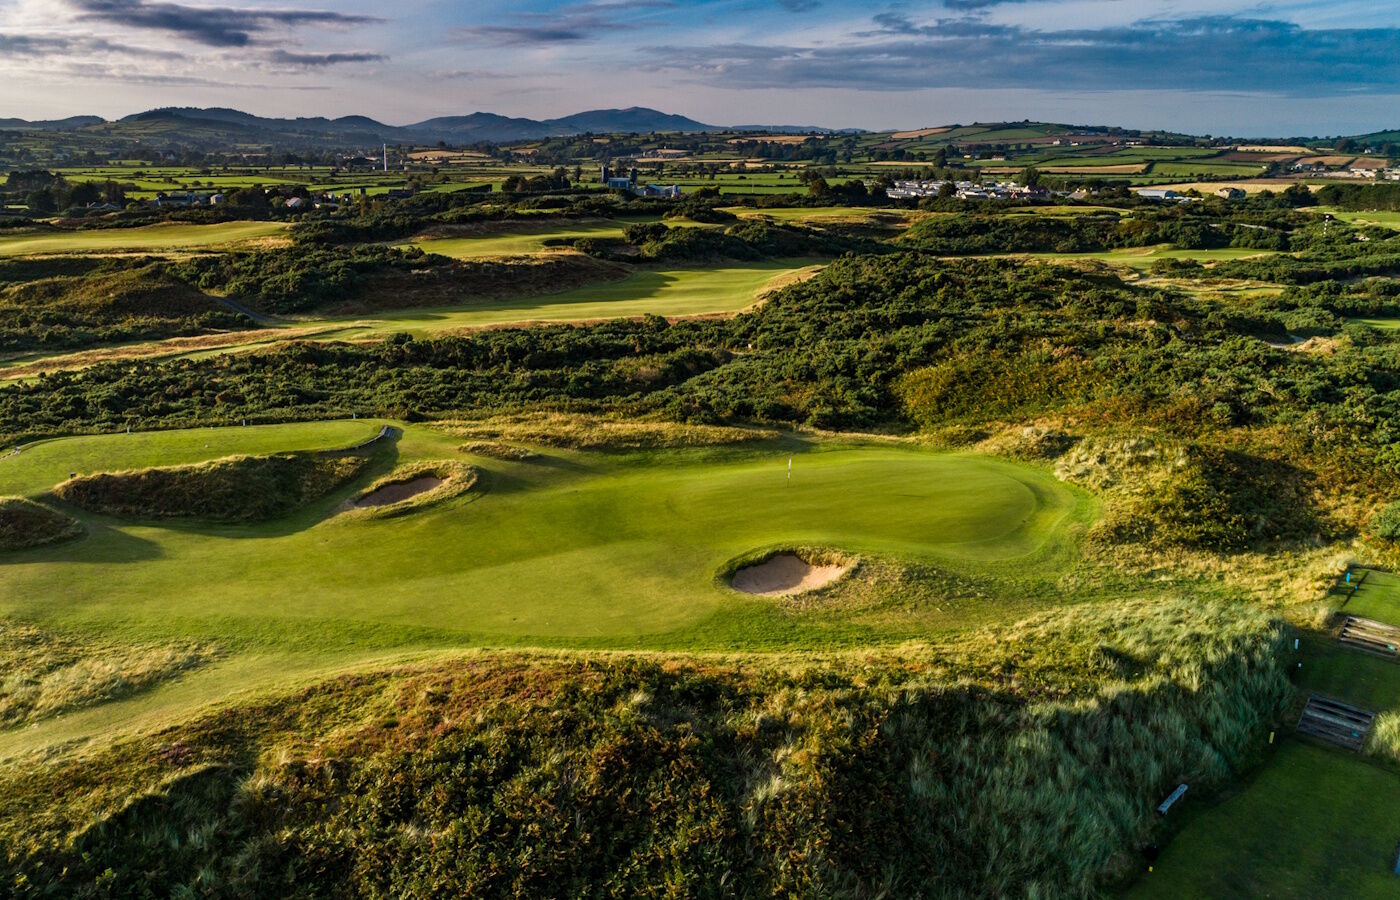
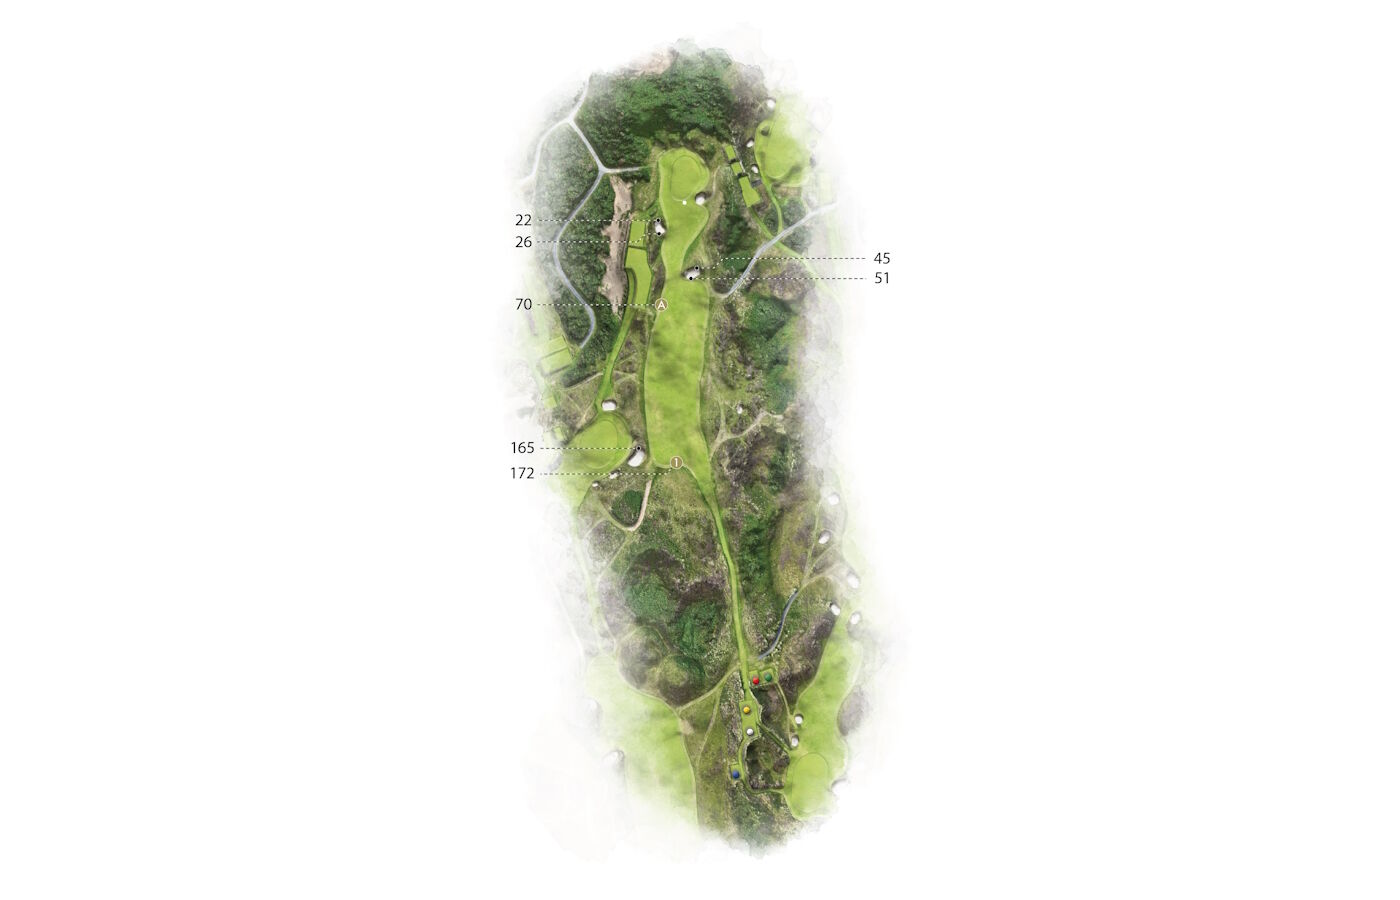
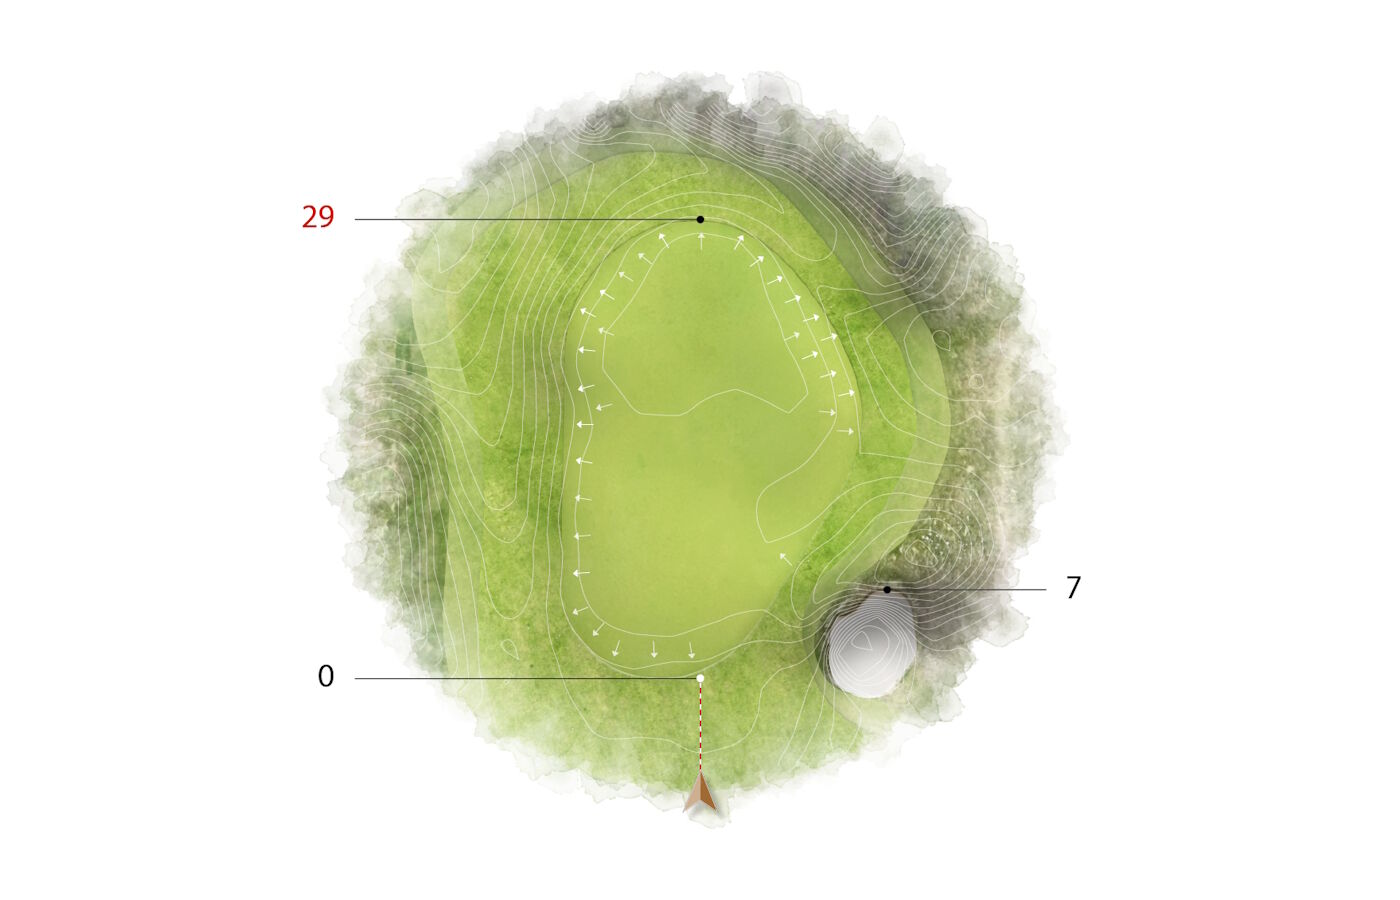
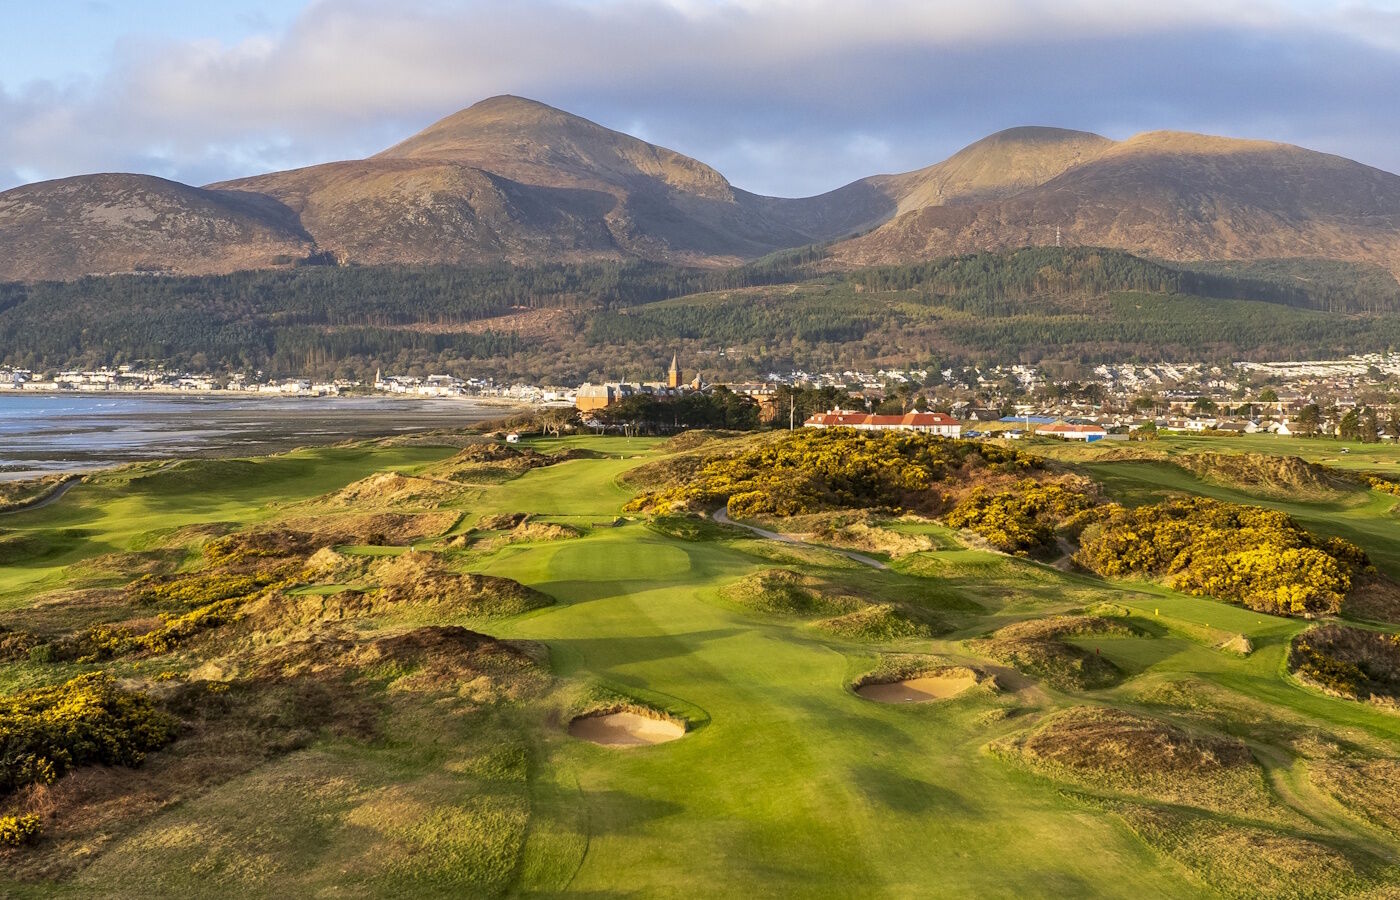
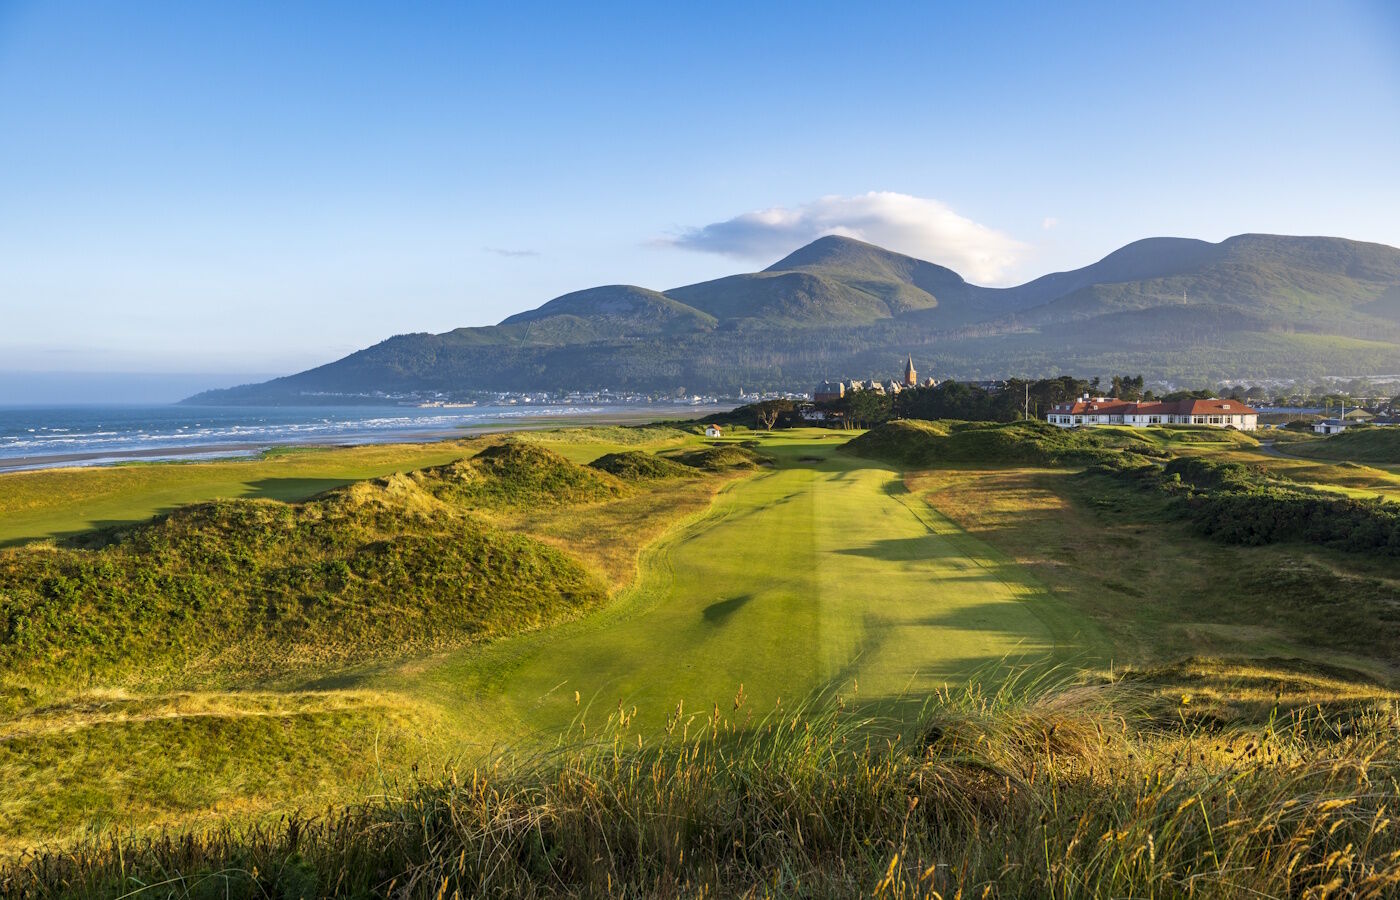
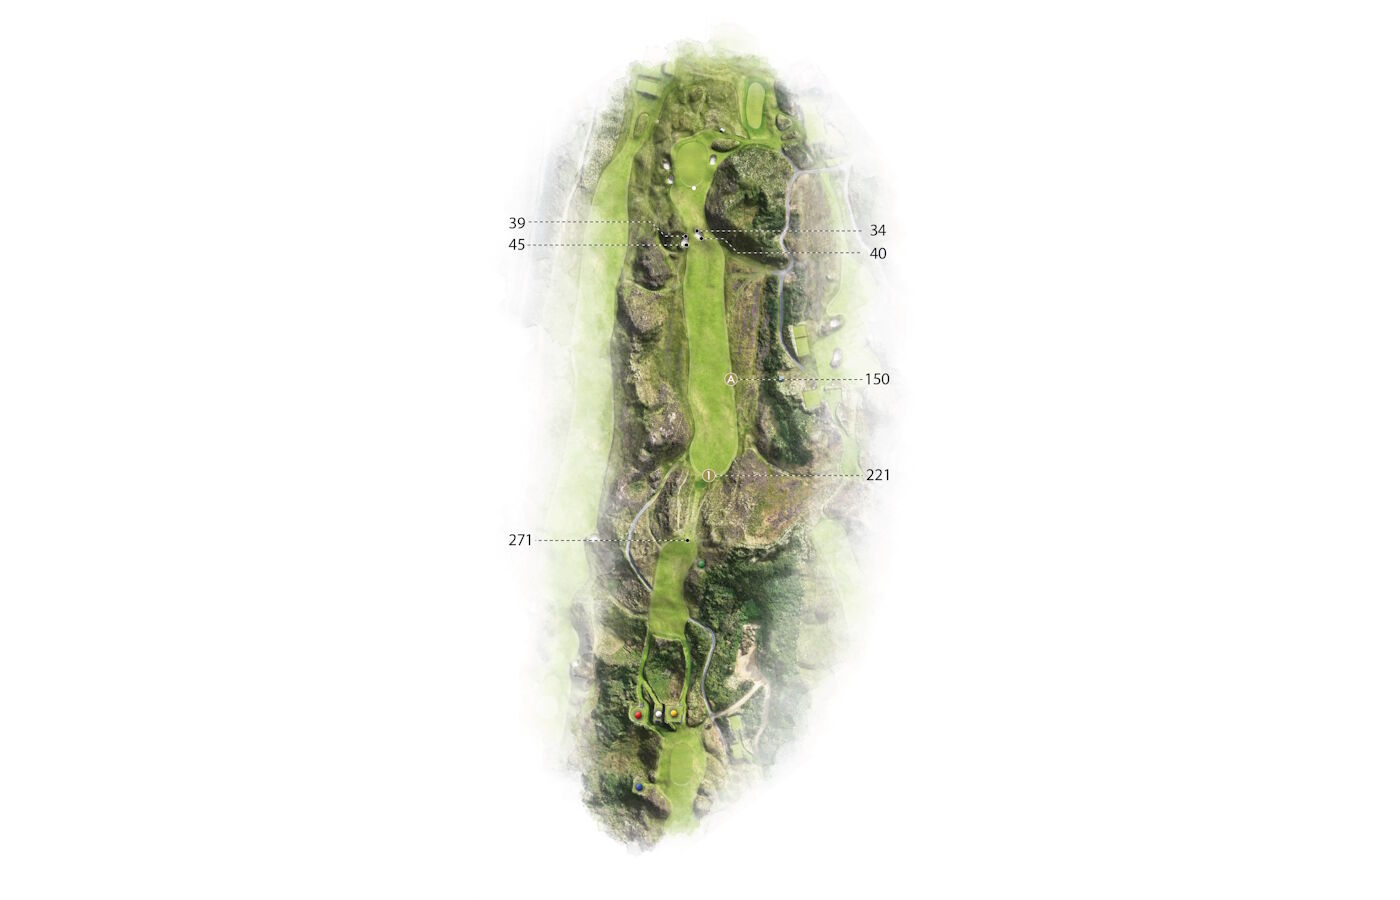
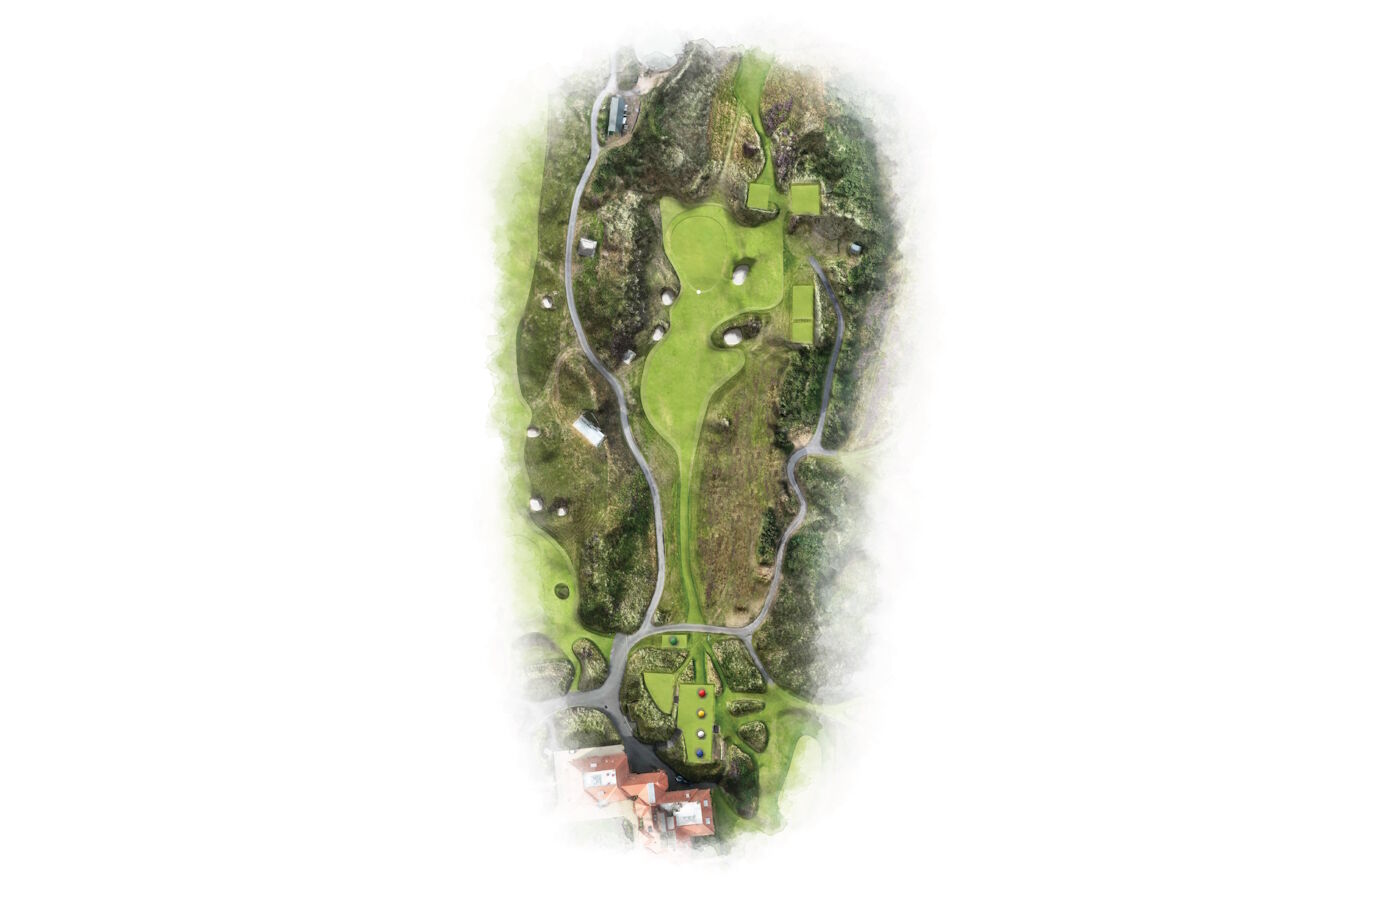
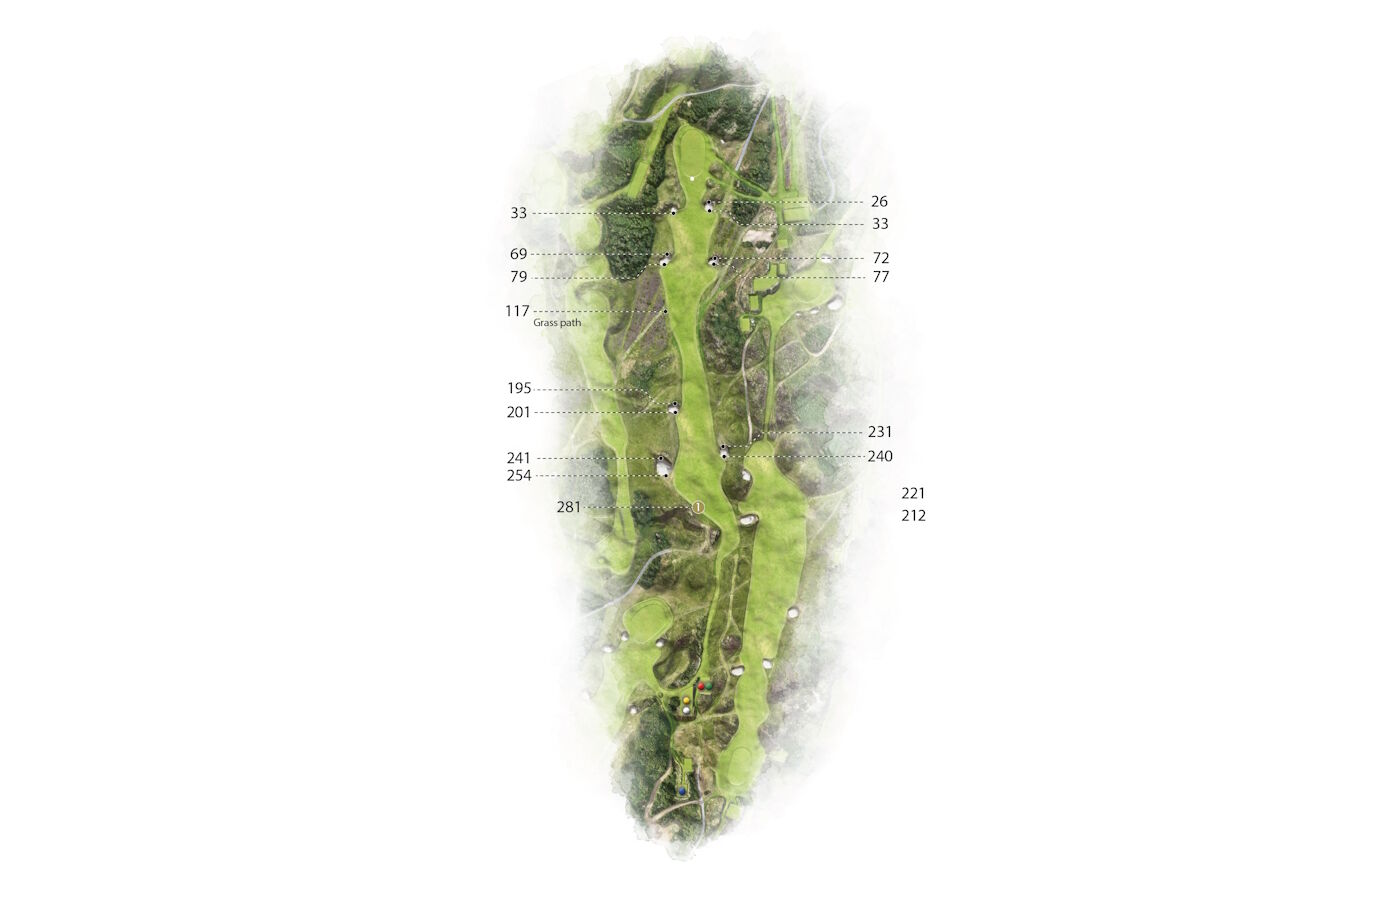
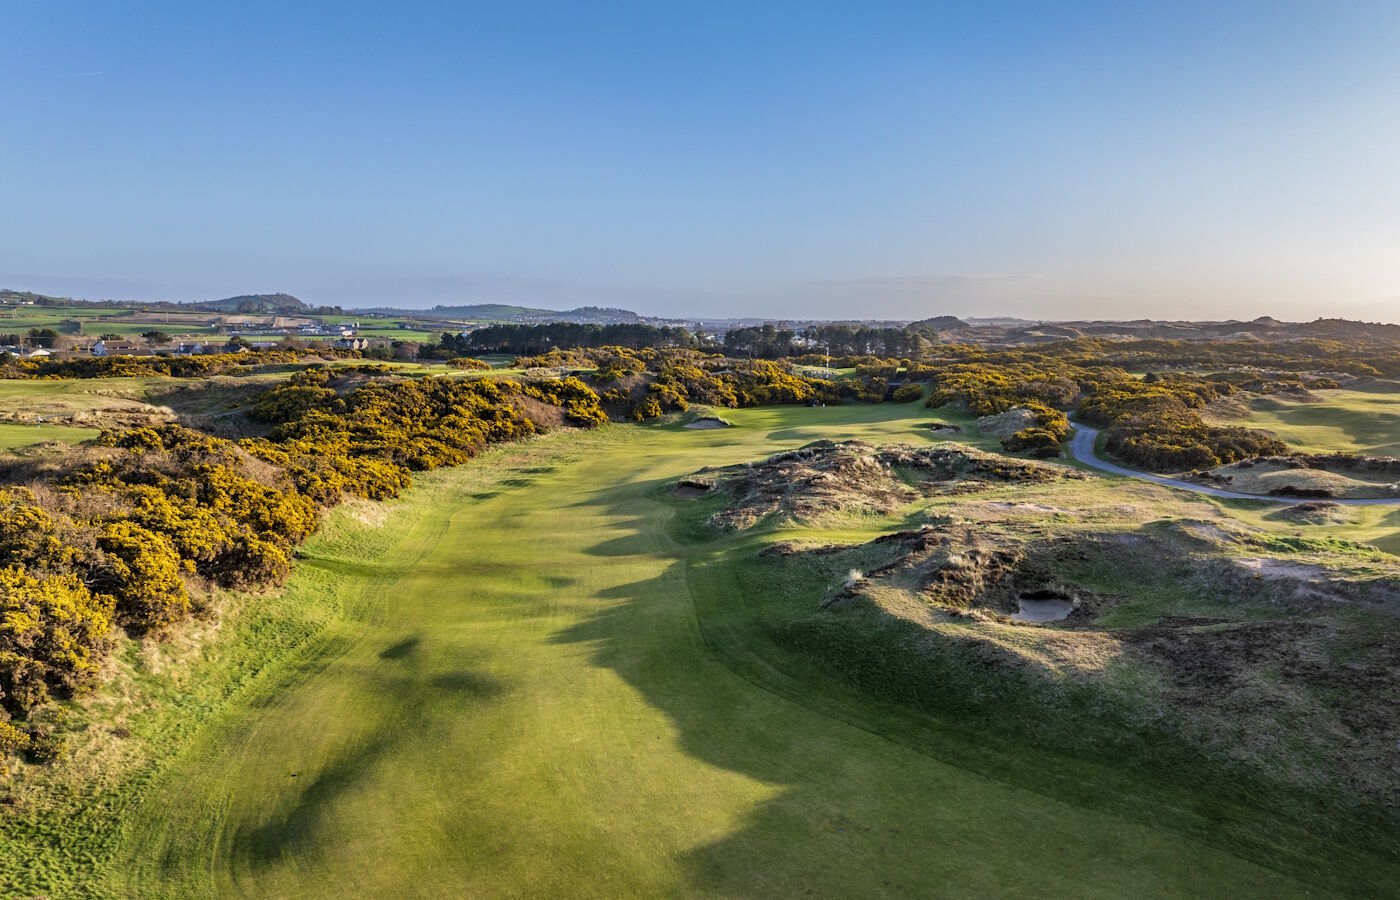
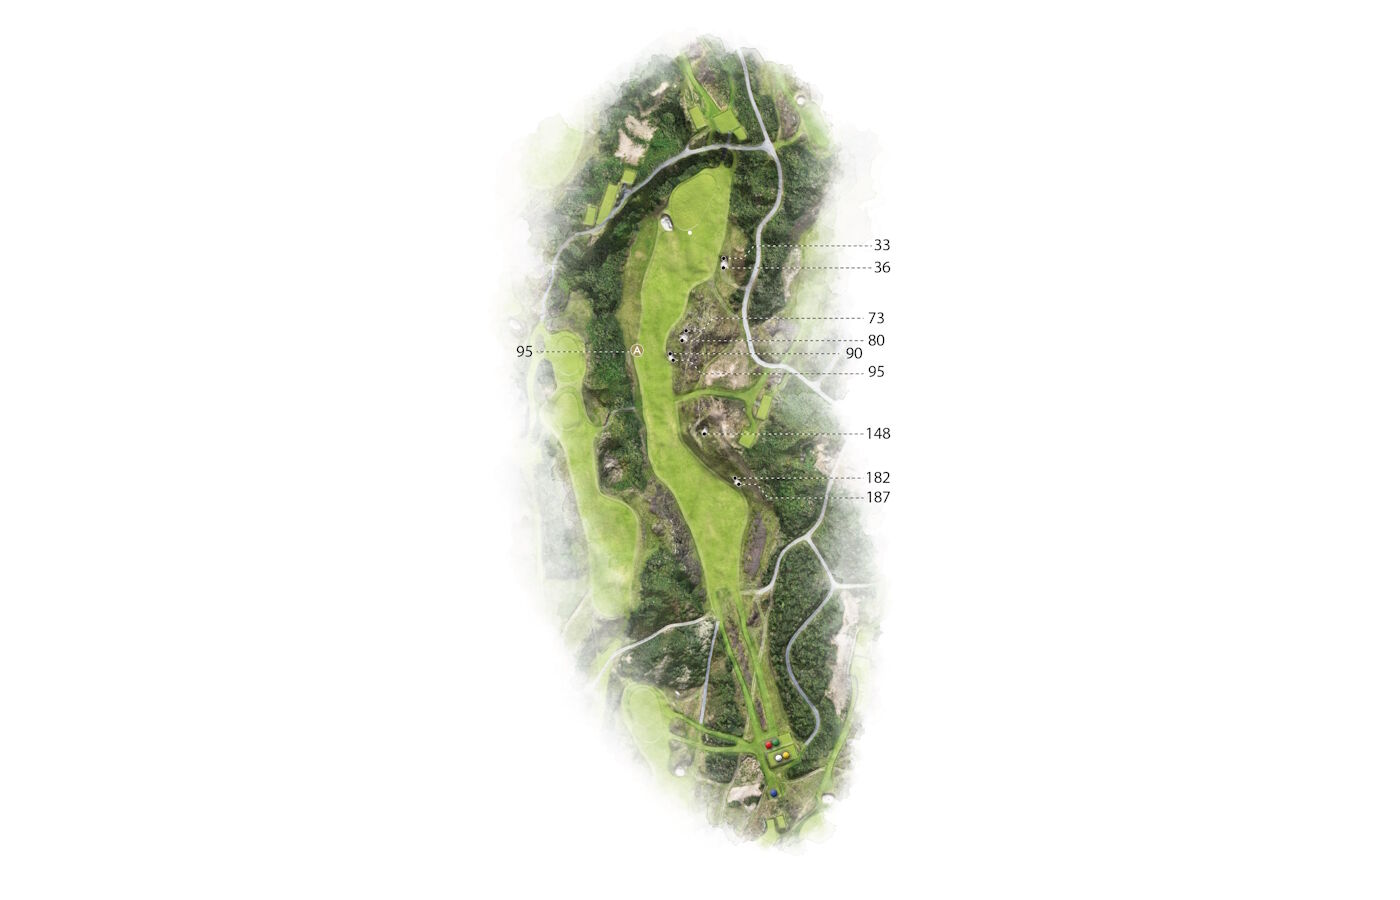
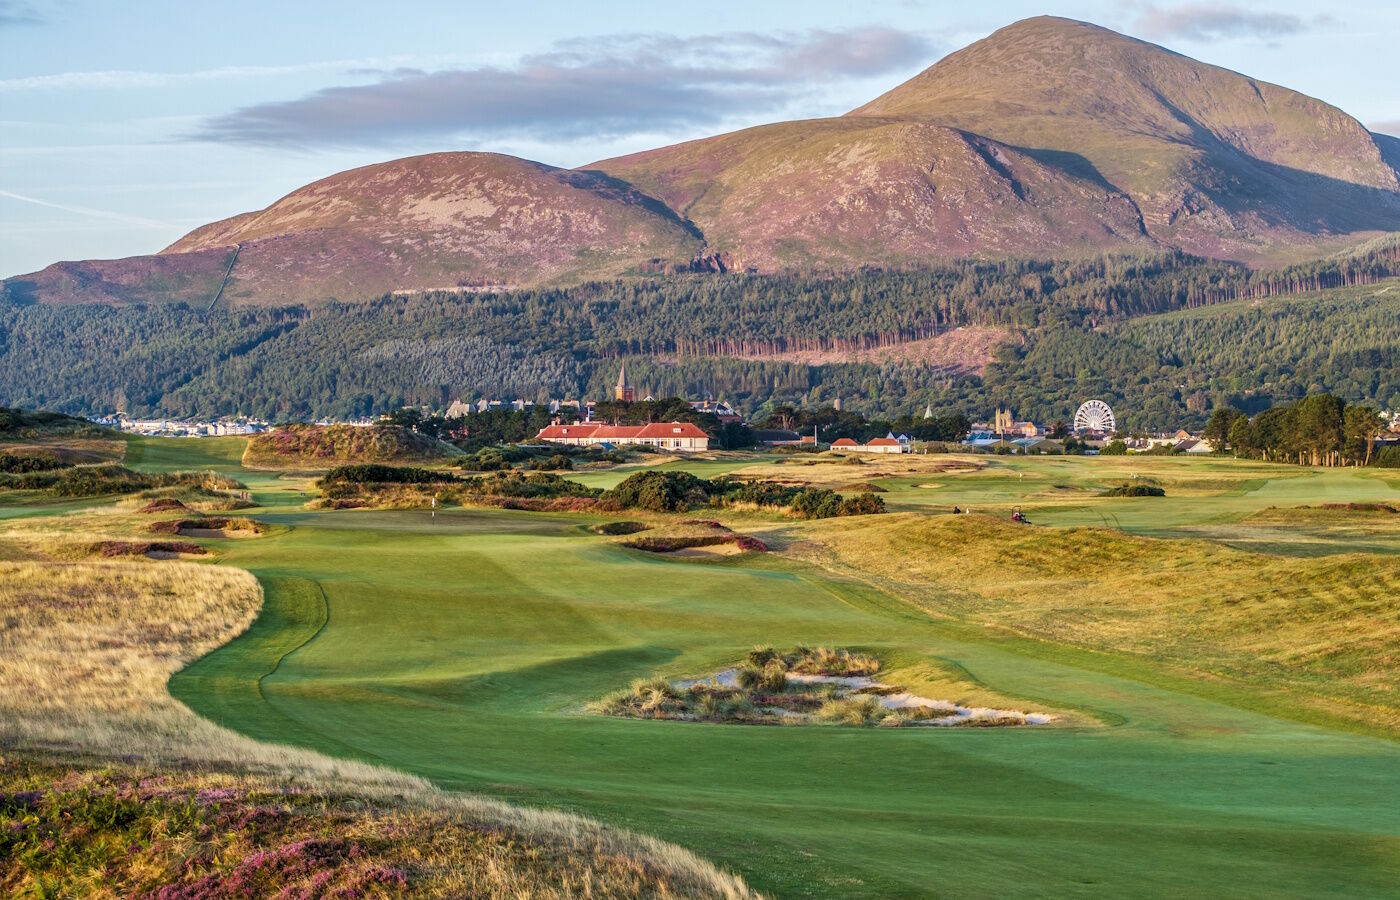
Hole 1
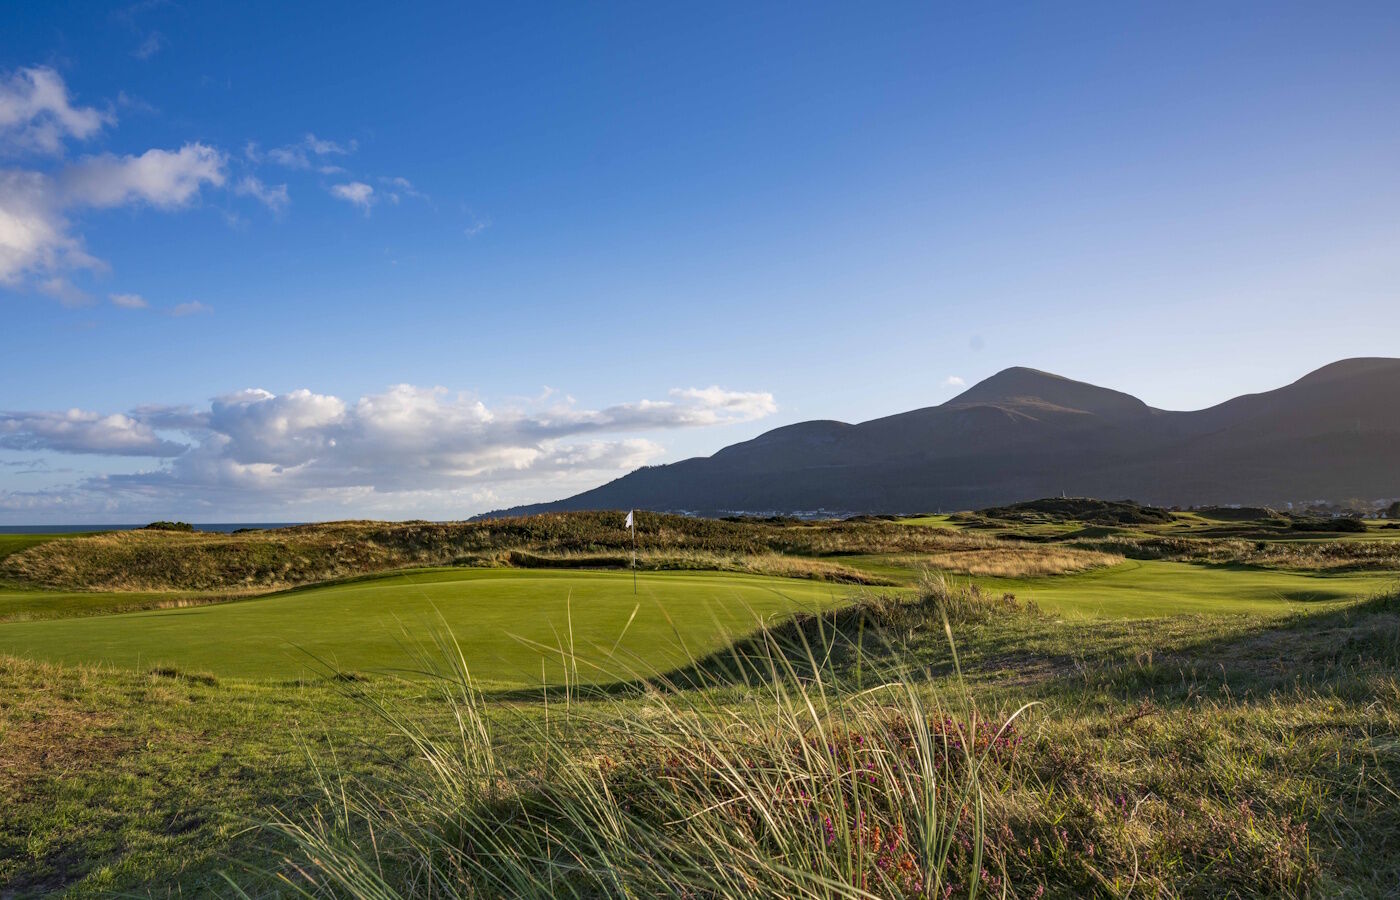
A straight-away par 5 with Dundrum Bay awaiting the errant drive to the right and a high dune guarding the left side. The sensible tee shot lands down the right side collecting the contours of the fairway to finish left of centre. The longer hitter can take the left of centre line, leaving a long to mid iron to the long narrow green. The shorter drive will require an accurate second to escape the well-placed bunkers. The longest green on the course requires good distance control to avoid an early three-putt.
Read More
- Gallery
- Flyover
- Layout

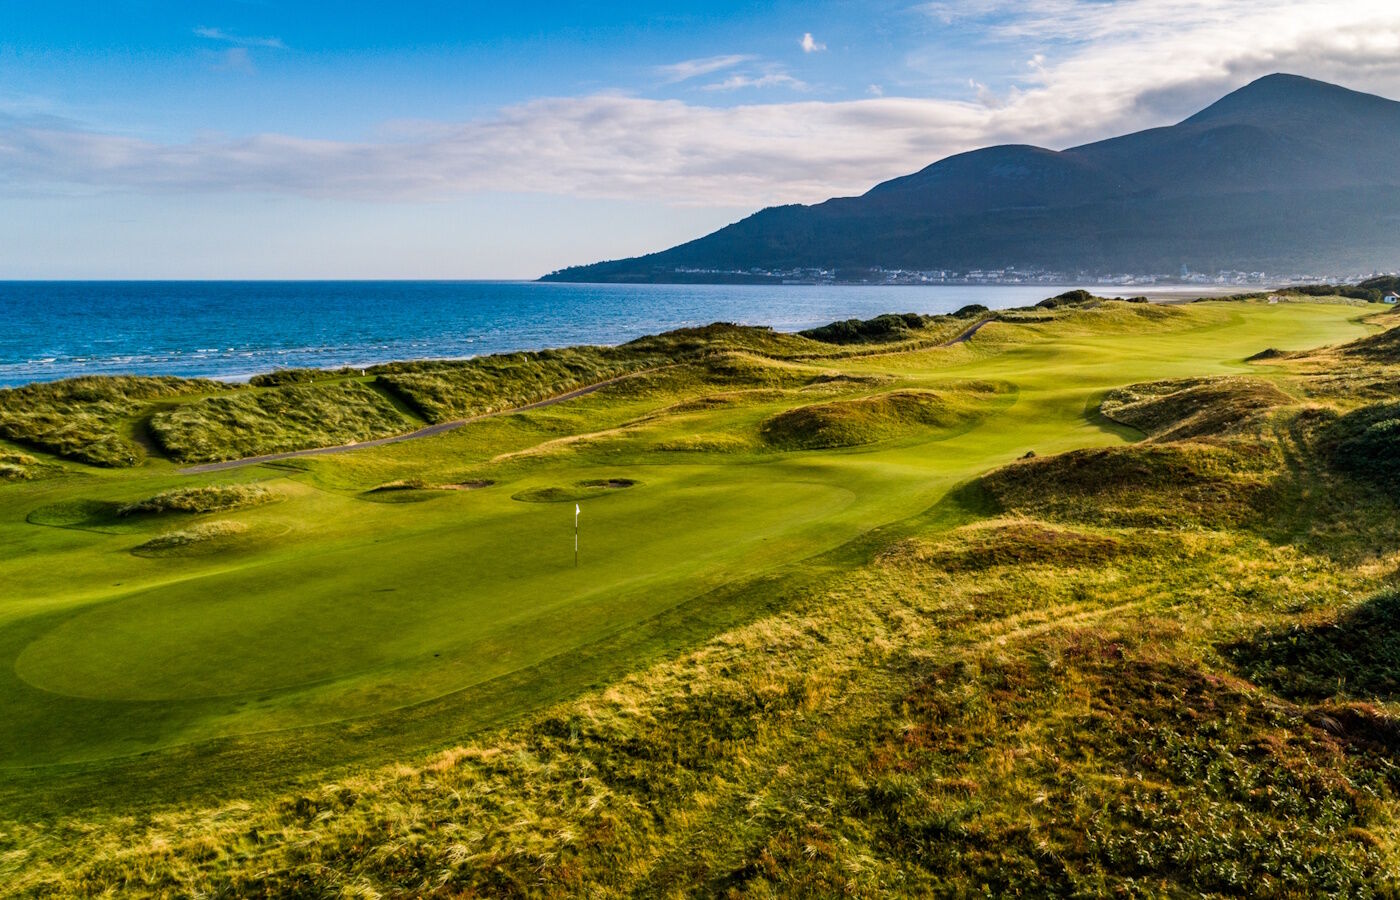
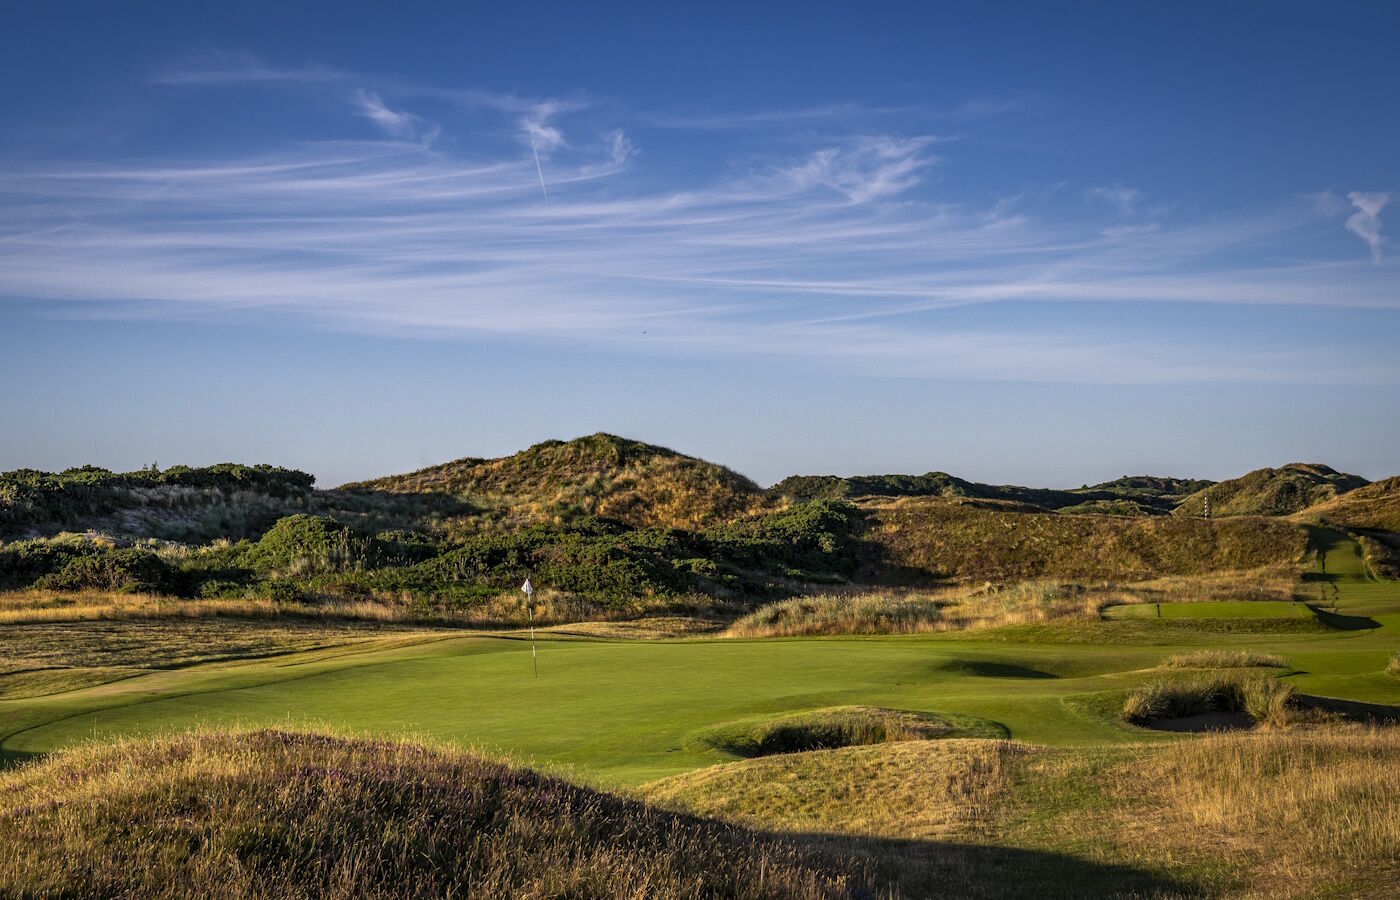
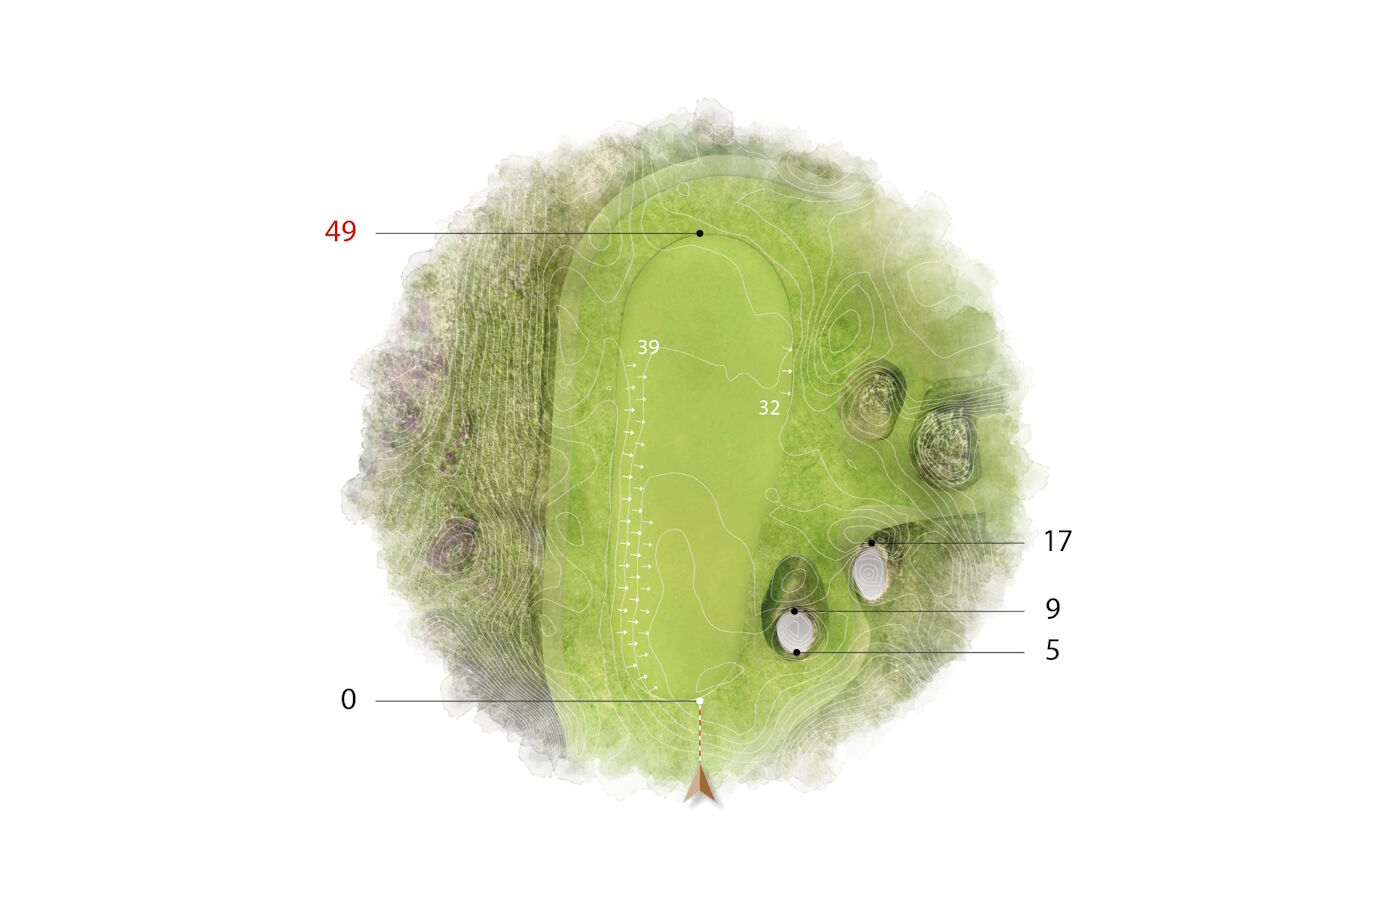
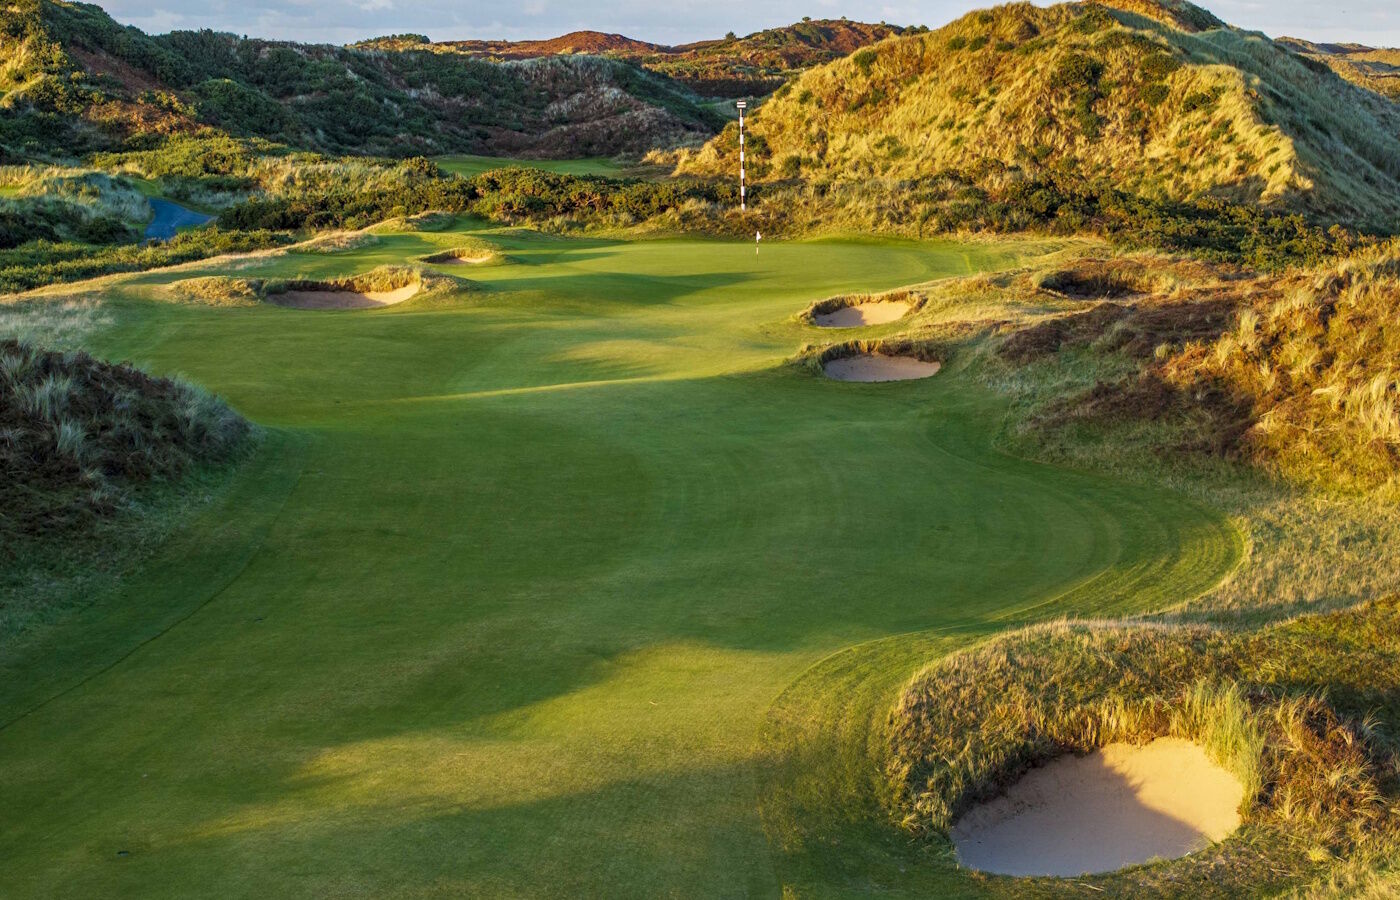
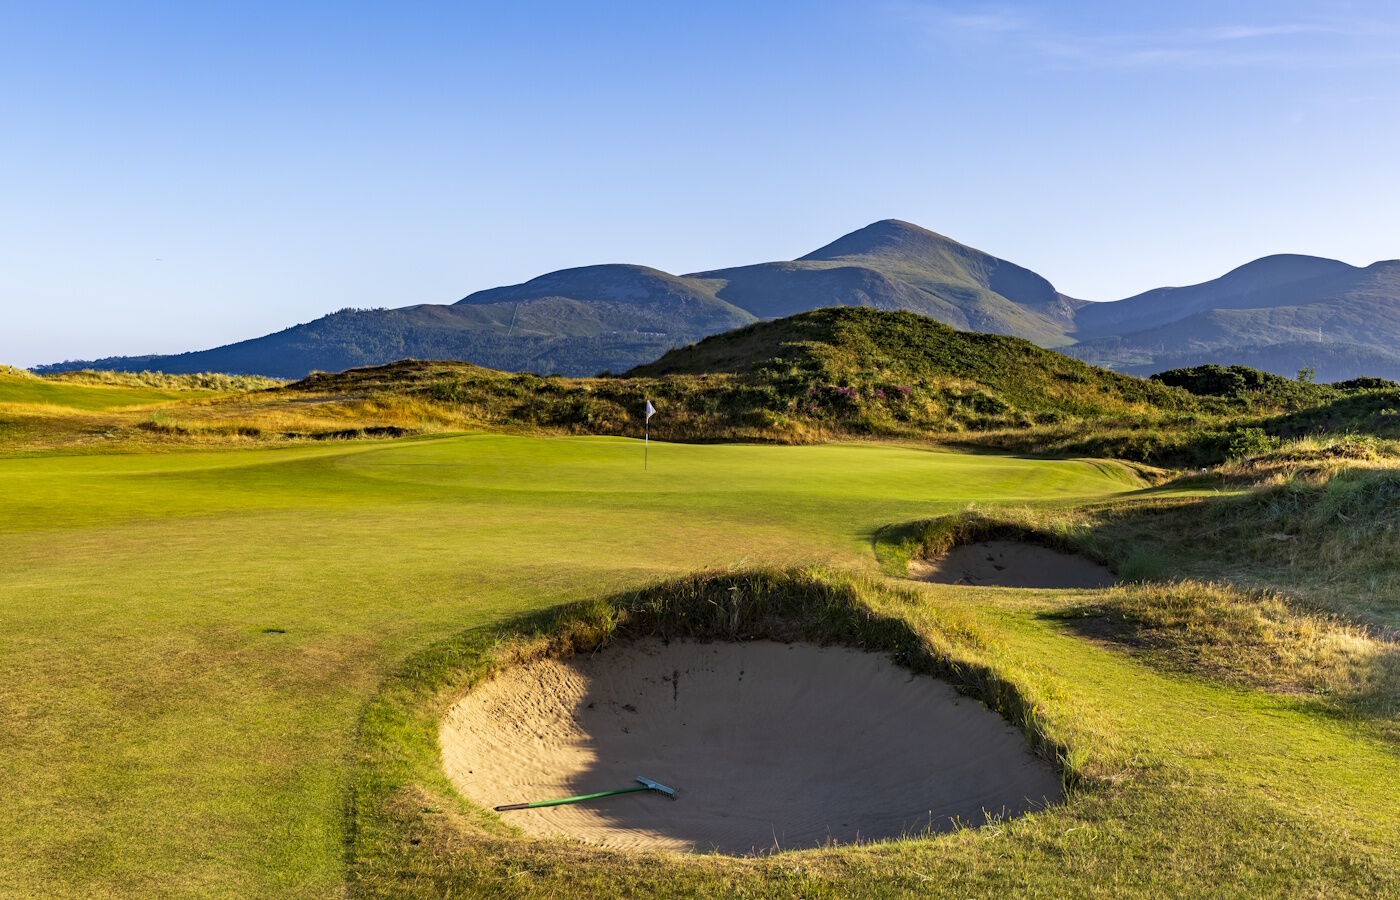
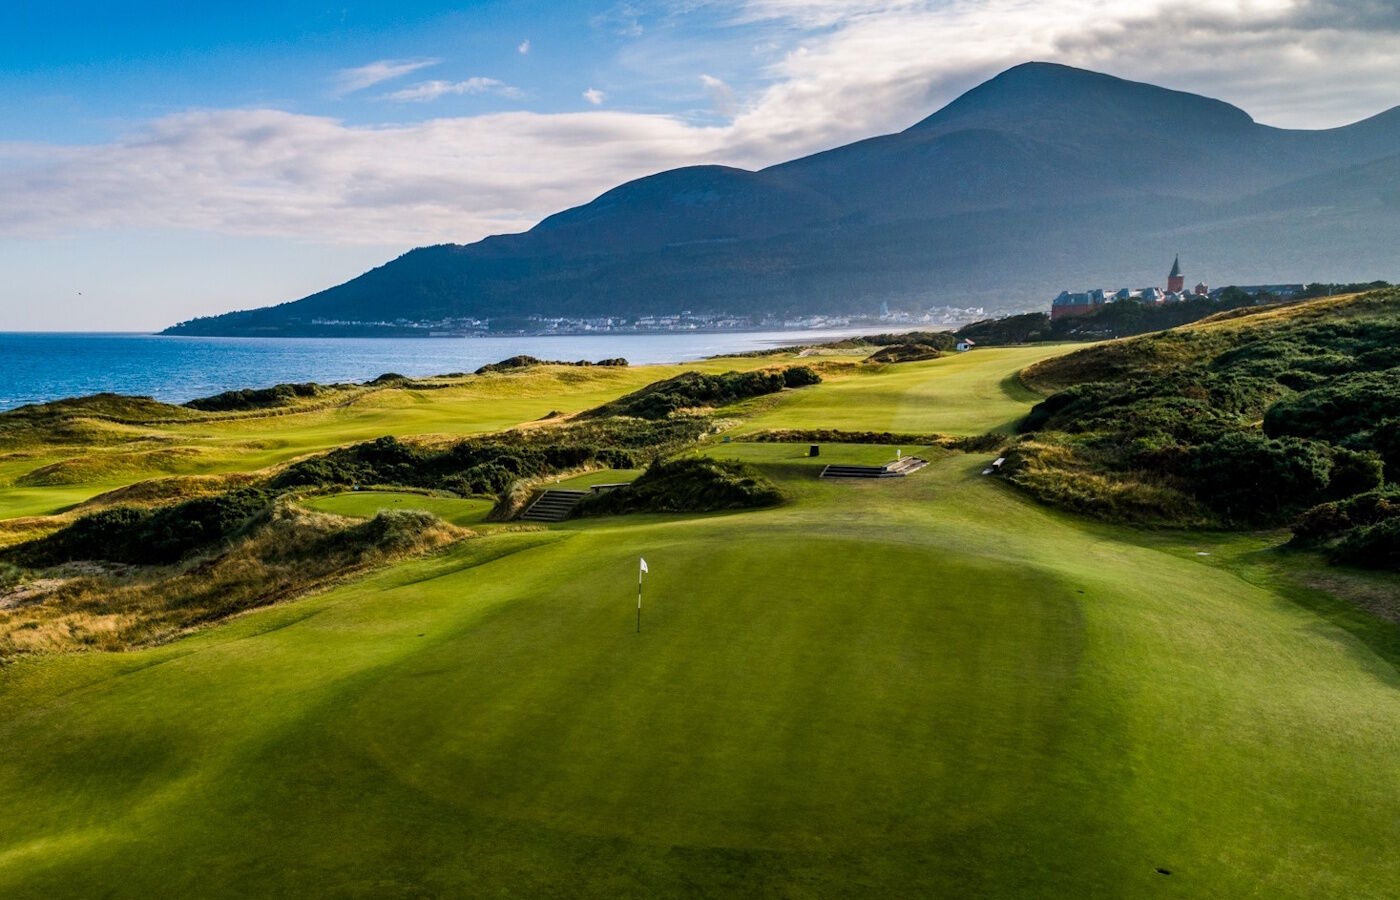
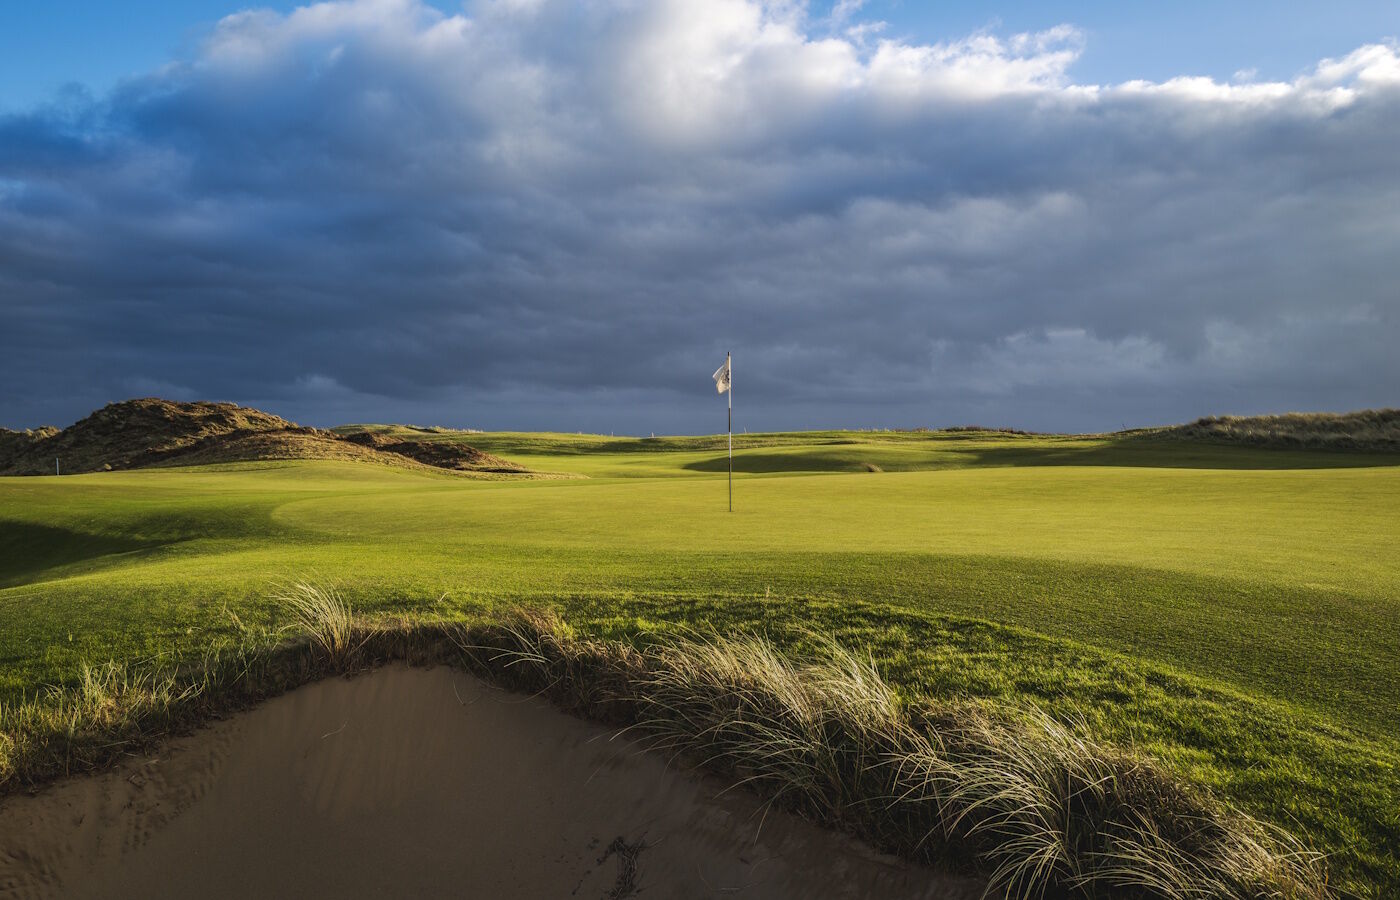
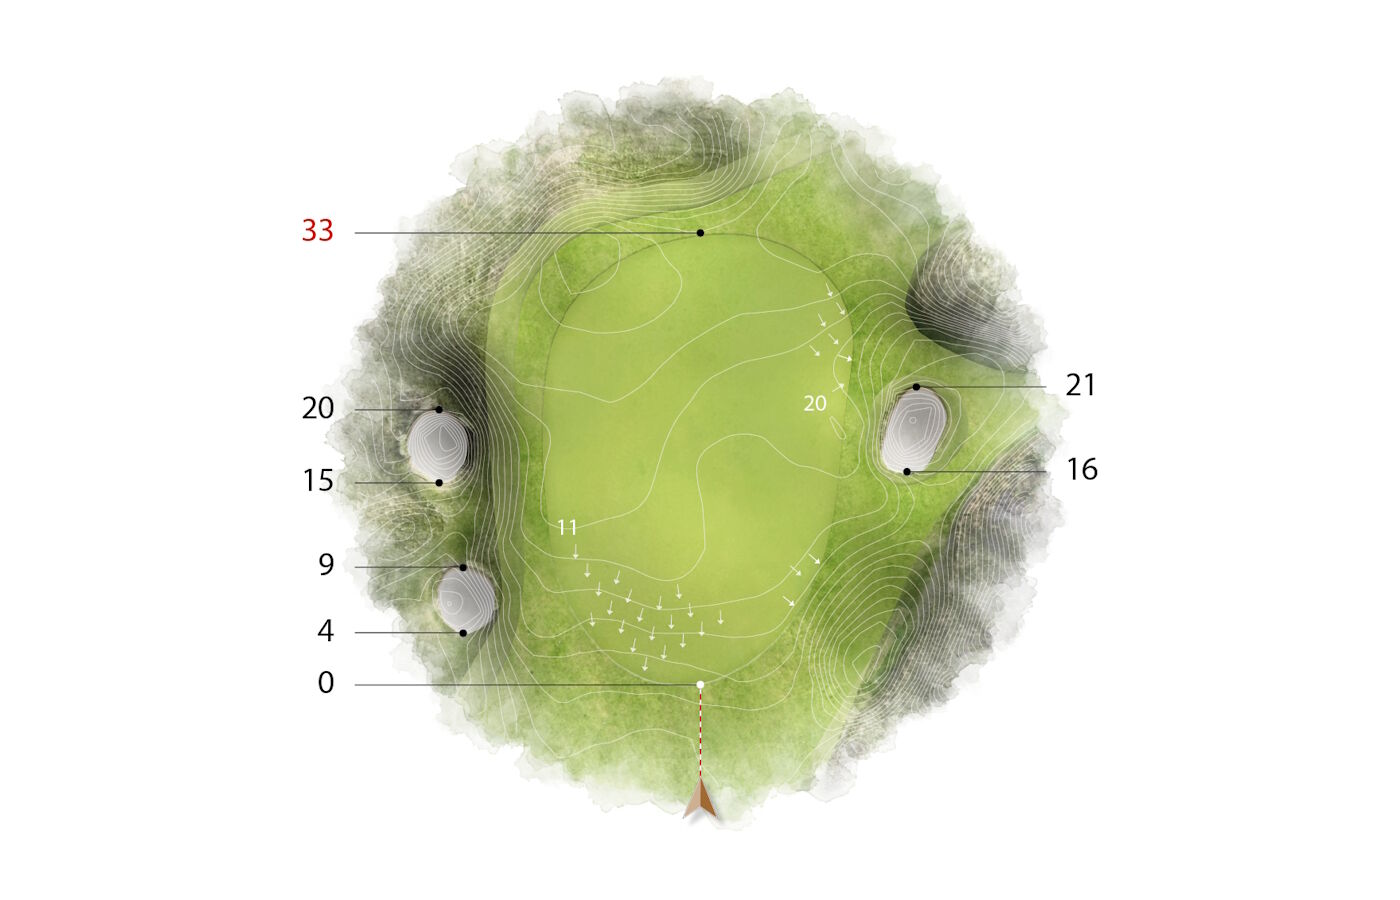
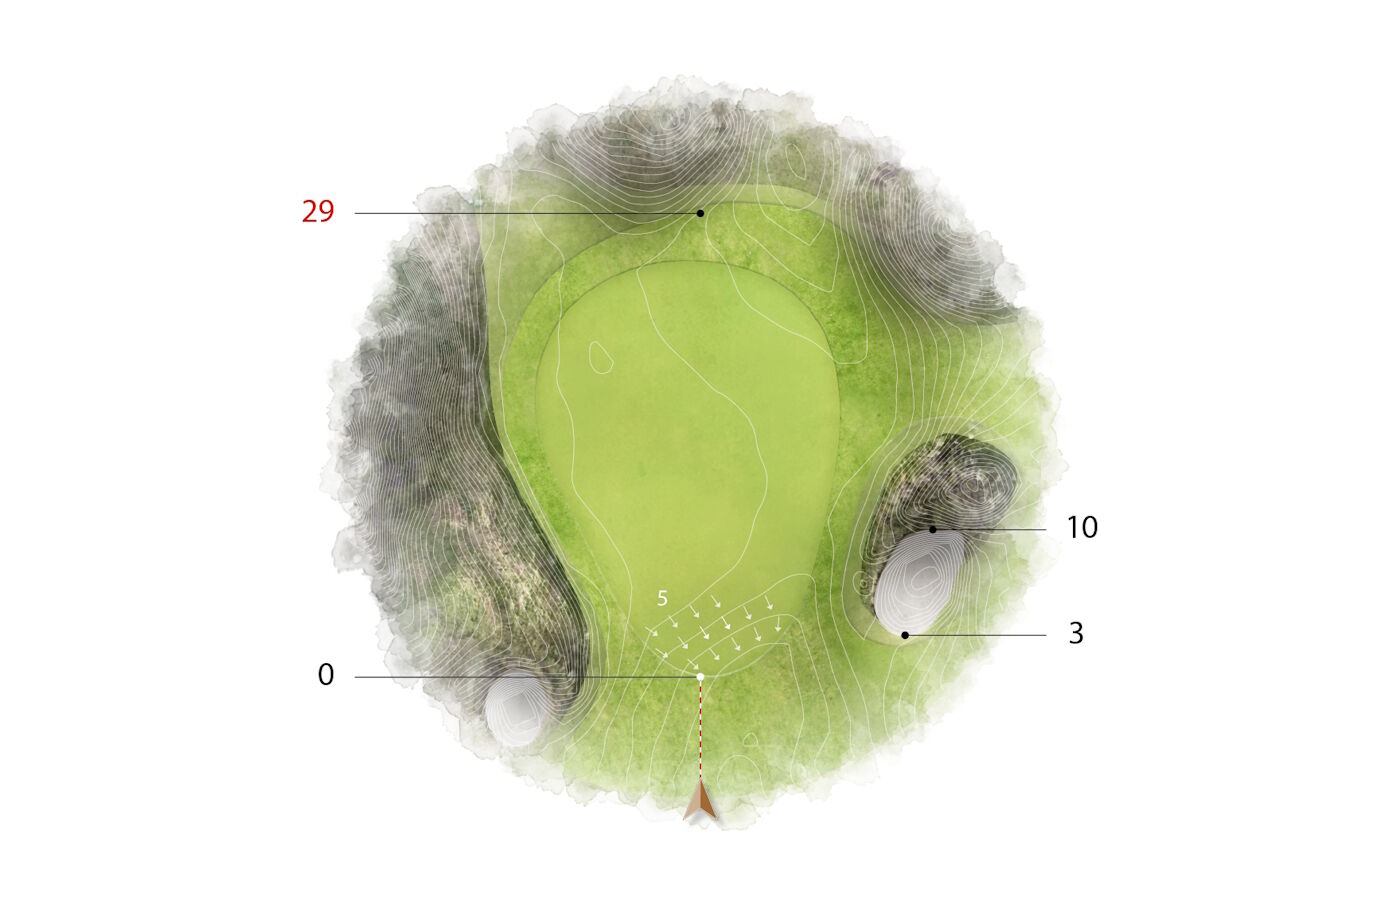
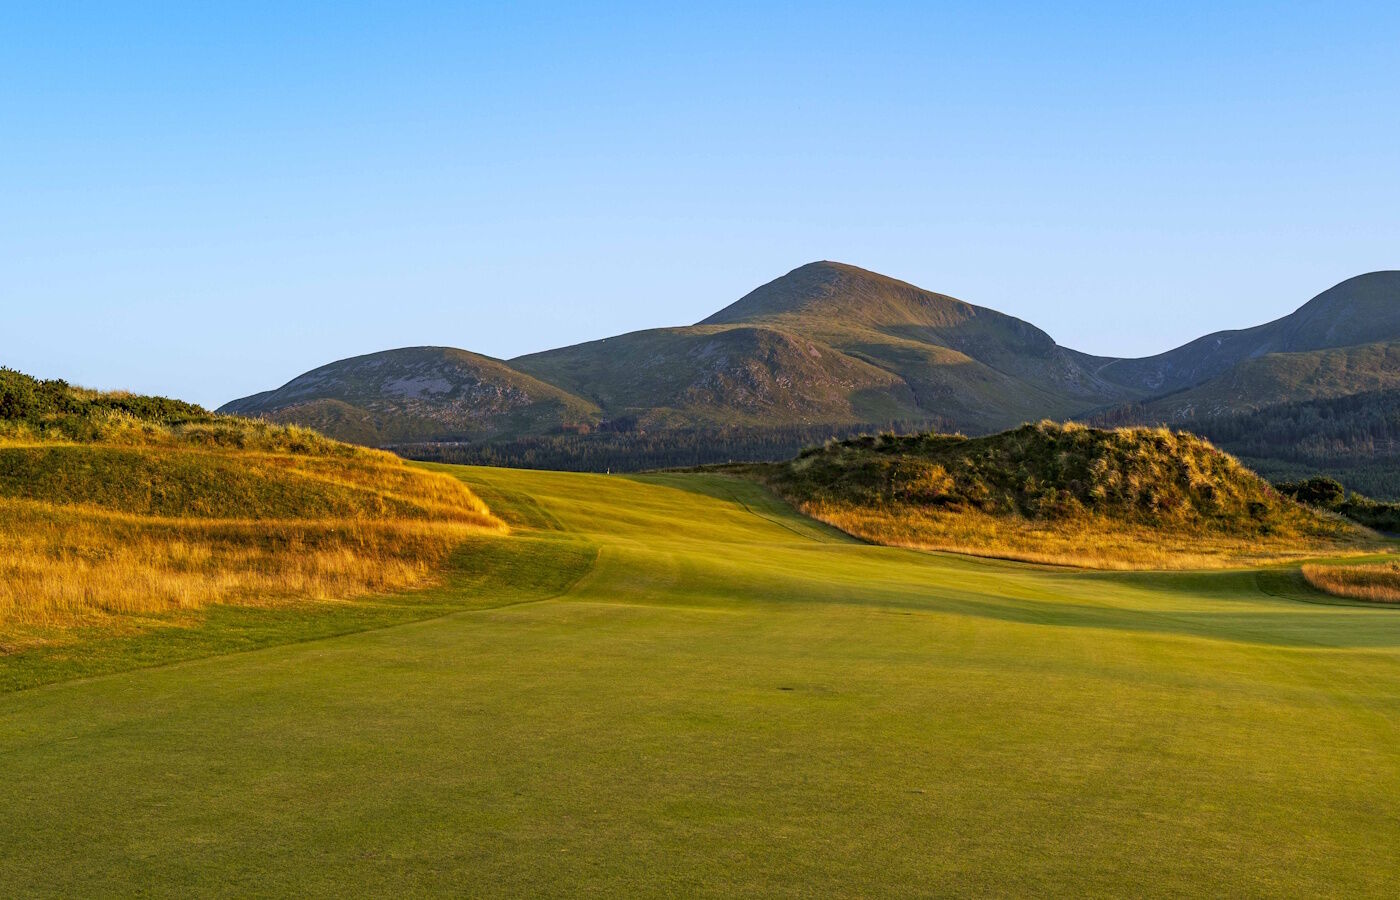
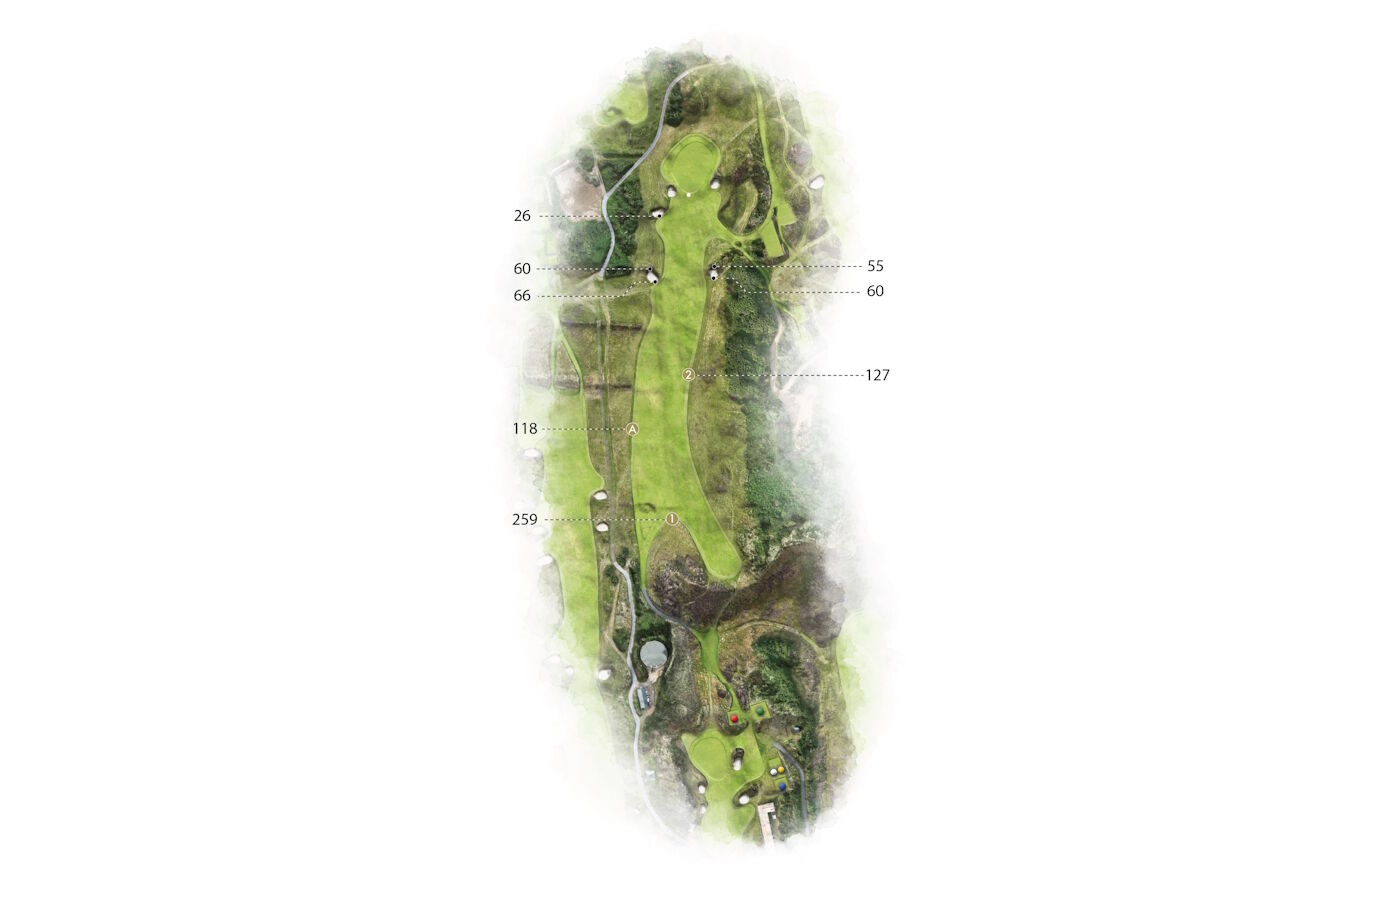
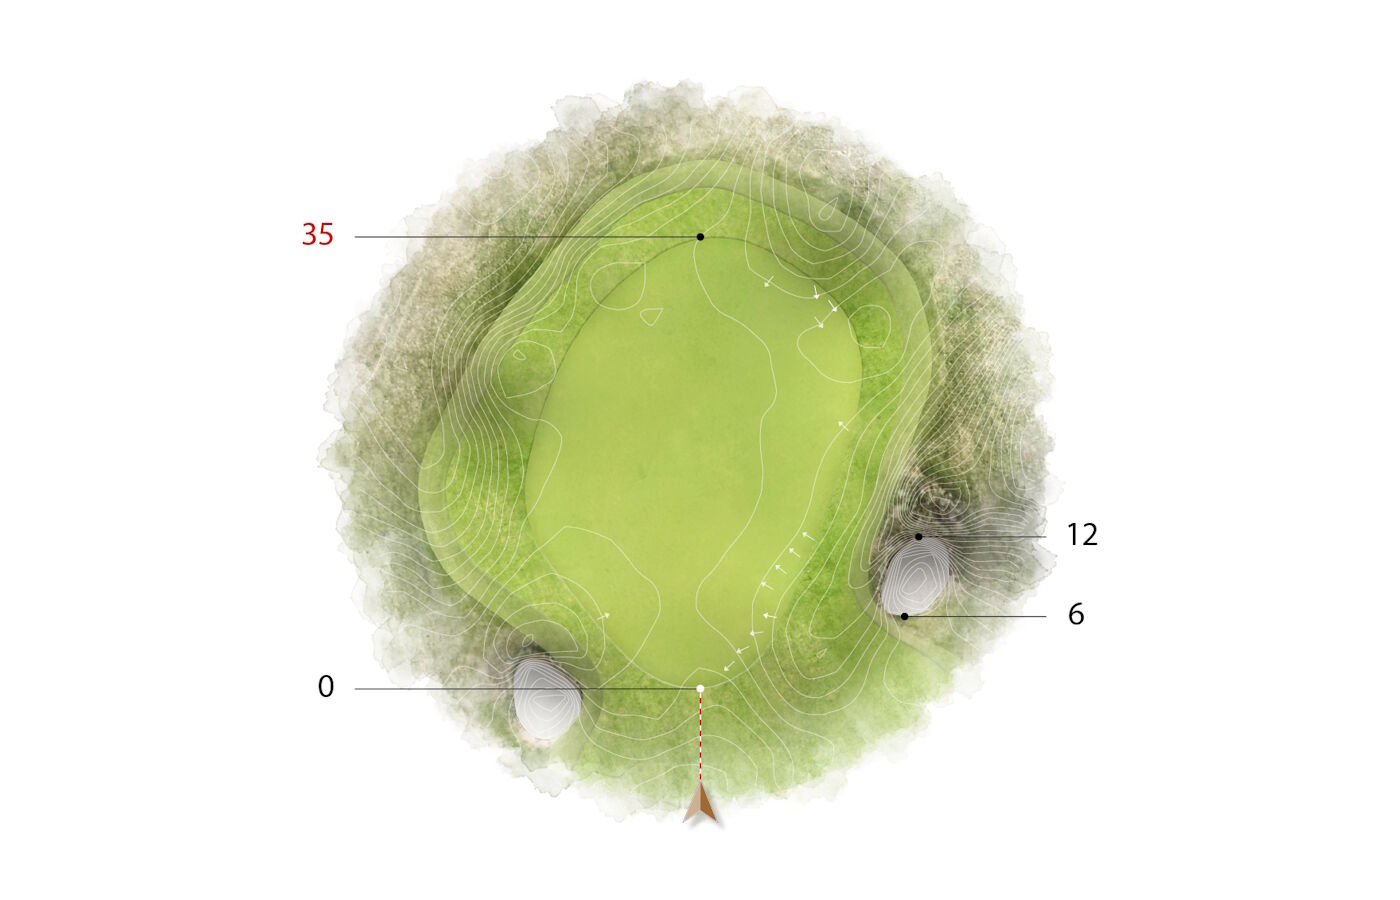
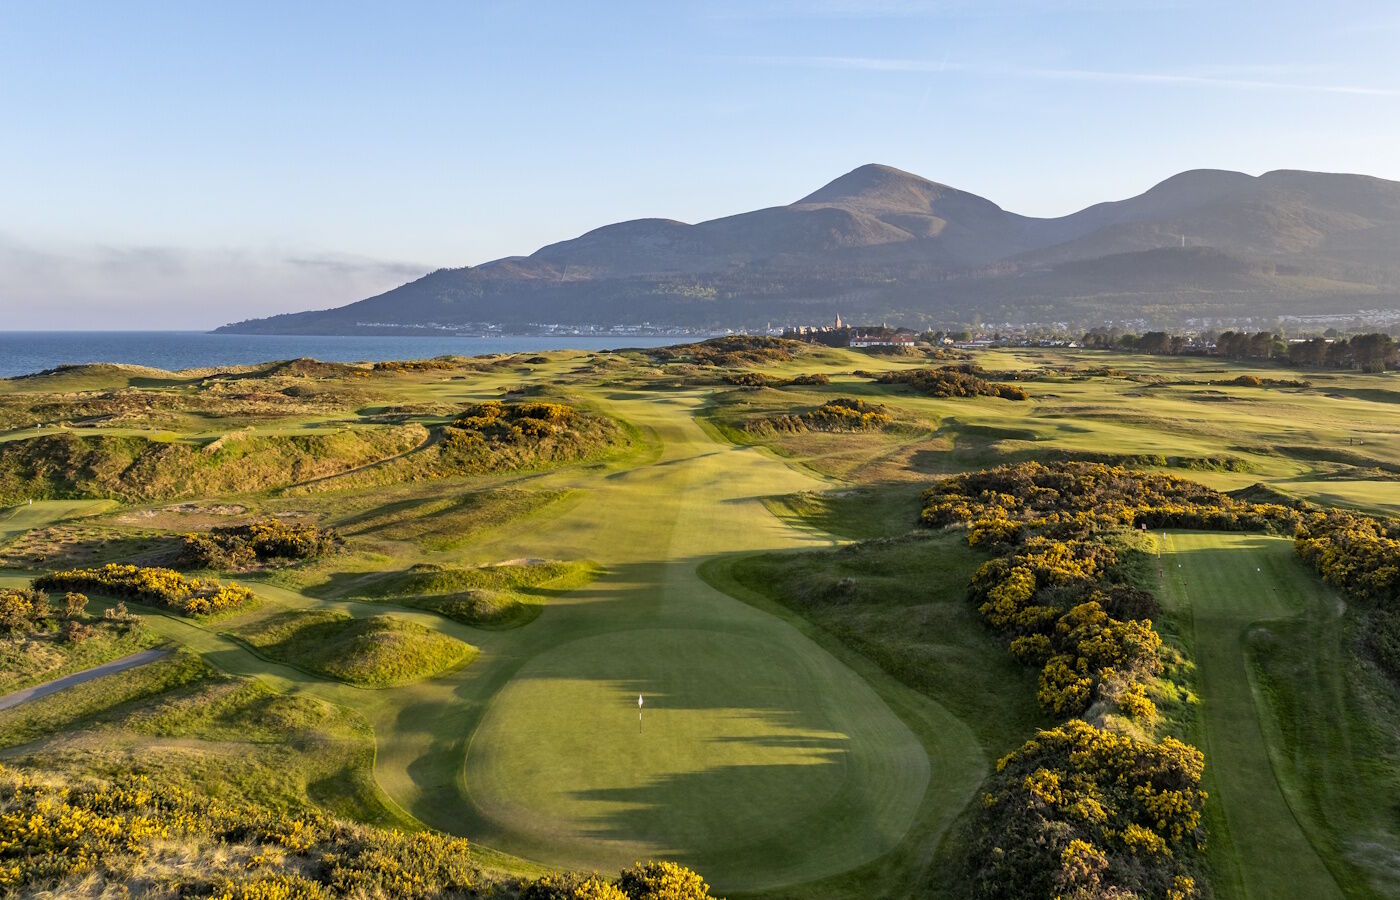
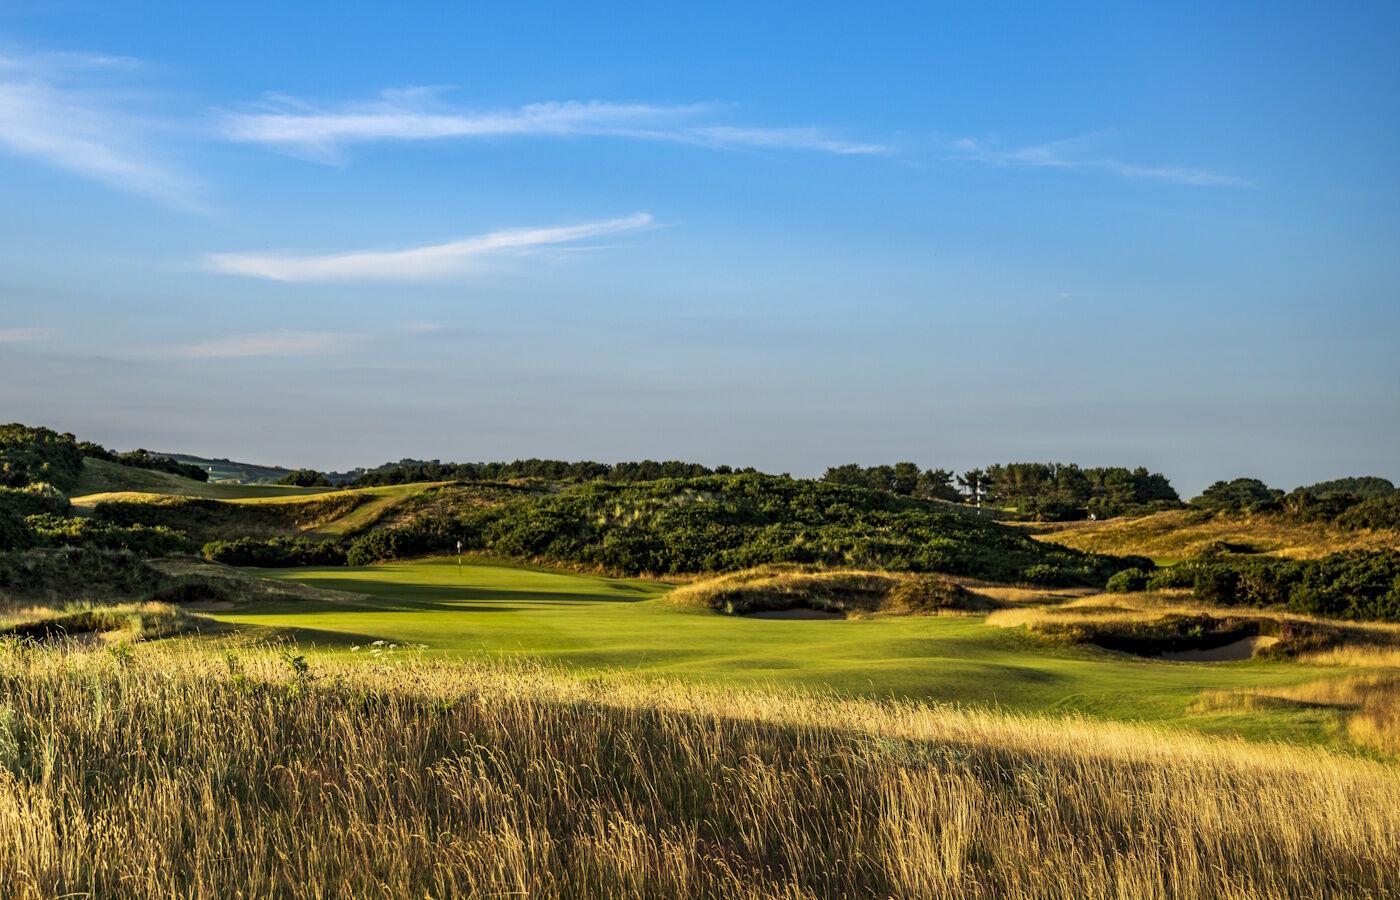
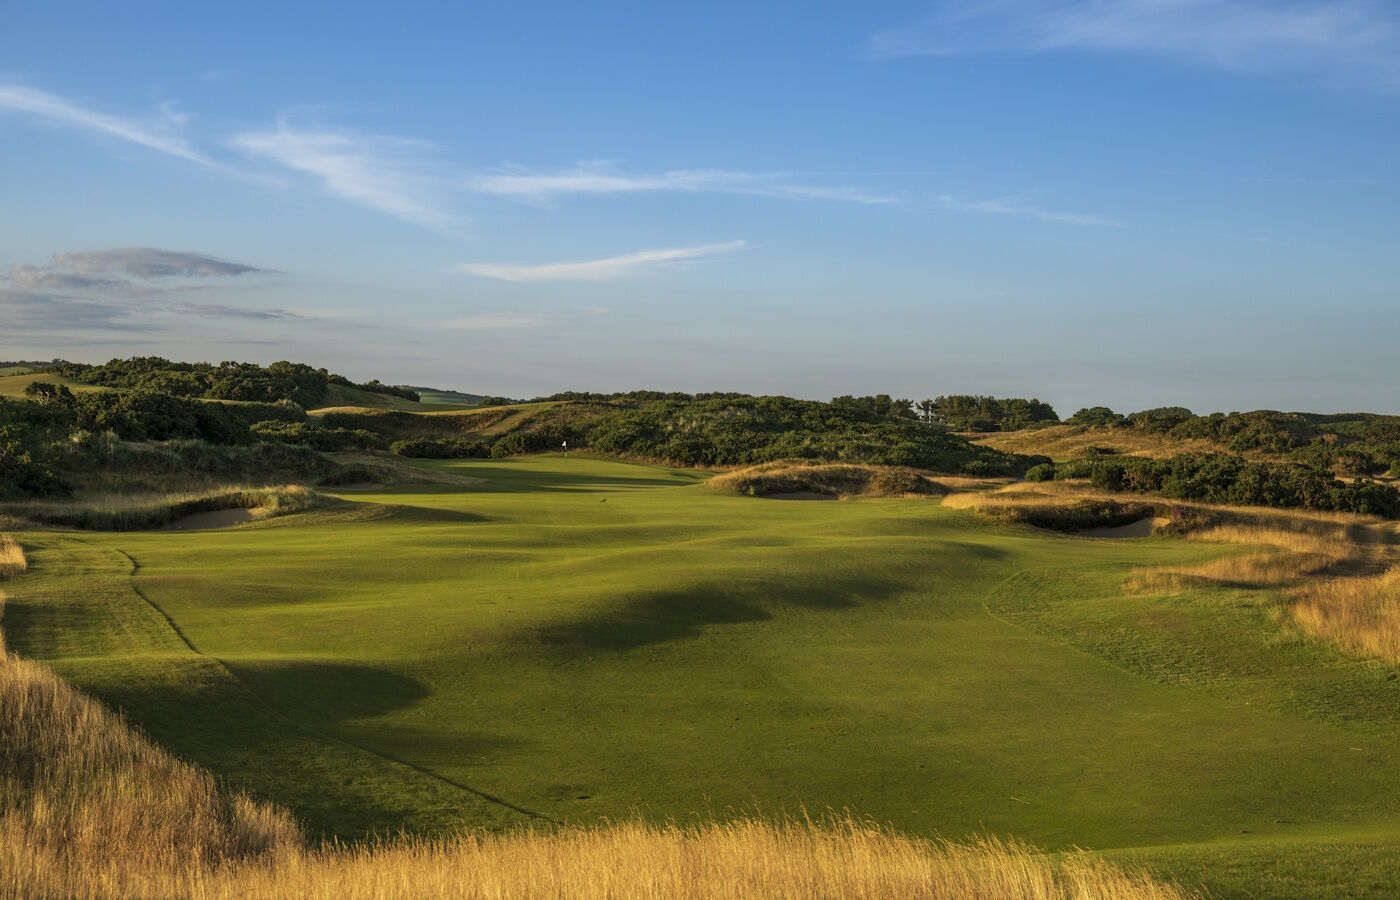
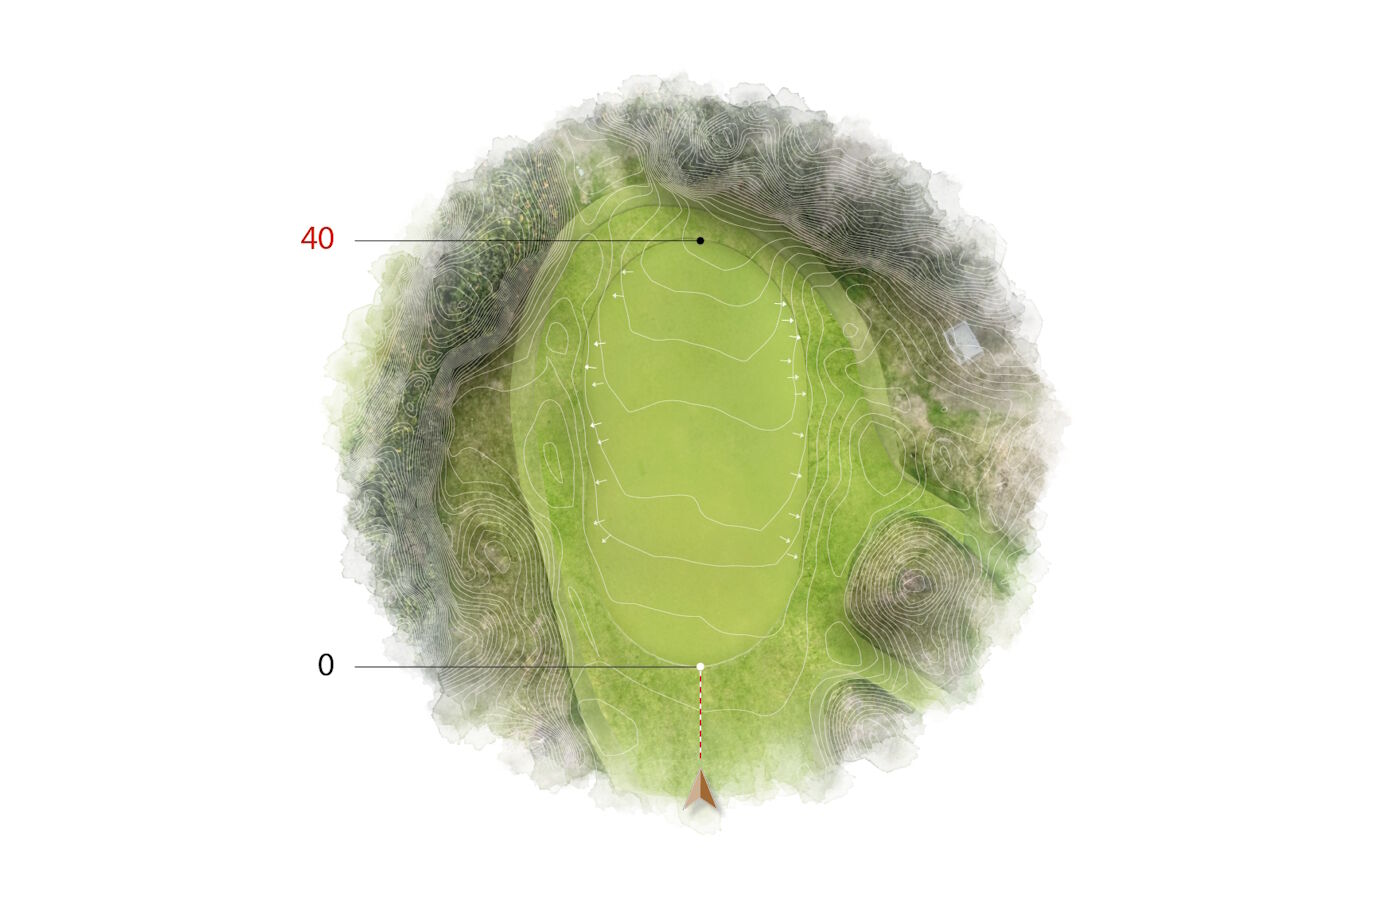
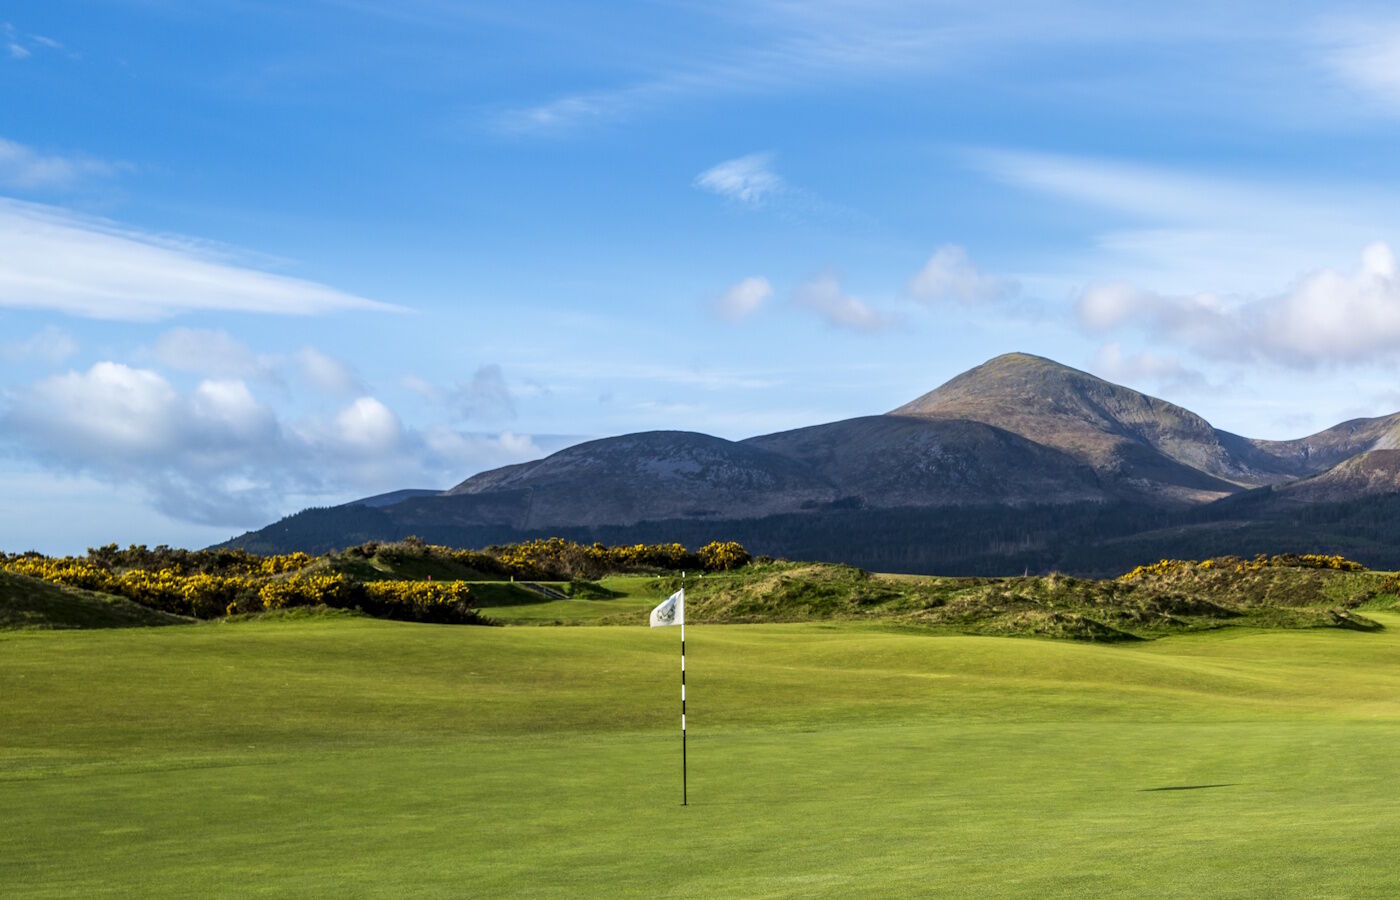
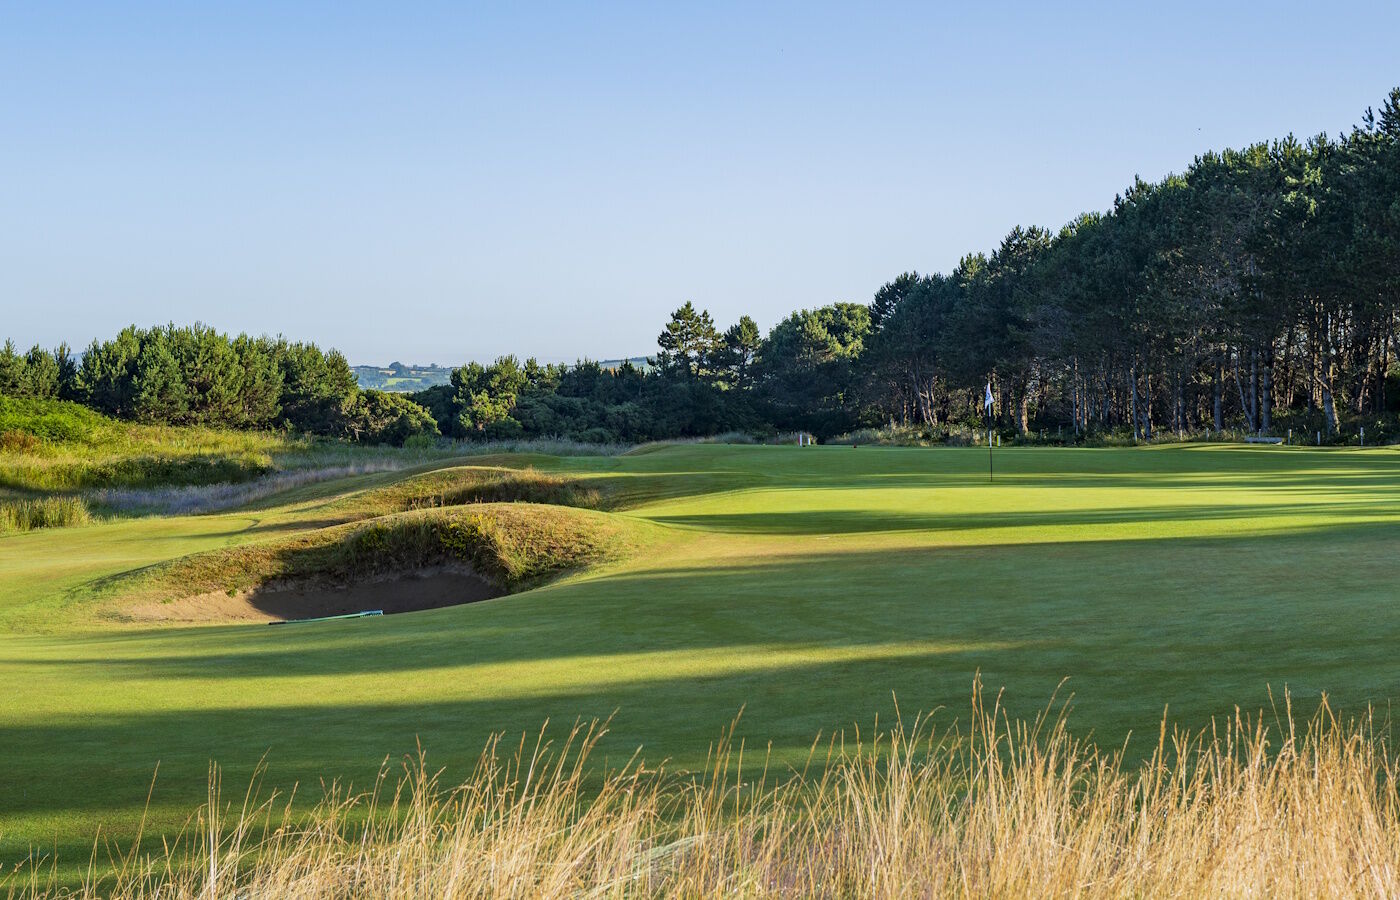
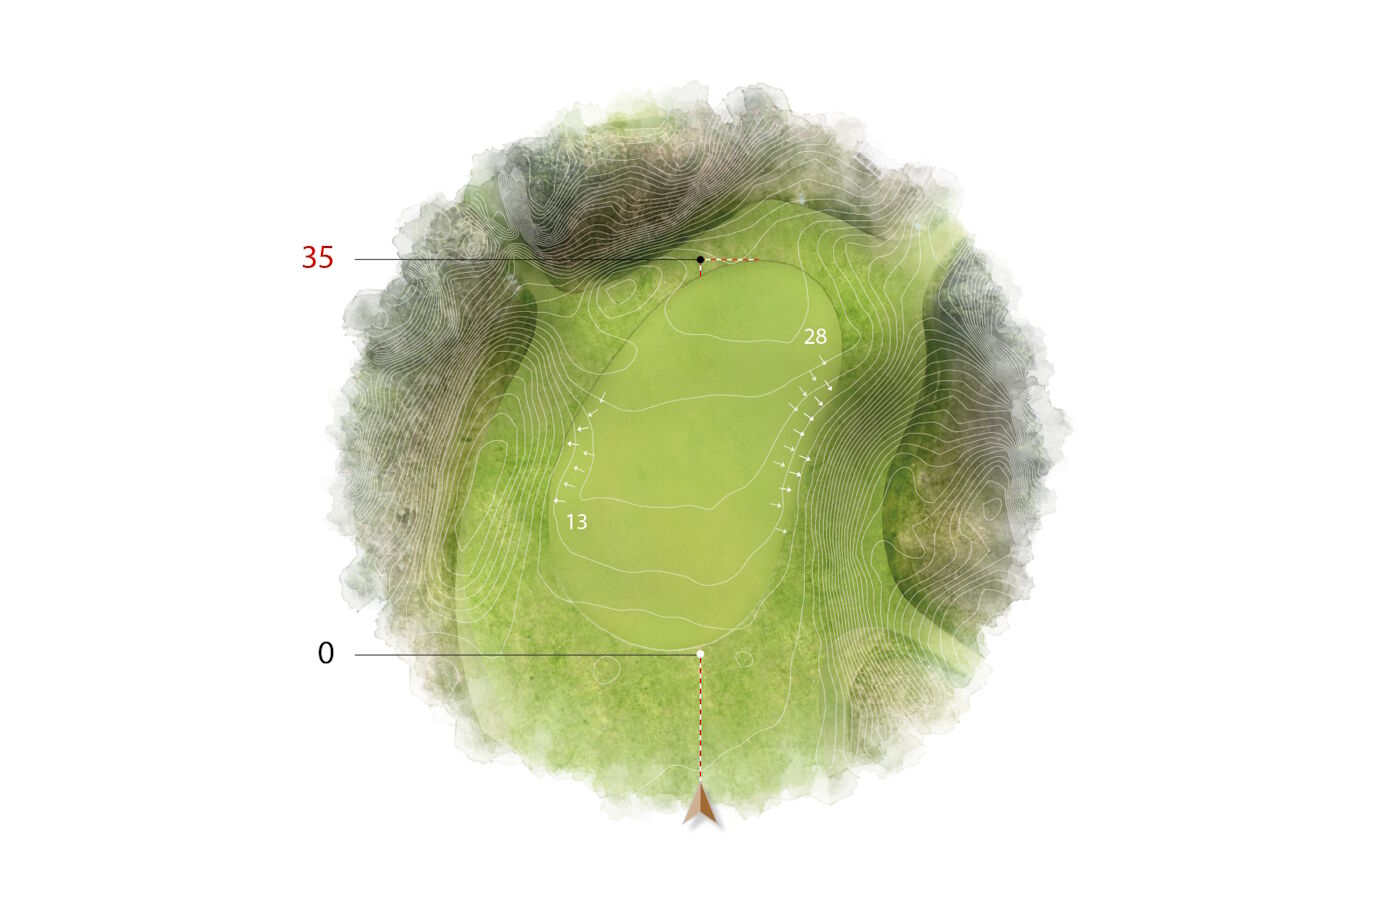
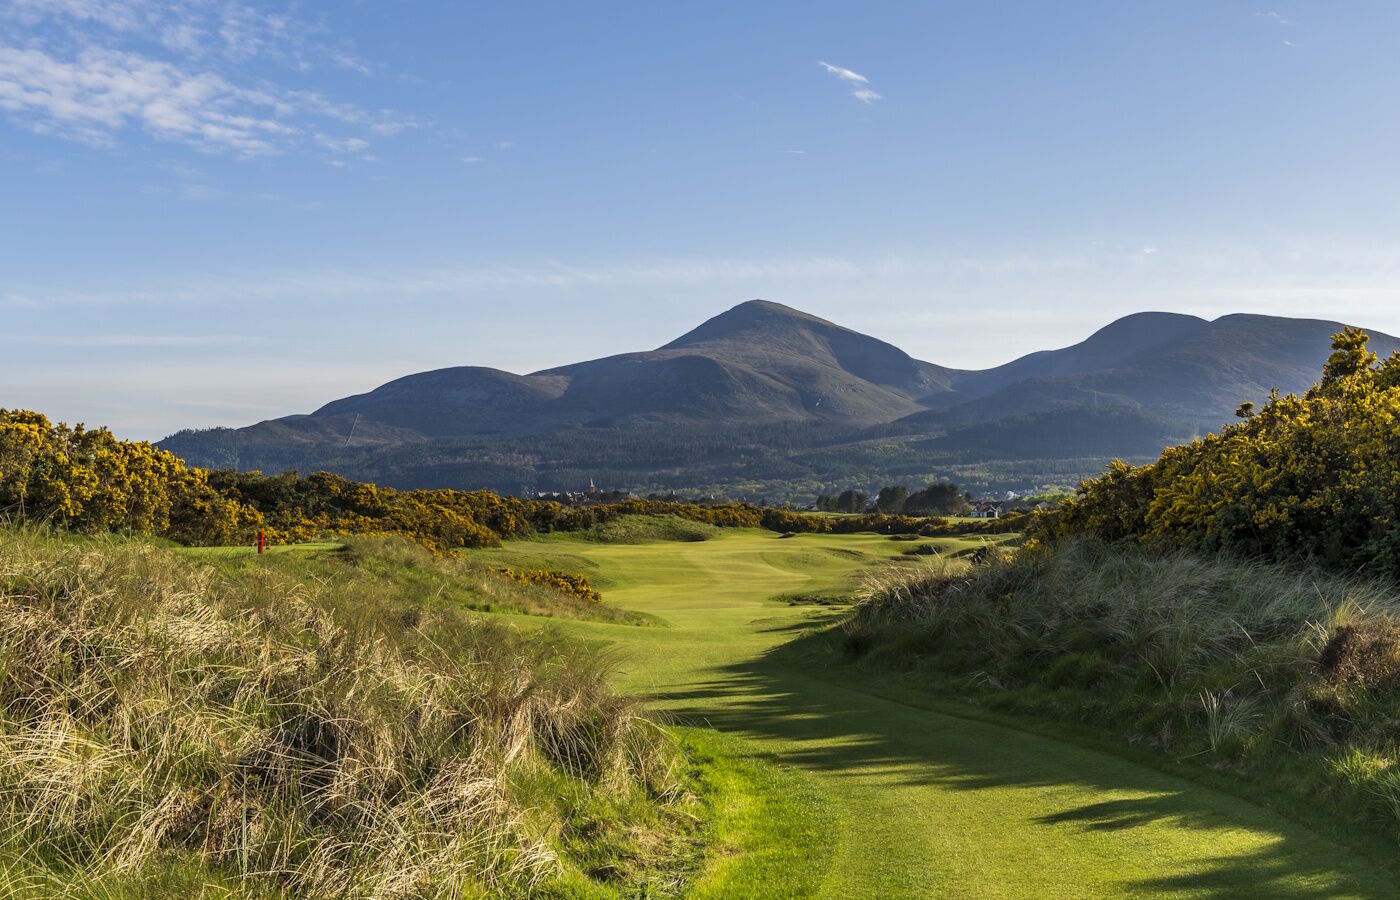
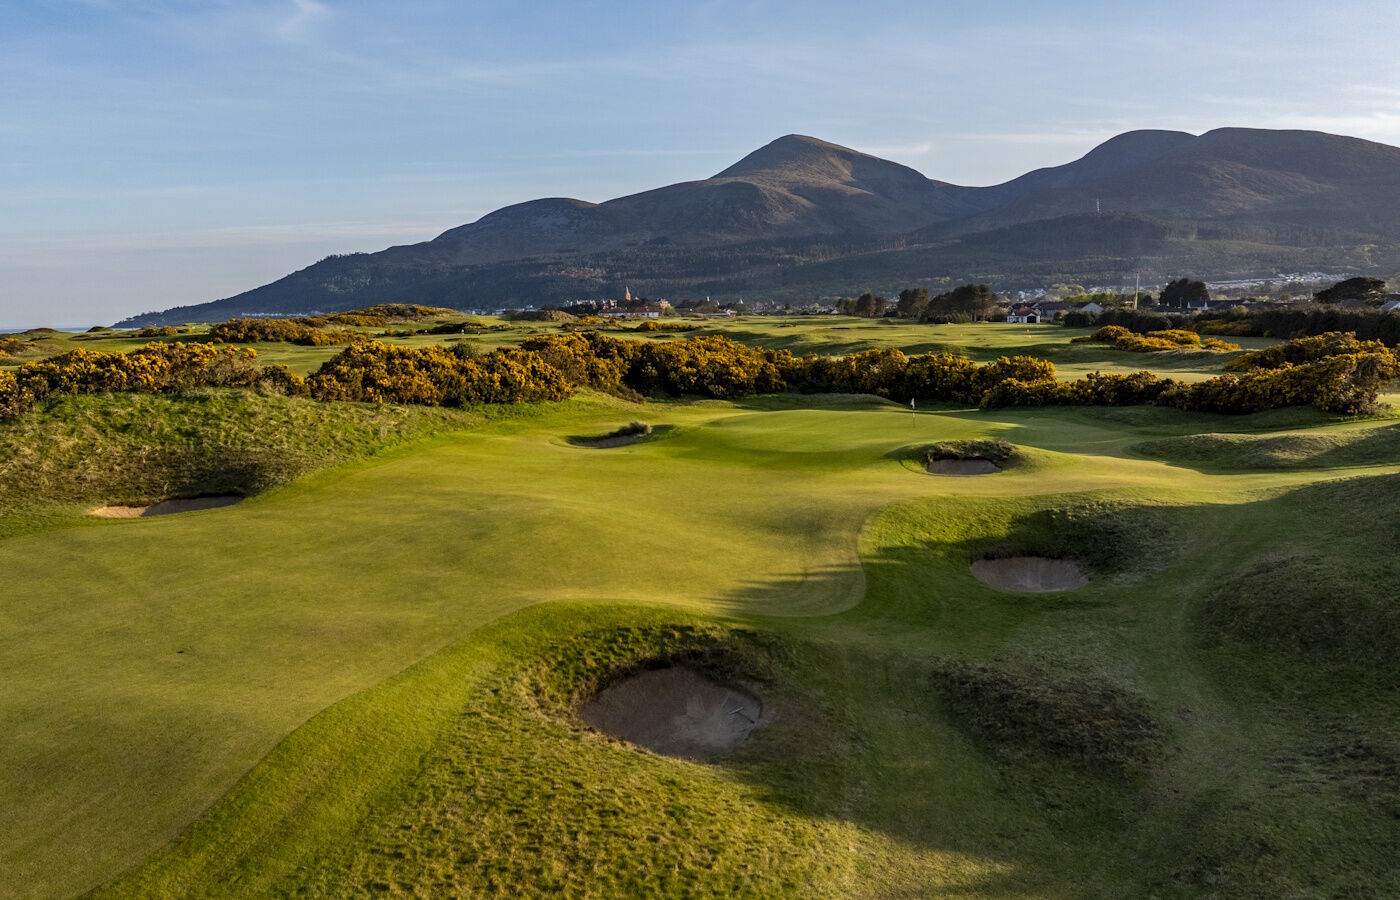
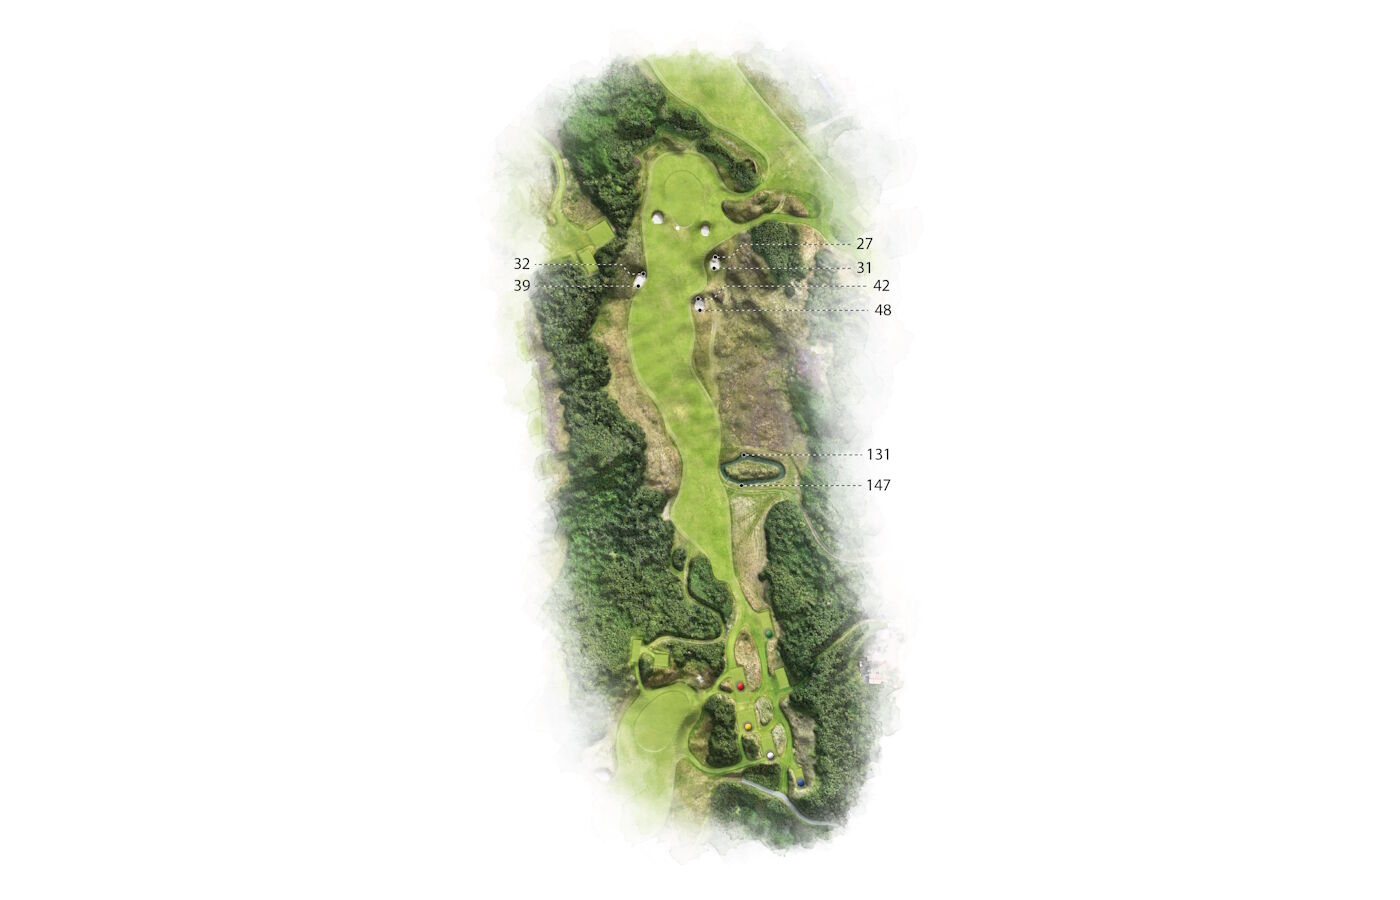
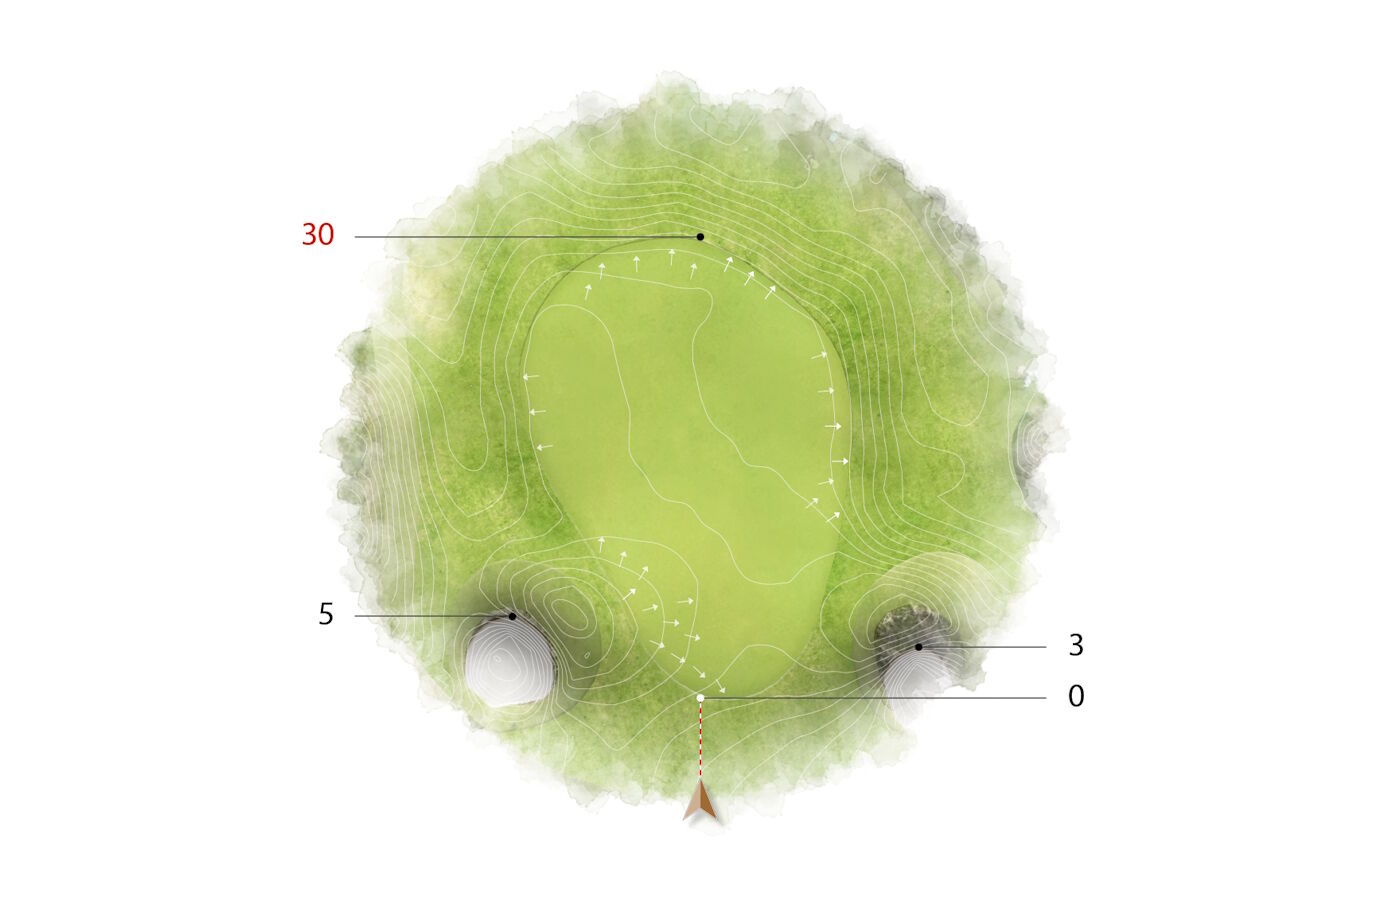
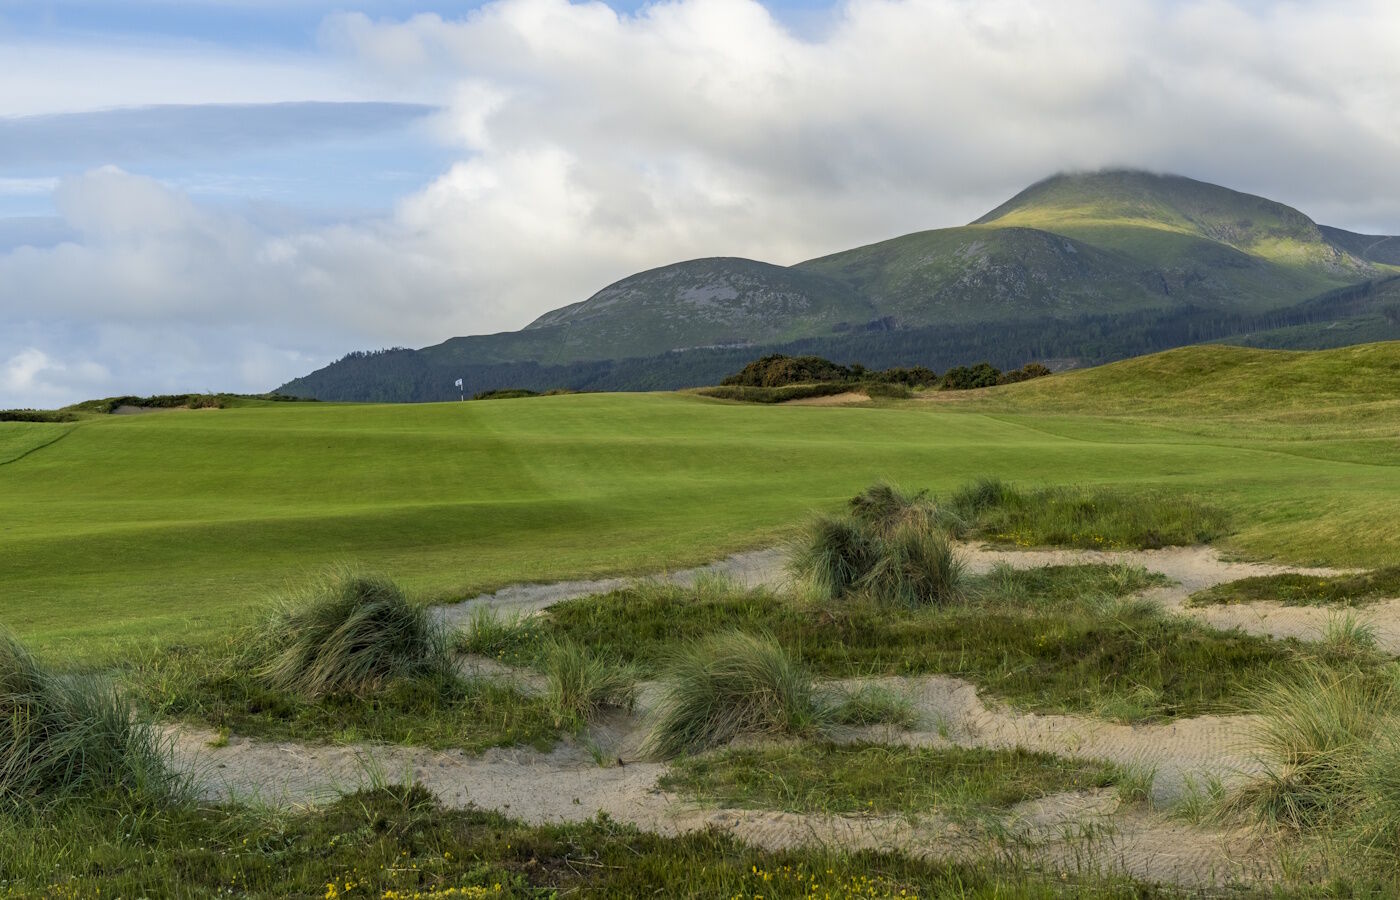
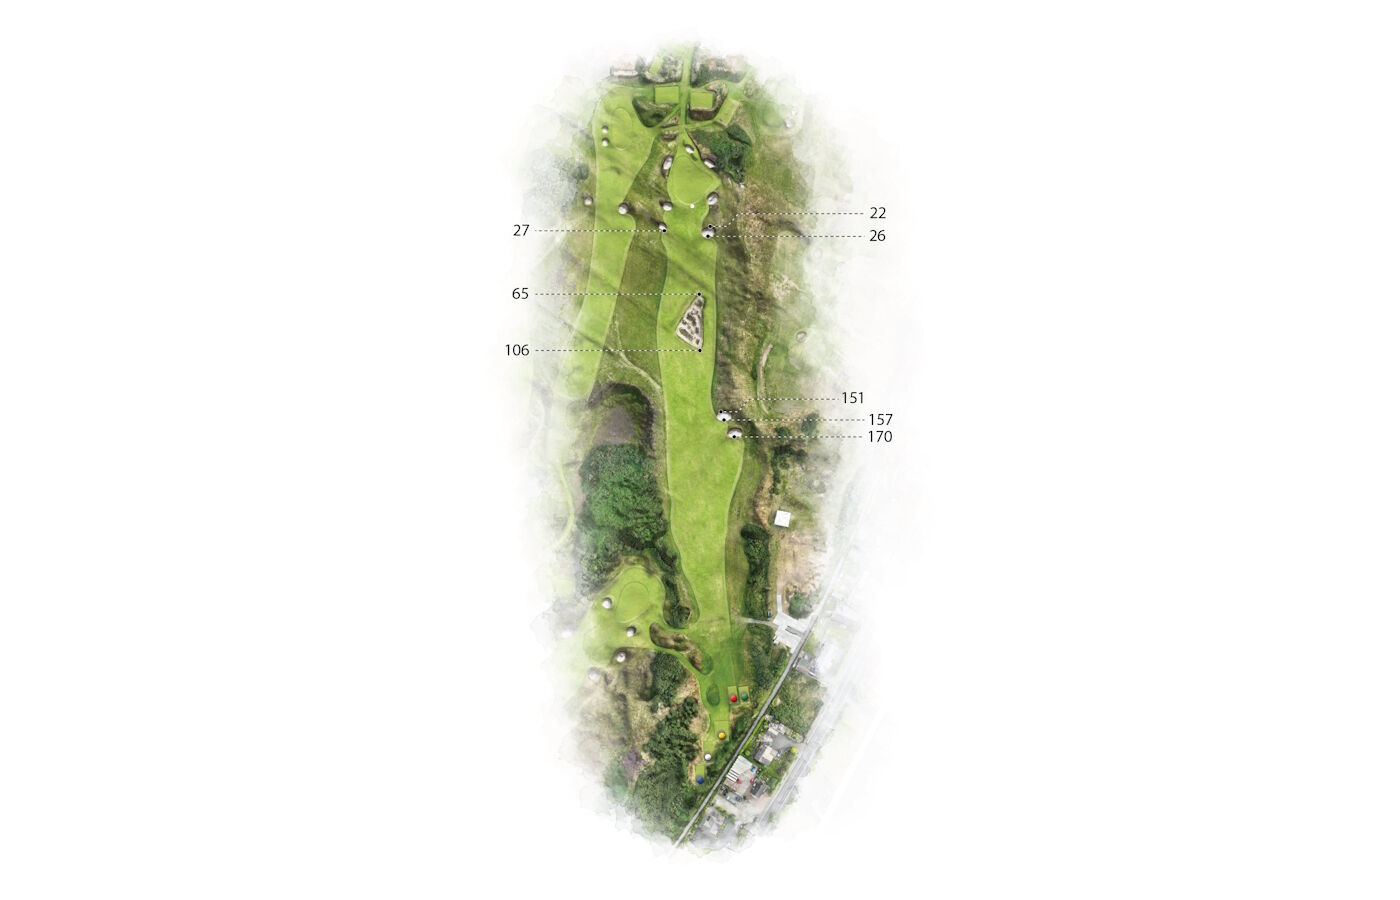
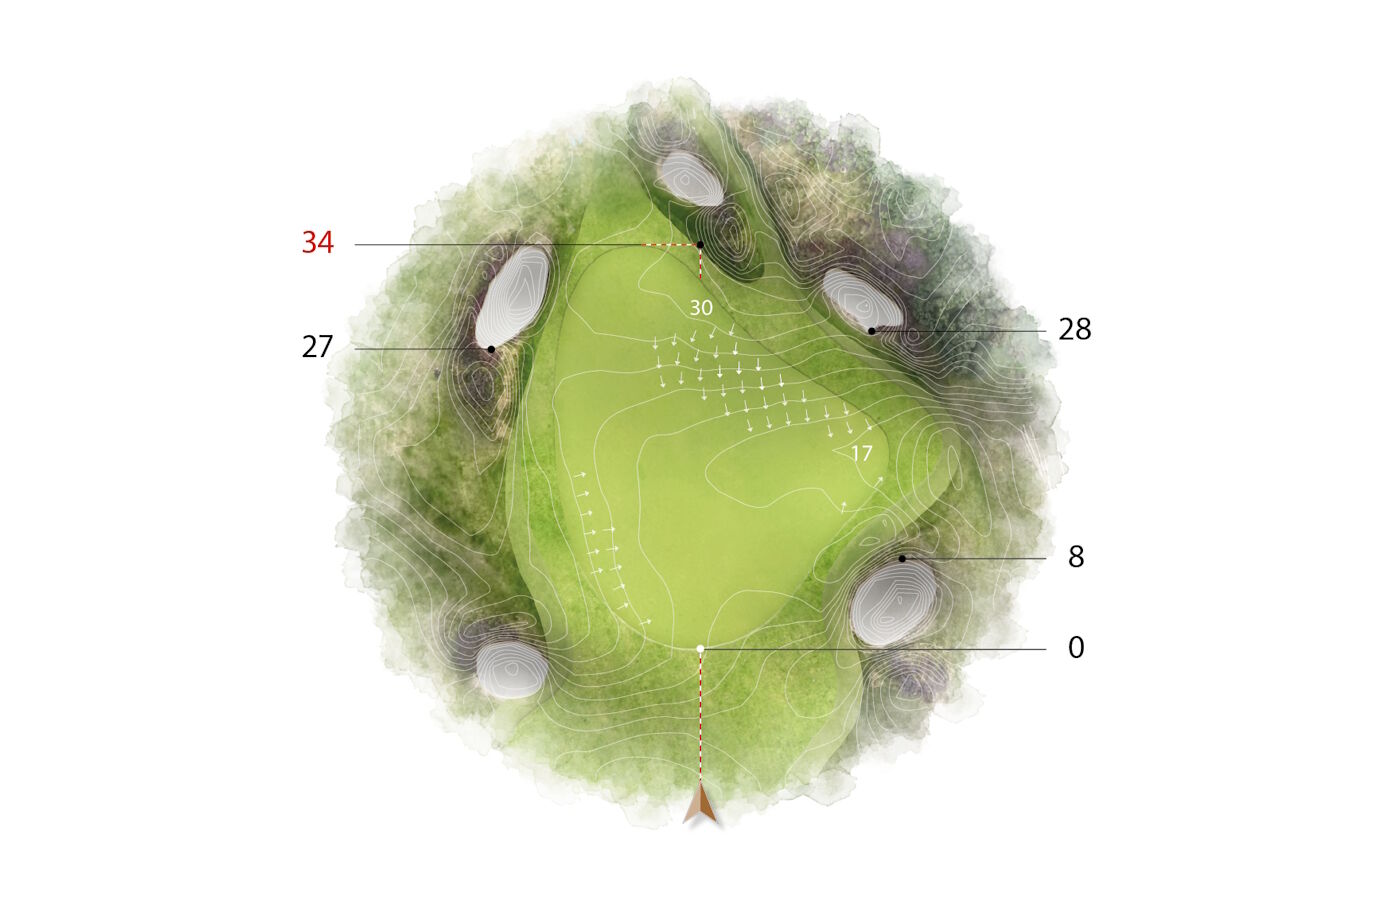
Hole 2
A blind tee shot down the left side of the fairway leaves the best view of the green. The approach must carry to the green to avoid the unfriendly bounce to the right down a grassy hollow. The green slopes front to back as well as left to right.
- Gallery
- Flyover
- Layout
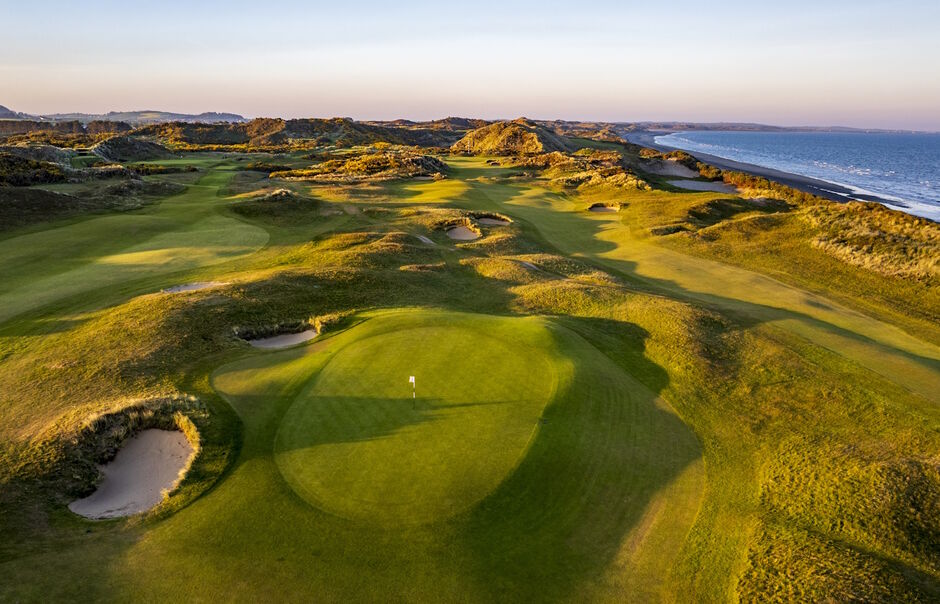
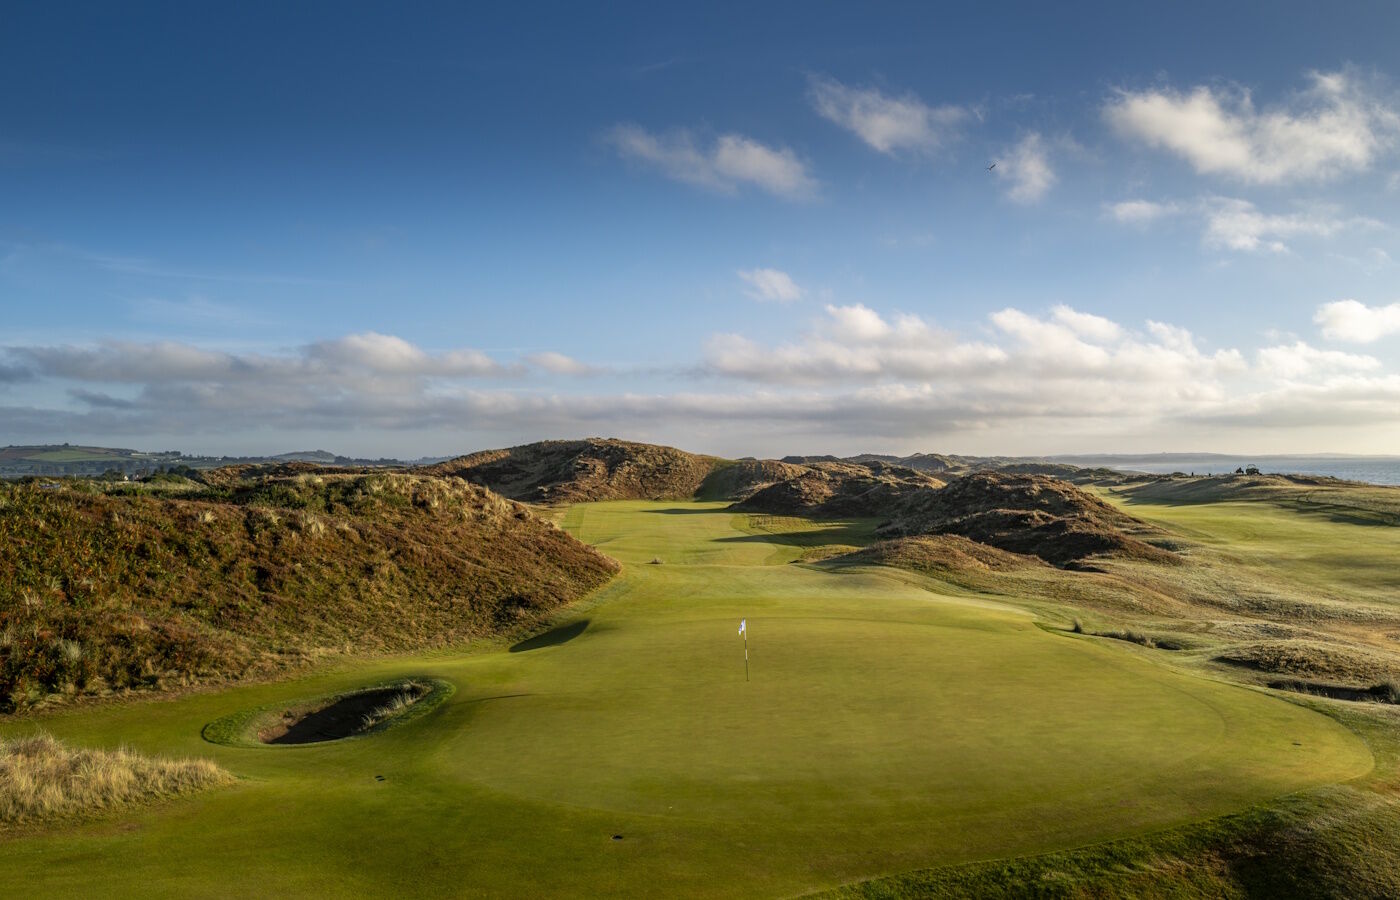
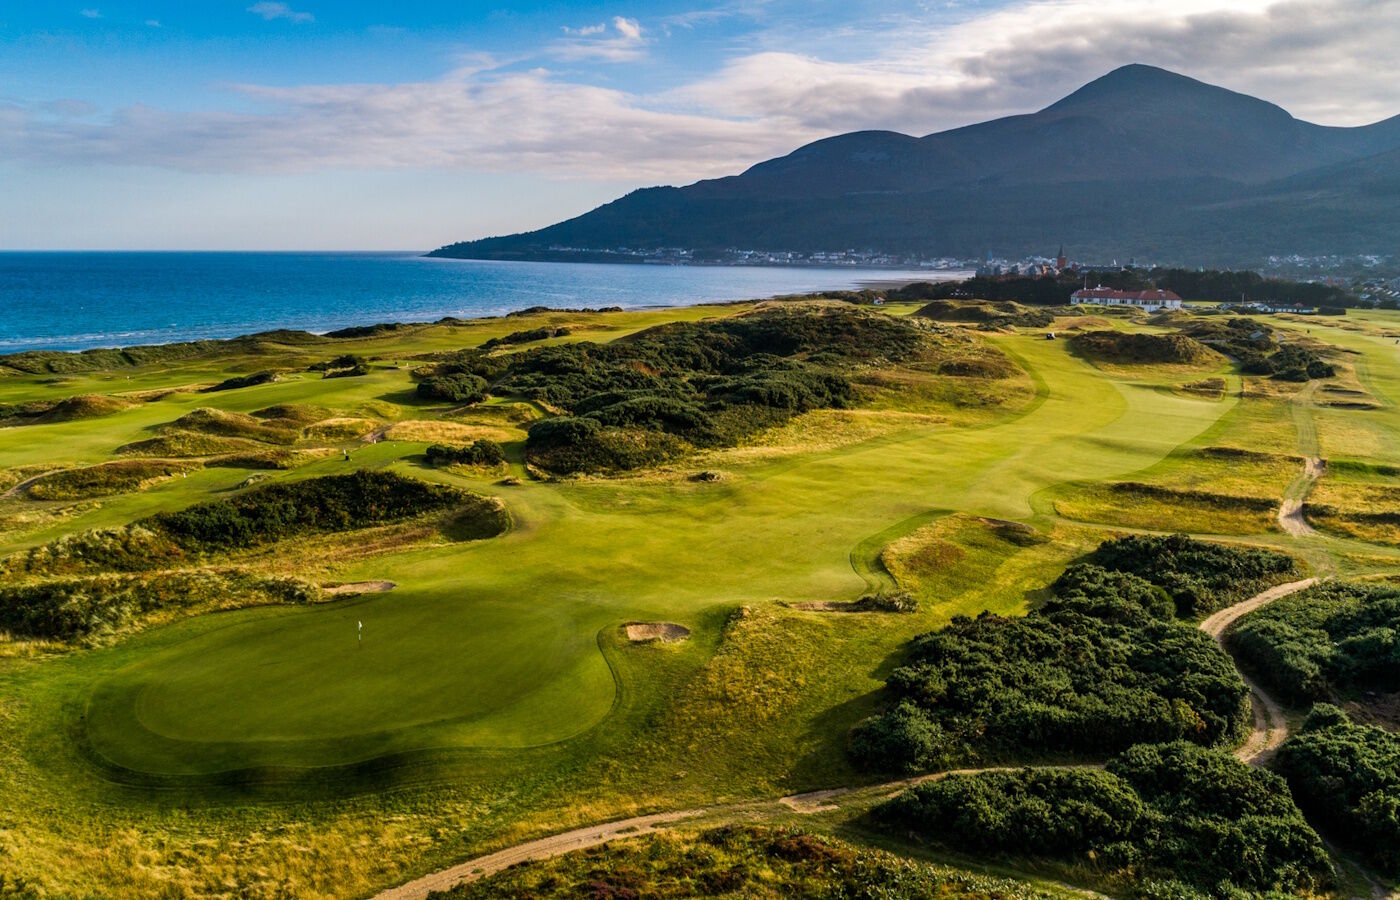
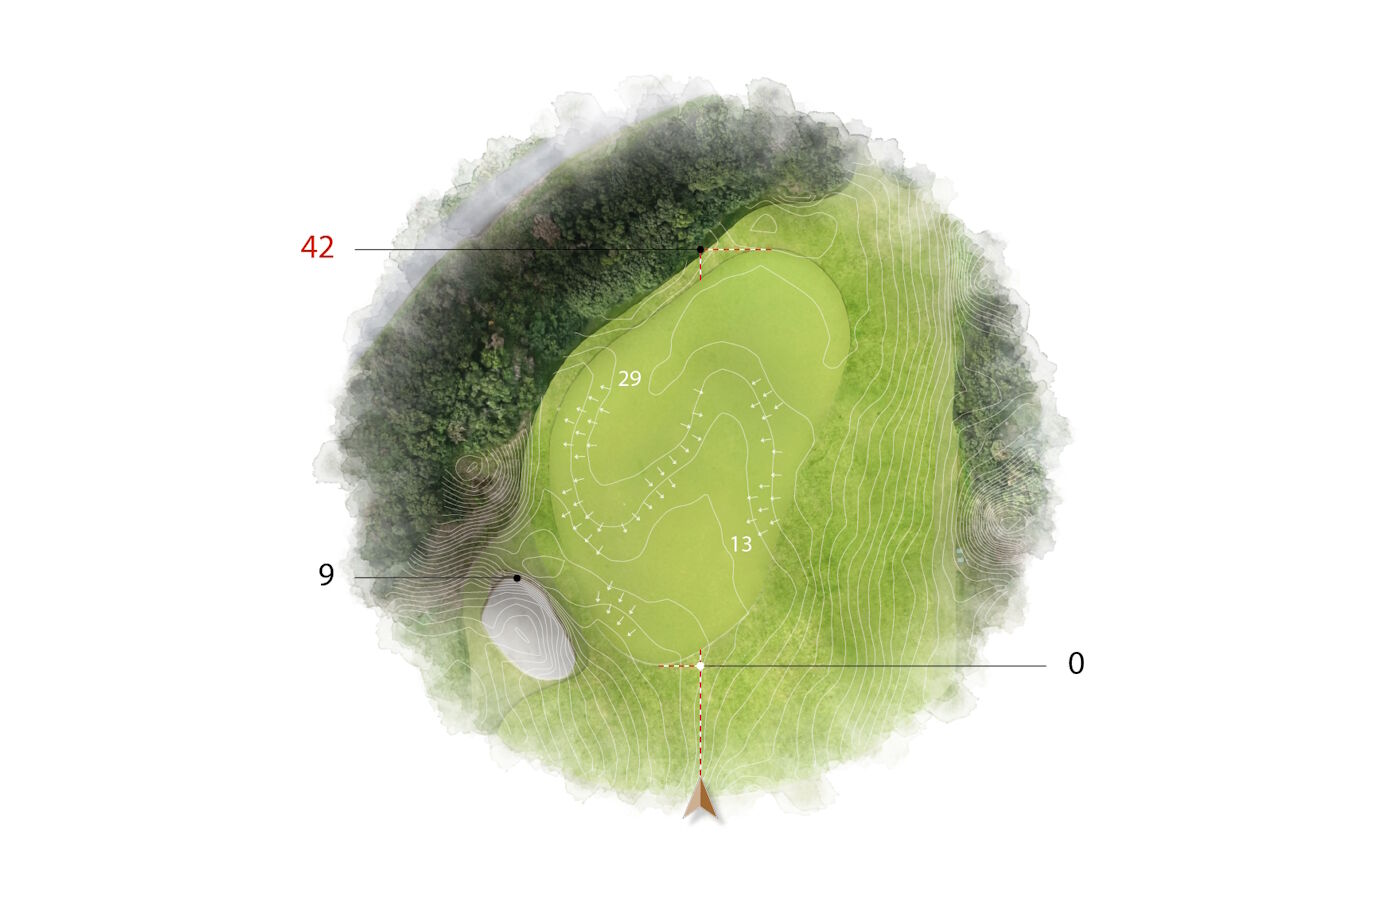
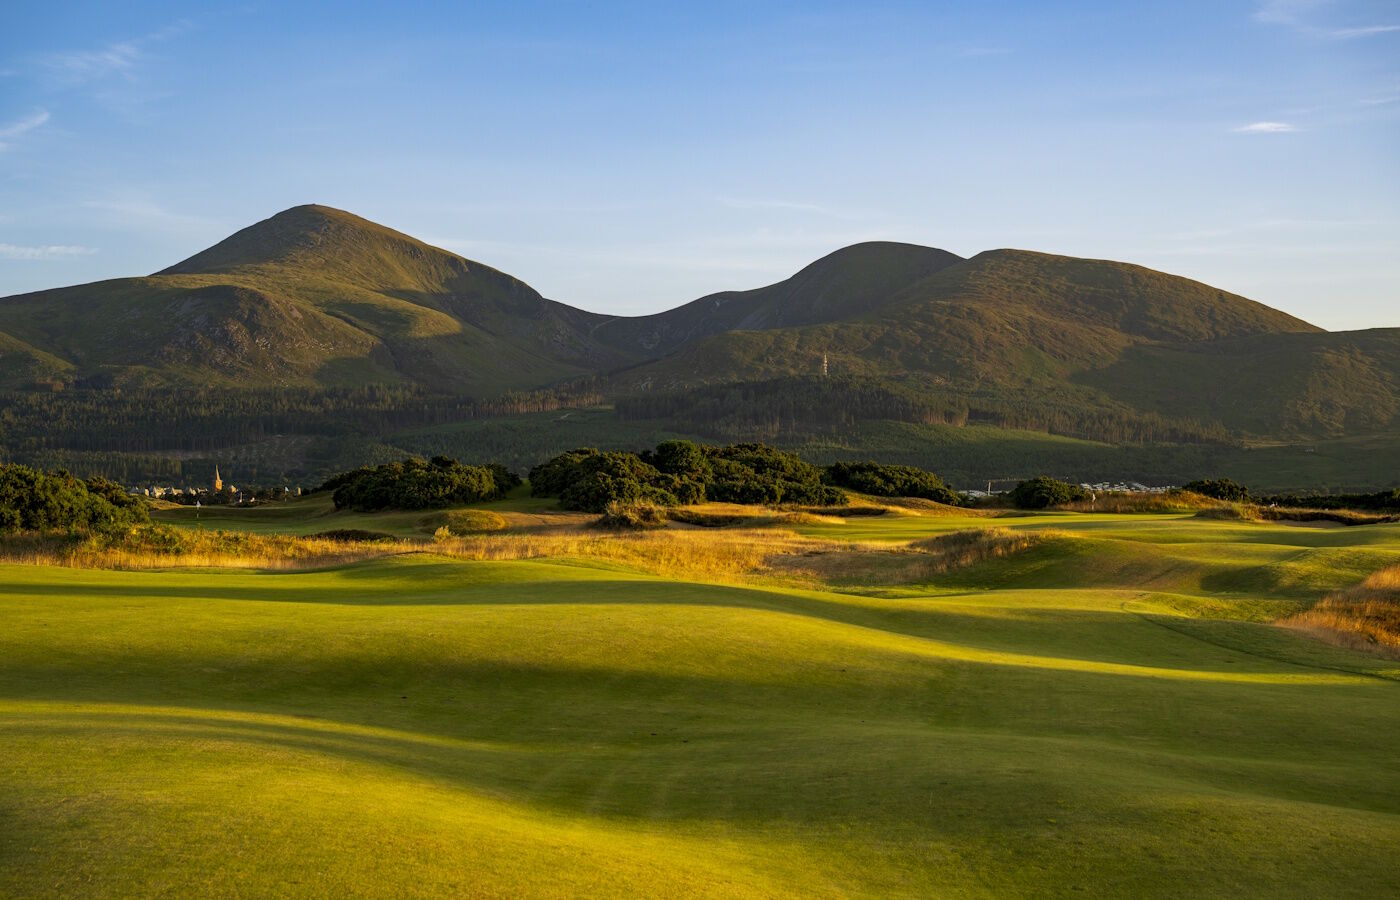
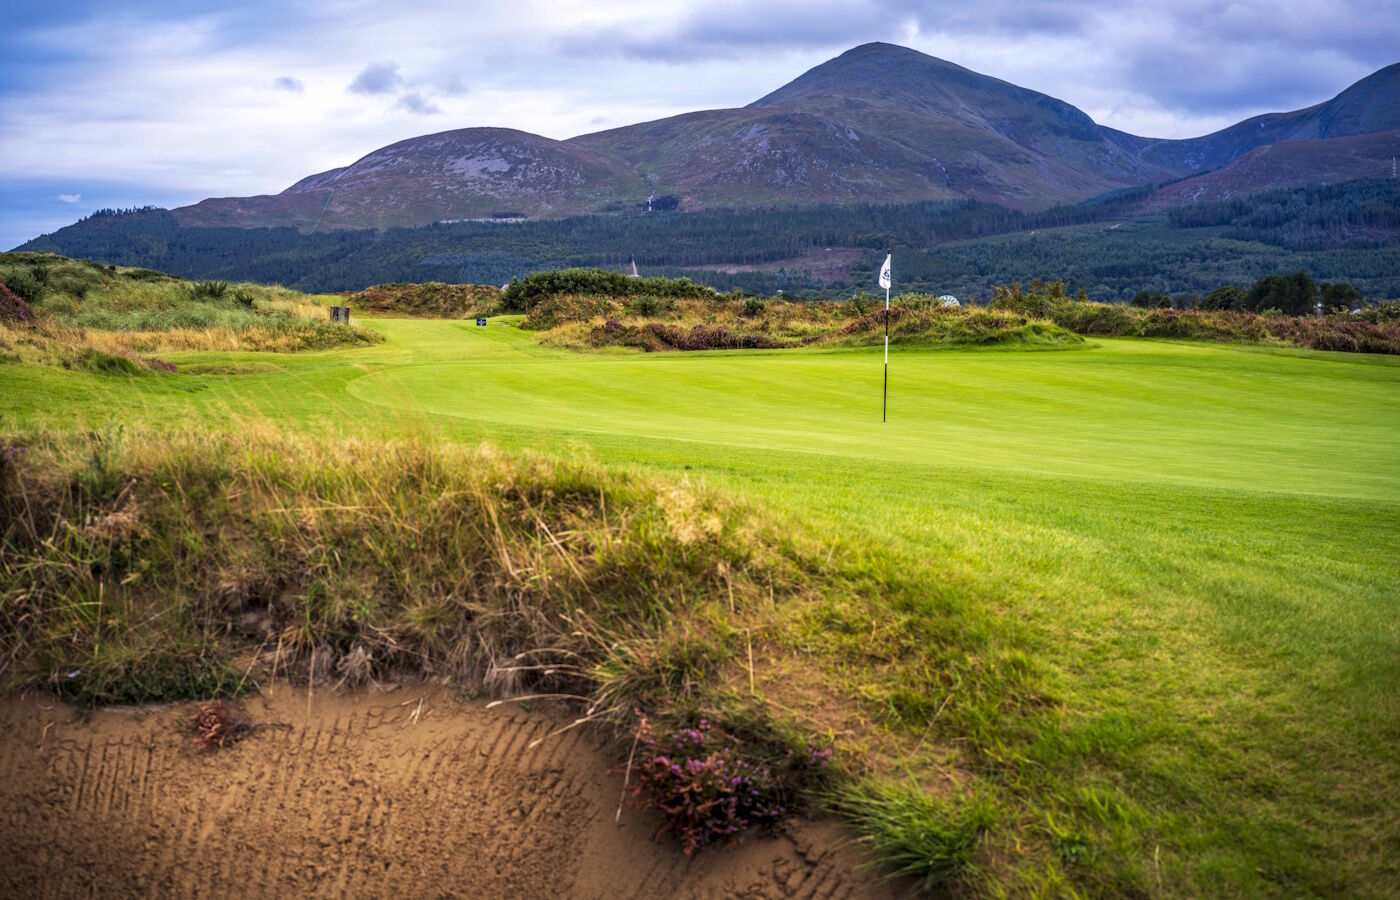
Hole 3
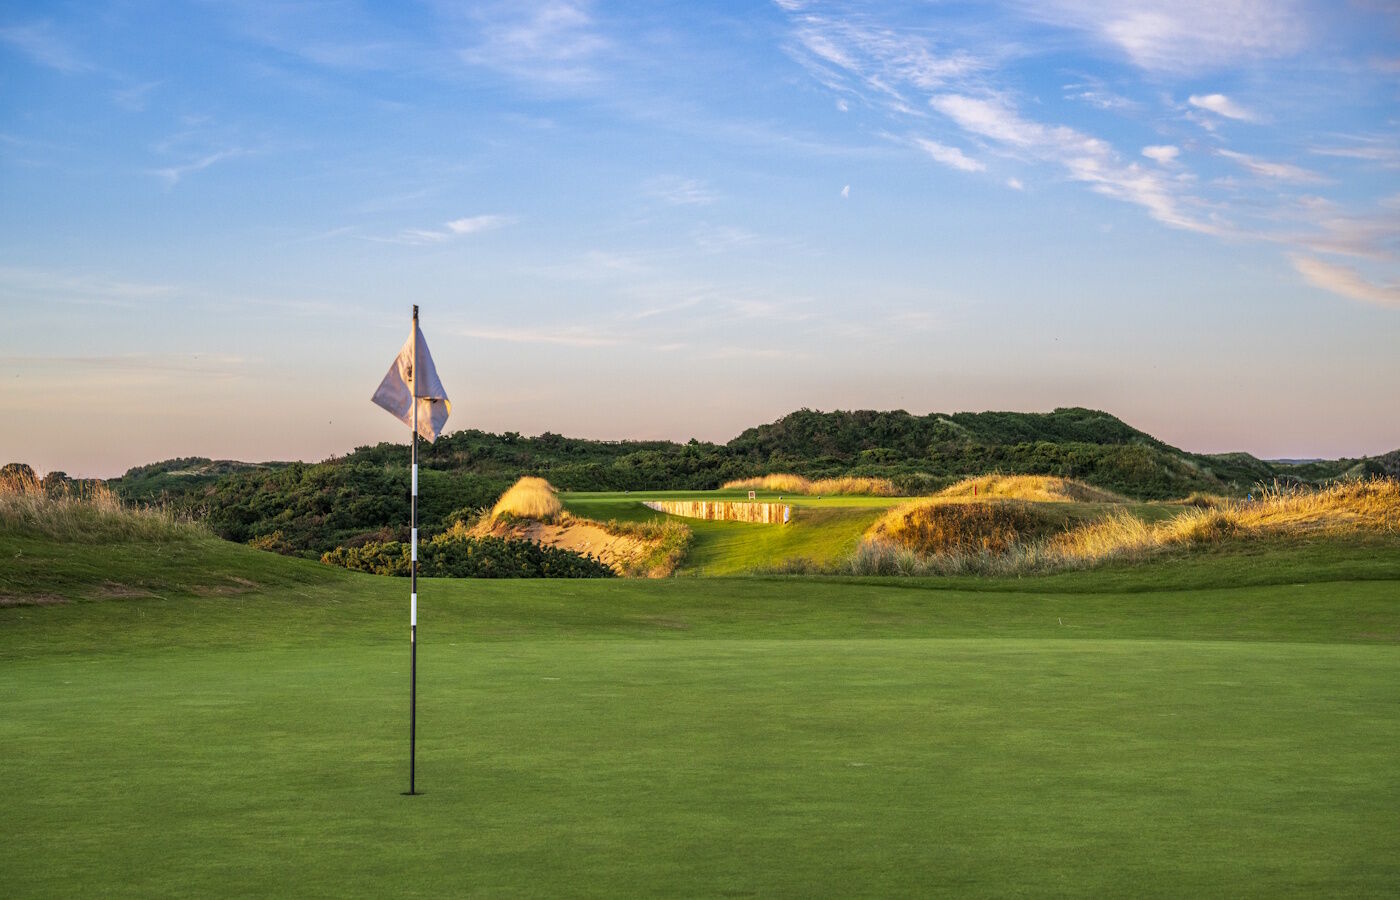
A spectacular long par 4 overlooking Dundrum Bay from the elevated tee. The longer hitter can fly the left-hand trap on to plateau giving a superb line into the green. The approach shot to this green from any angle is difficult, as there is a knuckle guarding the front left which throws any under hit shot right and short. The green is one of the fastest on the course and, although flat, is also one of the trickiest to read.
Read More
- Gallery
- Flyover
- Layout
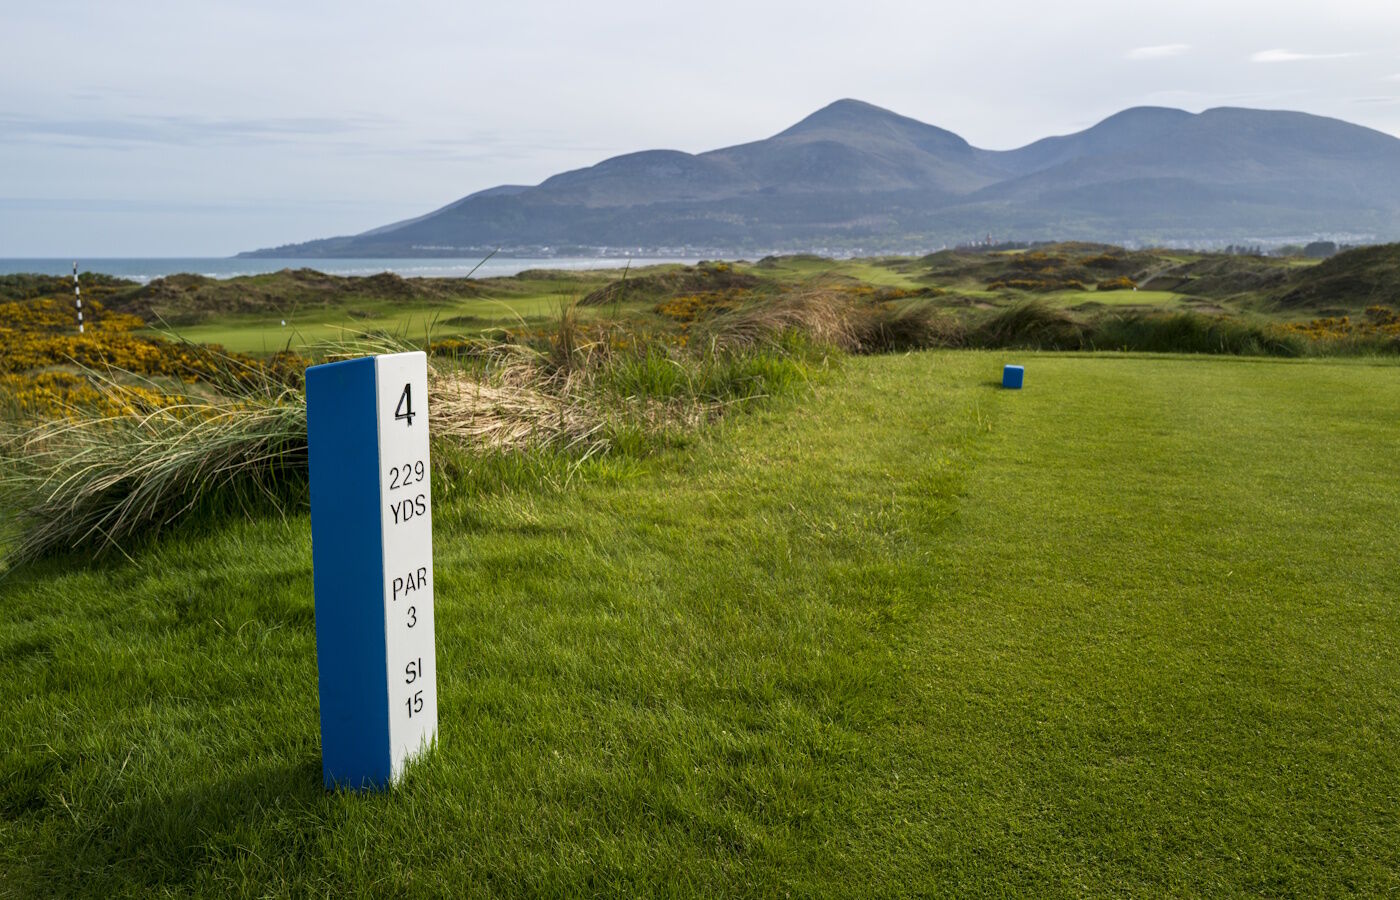


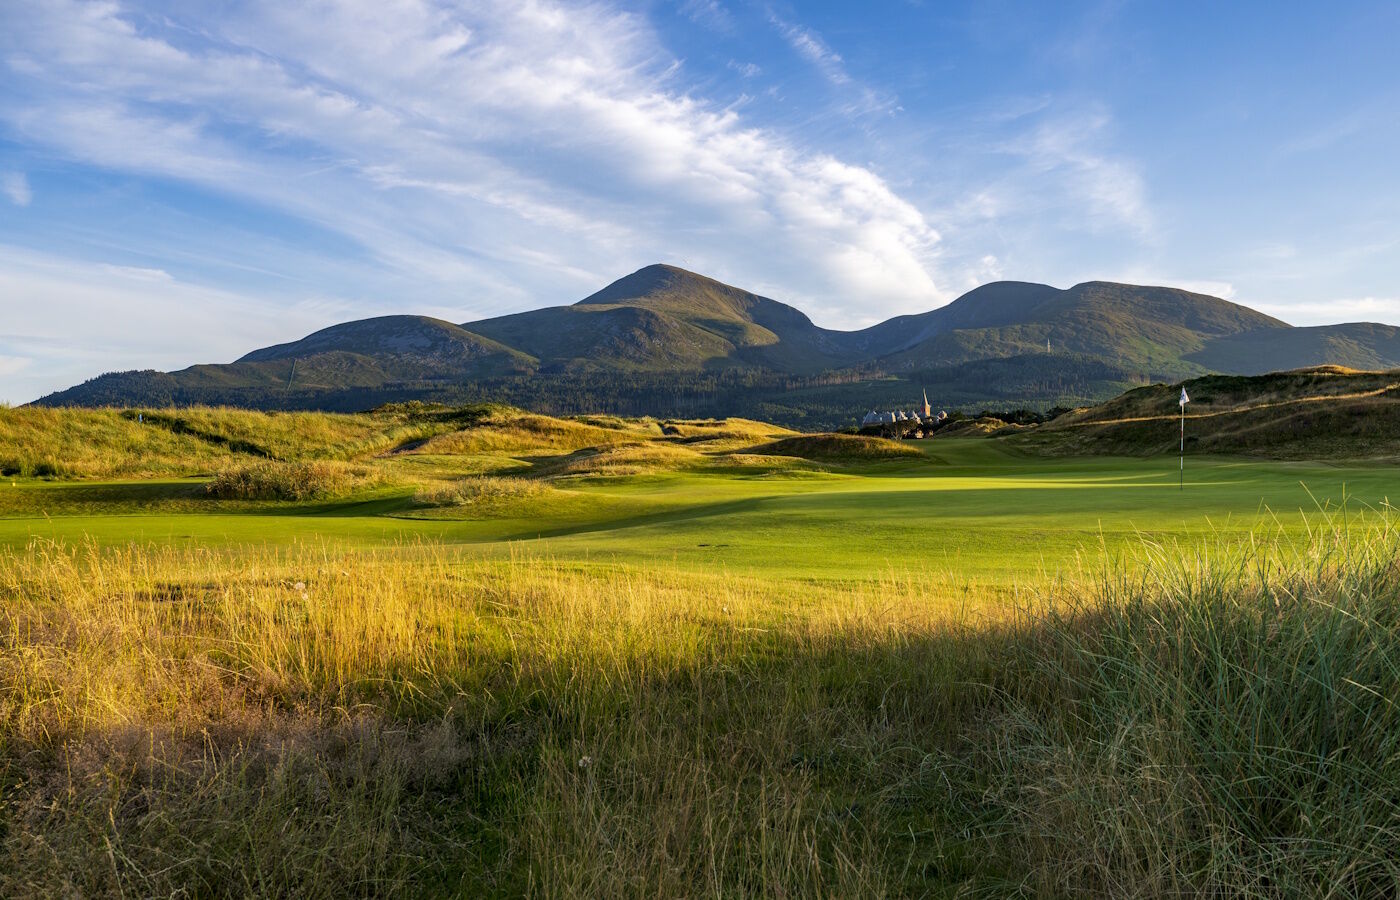
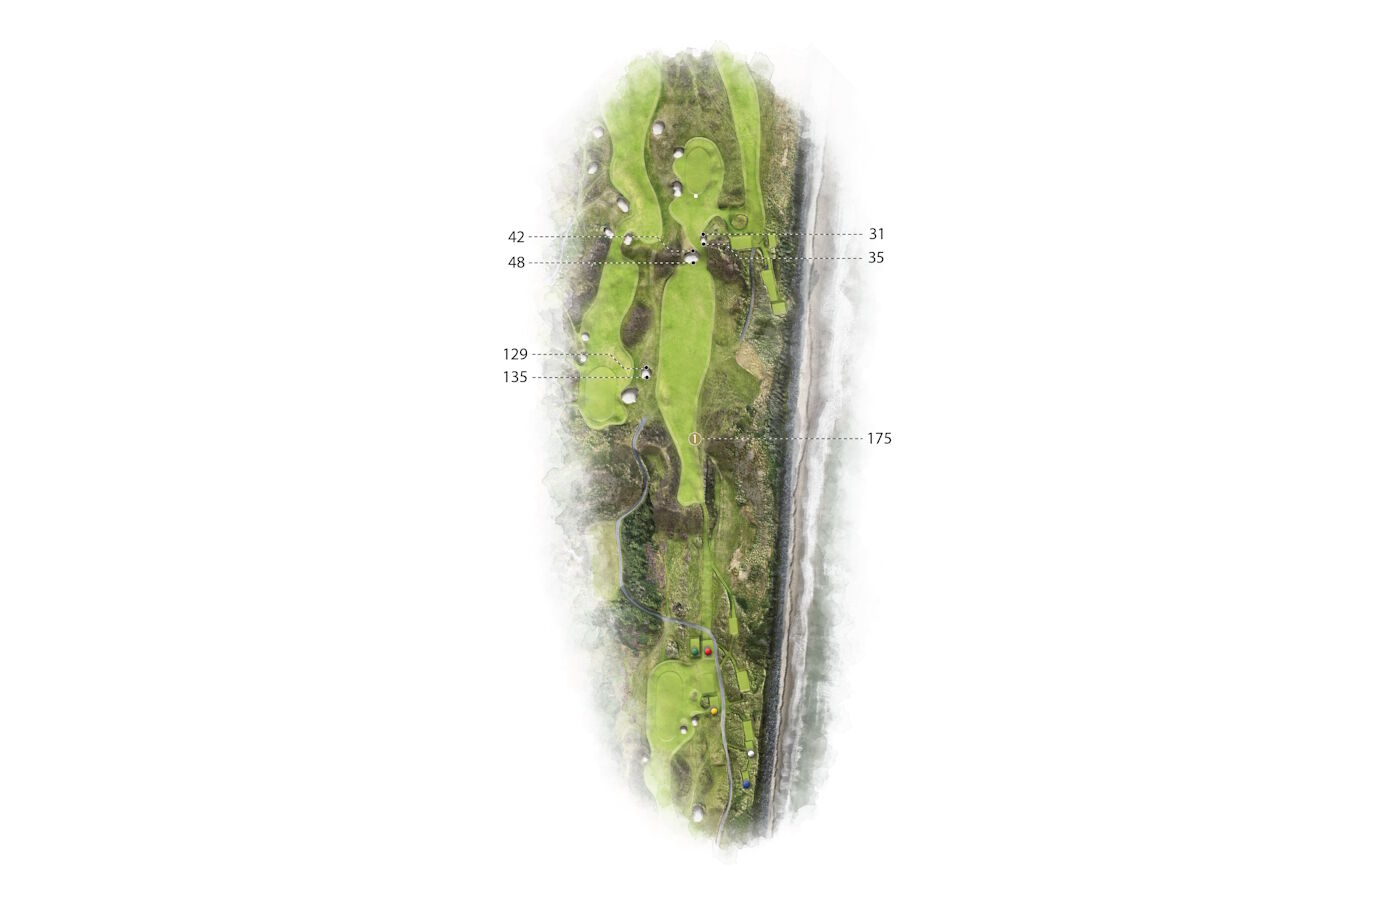
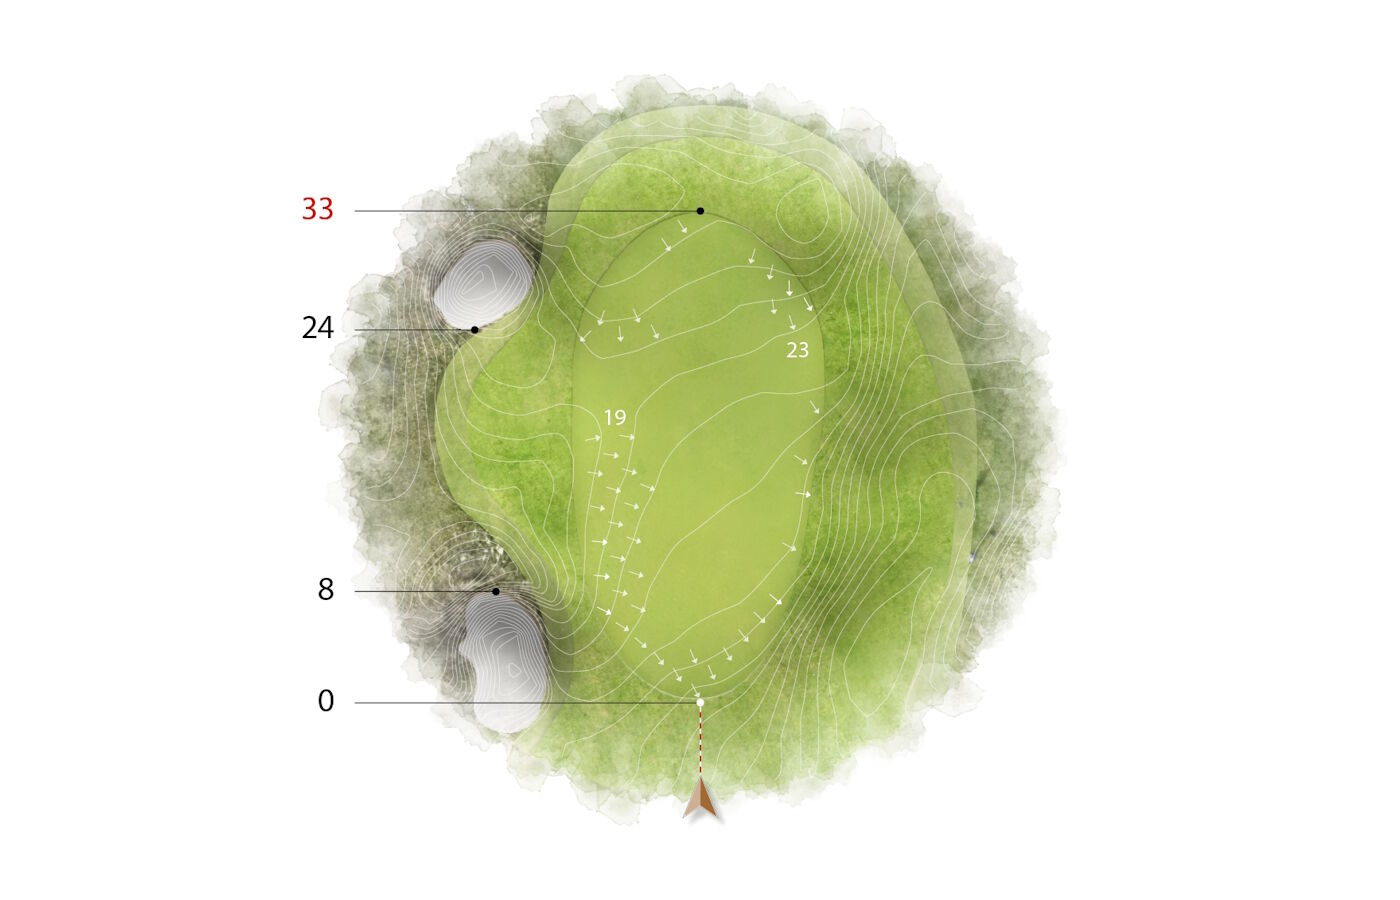
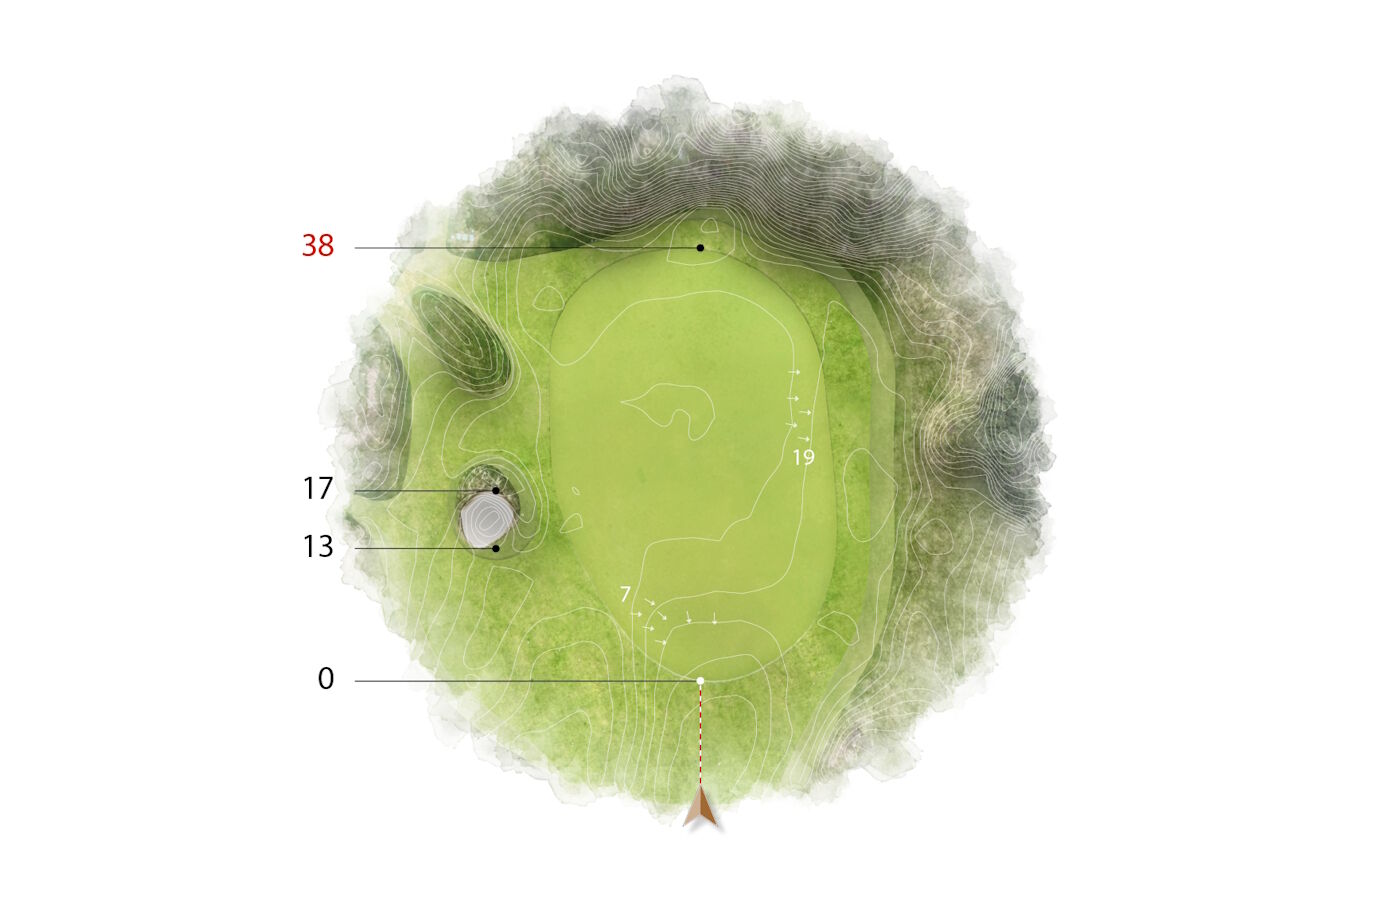
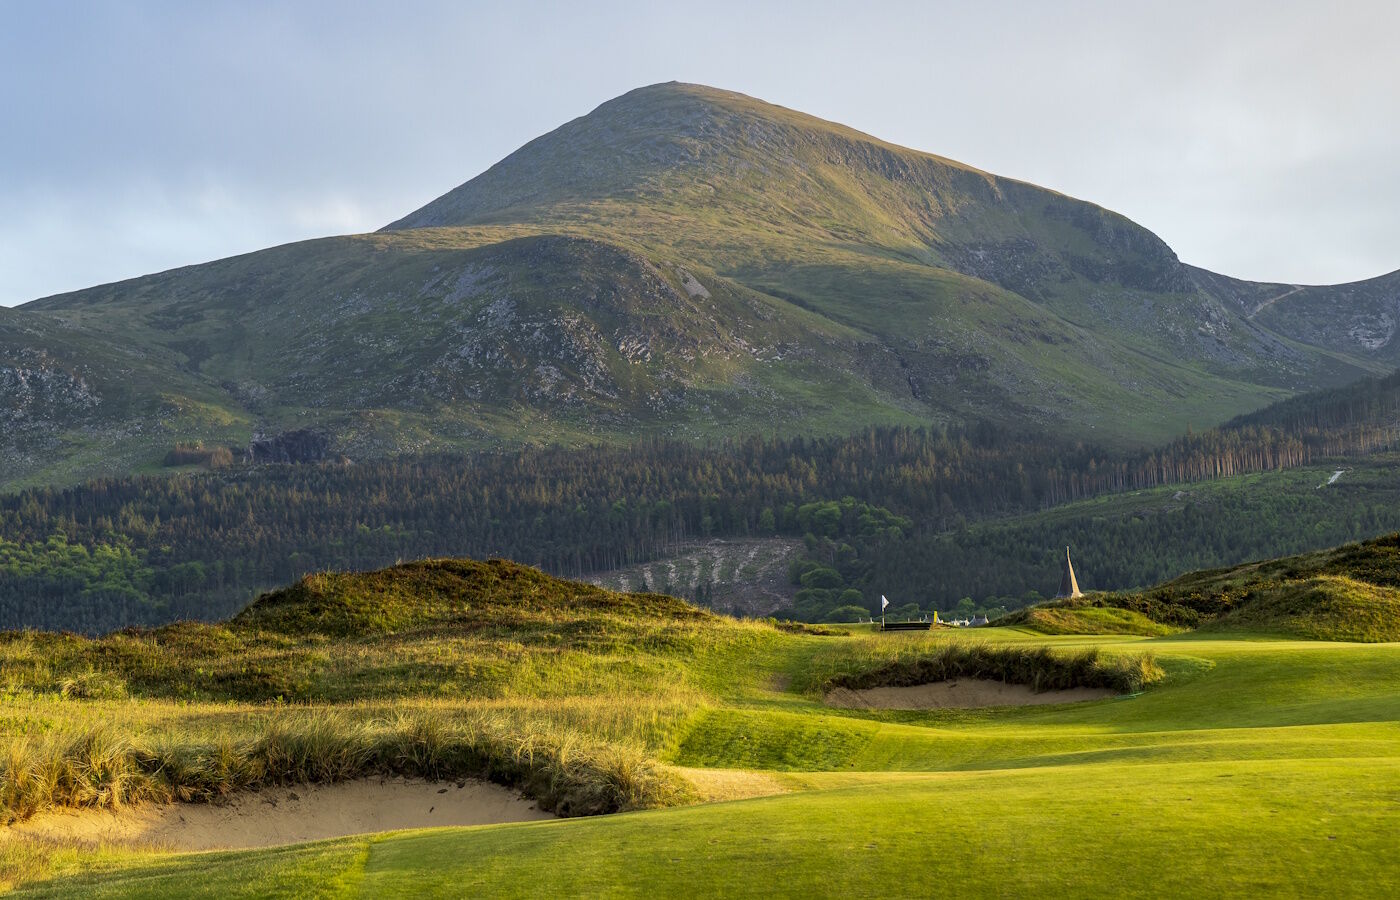
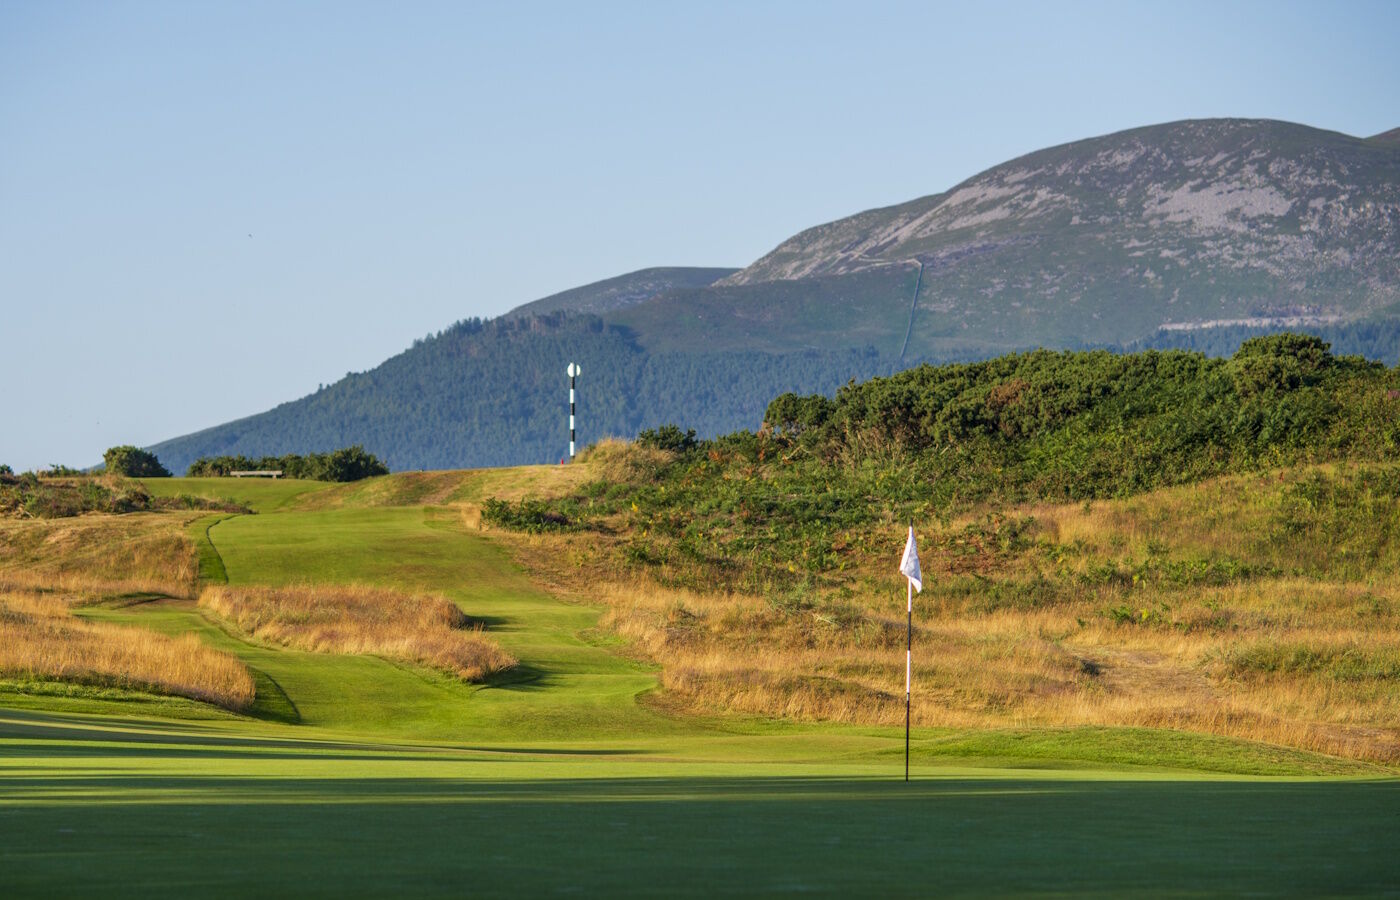
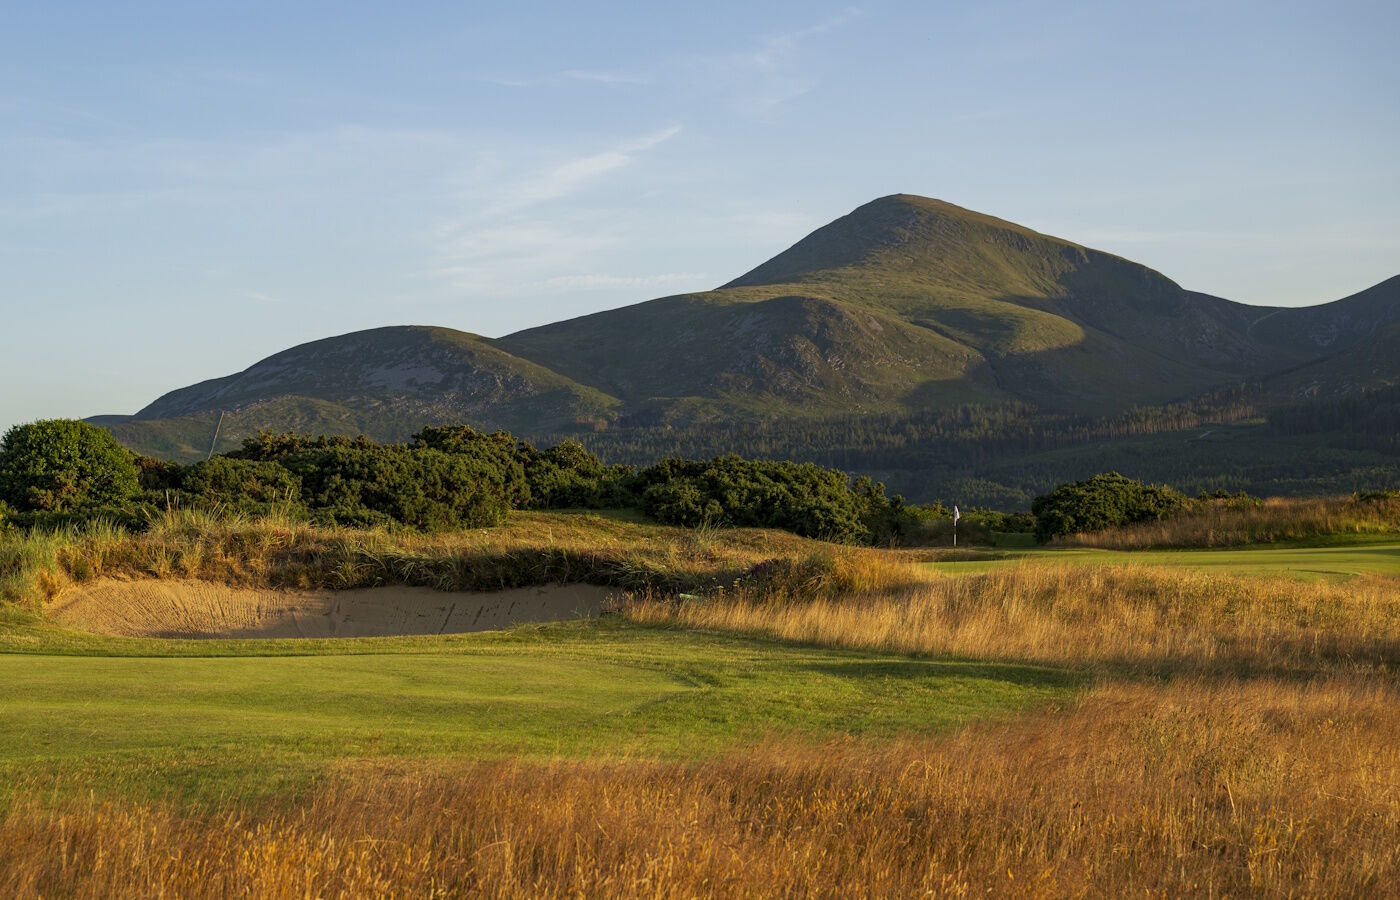
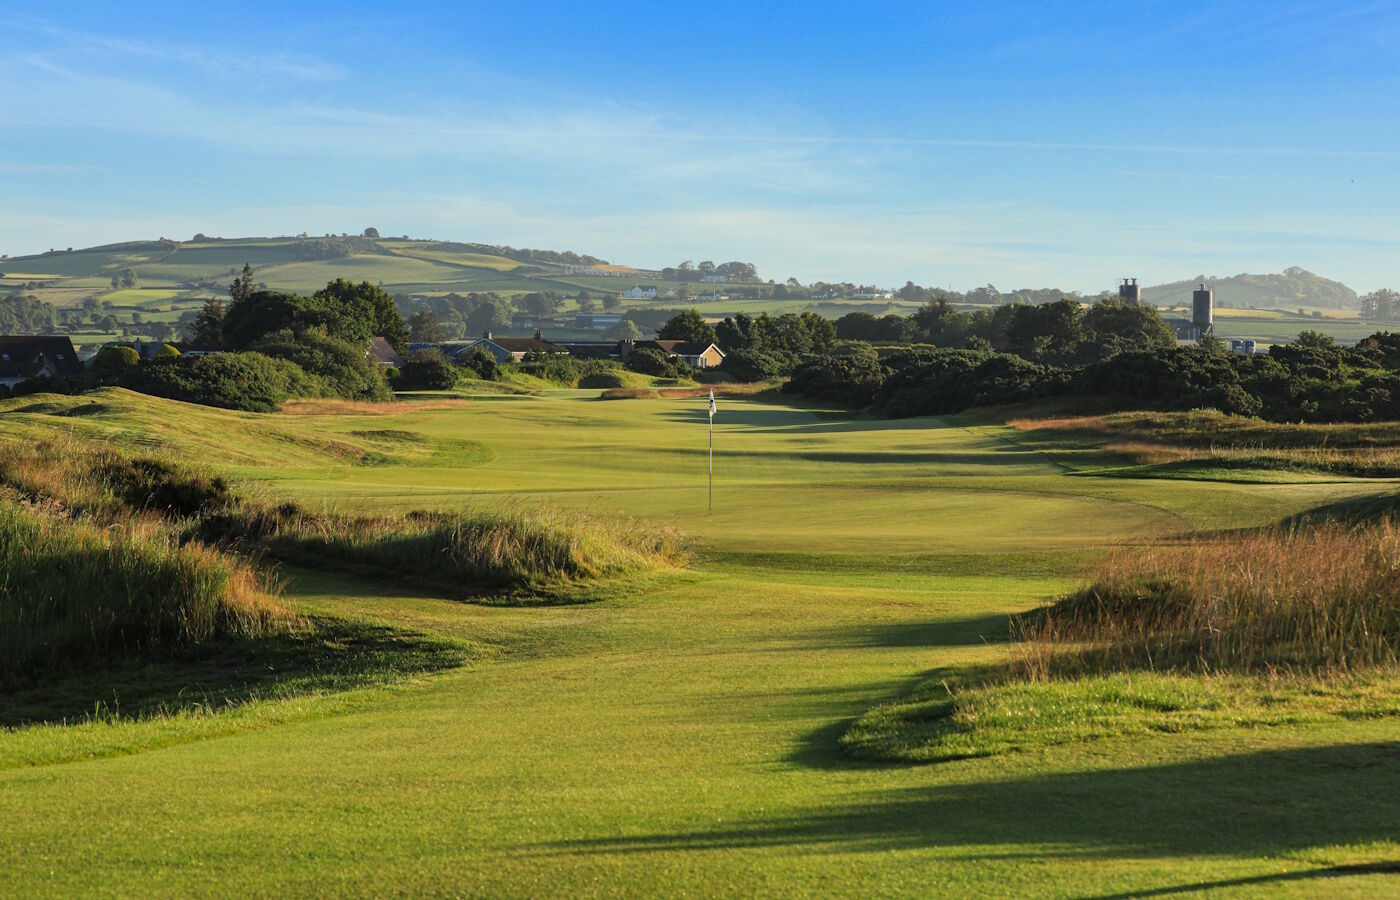
Hole 4
From the elevated tee the view is one of the most breathtaking, and most photographed, in the world of golf, with a sea of gorse from the tee and then a multitude of bunkers. The green is long and narrow, rising slightly from front to back, with severe run offs to both sides and to the rear. As with most greens at Royal County Down, putts running from front to back move towards the sea.
Read More
- Gallery
- Flyover
- Layout
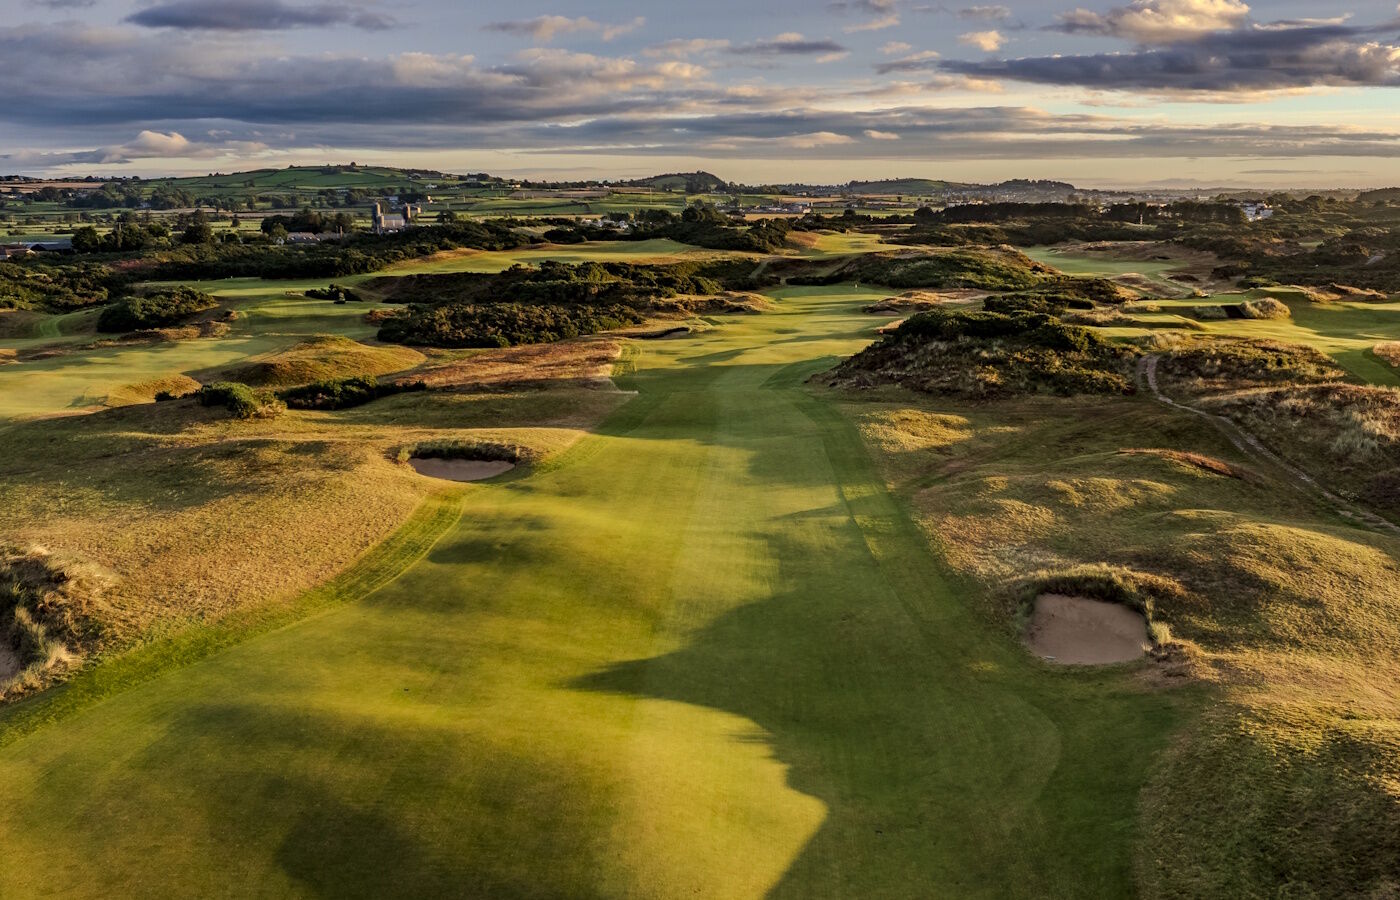
Hole 5
A blind tee shot over the white stone will find the undulating fairway. The long hitter must be careful not to run out of fairway on the left and may decide on a fairway wood. The second shot is to a well-protected green with a bunker to the left. The green slopes up from the front and from right to left. Short putts are not easy, and three-putts are common here.
Read More
- Gallery
- Flyover
- Layout
Hole 6
This hole, while not the longest on the course, offers one of the most difficult second shots to a small narrow green. The tee shot is blind and from the championship tee the white stone can be used as a marker, but a shot pulled left will flirt with a deep bunker protecting the 7th green. Although the second shot requires great finesse it is usually with a medium to short iron. The green is like an upturned saucer and requires great care when chipping.
Read More
- Gallery
- Flyover
- Layout
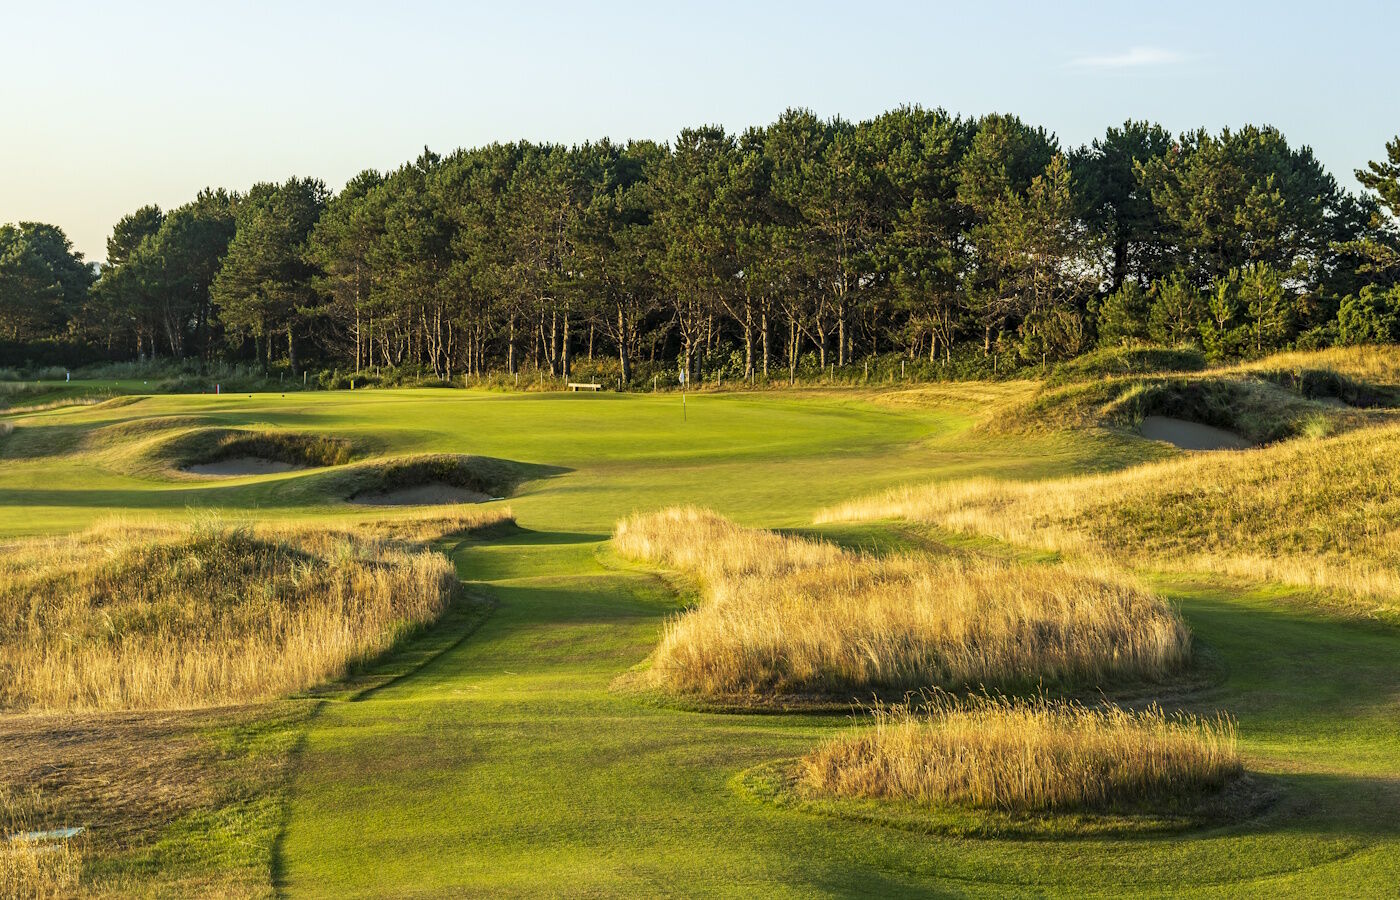
Hole 7
The shortest hole on the course. The target area on the green is the front right-hand quarter and the ball must stop quickly, as anything turning or bouncing off the steep slope to the left of the pin is almost certain to be swallowed up by the bunker left. There is a severe drop off to the back right for any shot hit too long. Missing this green always leaves a difficult up and down.
Read More
- Gallery
- Flyover
- Layout

Hole 8
A world-class hole, where a par 4 gives great satisfaction. A well struck tee shot is needed to reach the undulating fairway. The longer hitter will choose the distant cross bunkers as a line and allow the contours to take the ball over to the left centre of the fairway. The long narrow green is very fast, with a slope from right to left. One of the highest points on the course, factor in the wind when putting.
Read More
- Gallery
- Flyover
- Layout
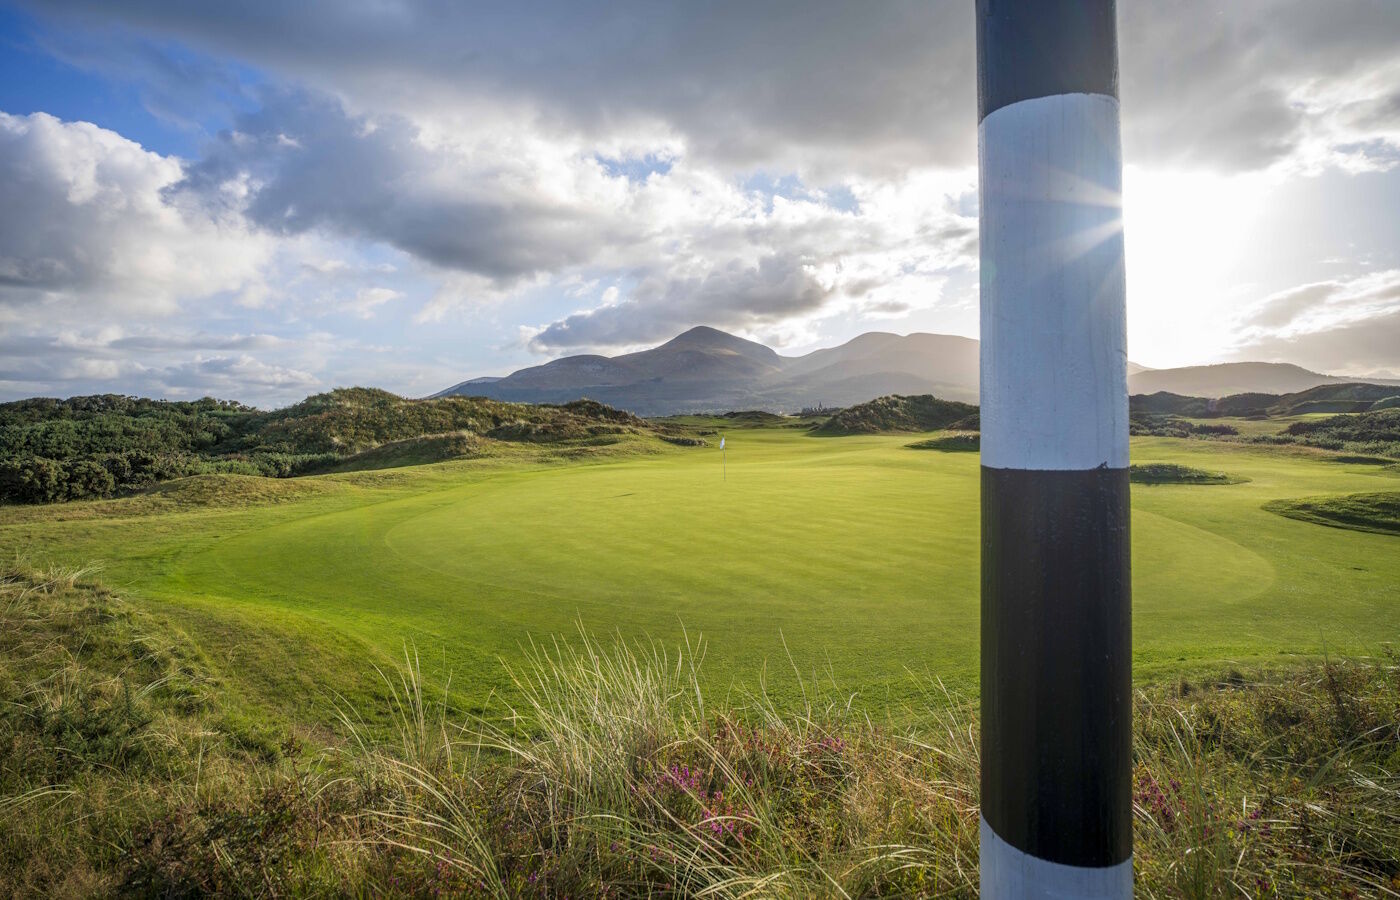
Hole 9
A tee shot onto the mountain over the black post sets up the best approach to the green. There is little room for error on the left as any shot drifting too far will be trapped by the large dune. There are two well placed cross bunkers some 50 yards short of the green, look out for the greenside bunker on the right and two pot bunkers on the left. Once again there is a great premium on hitting the target, as pitching from around this green is particularly difficult.
Read More
- Gallery
- Flyover
- Layout
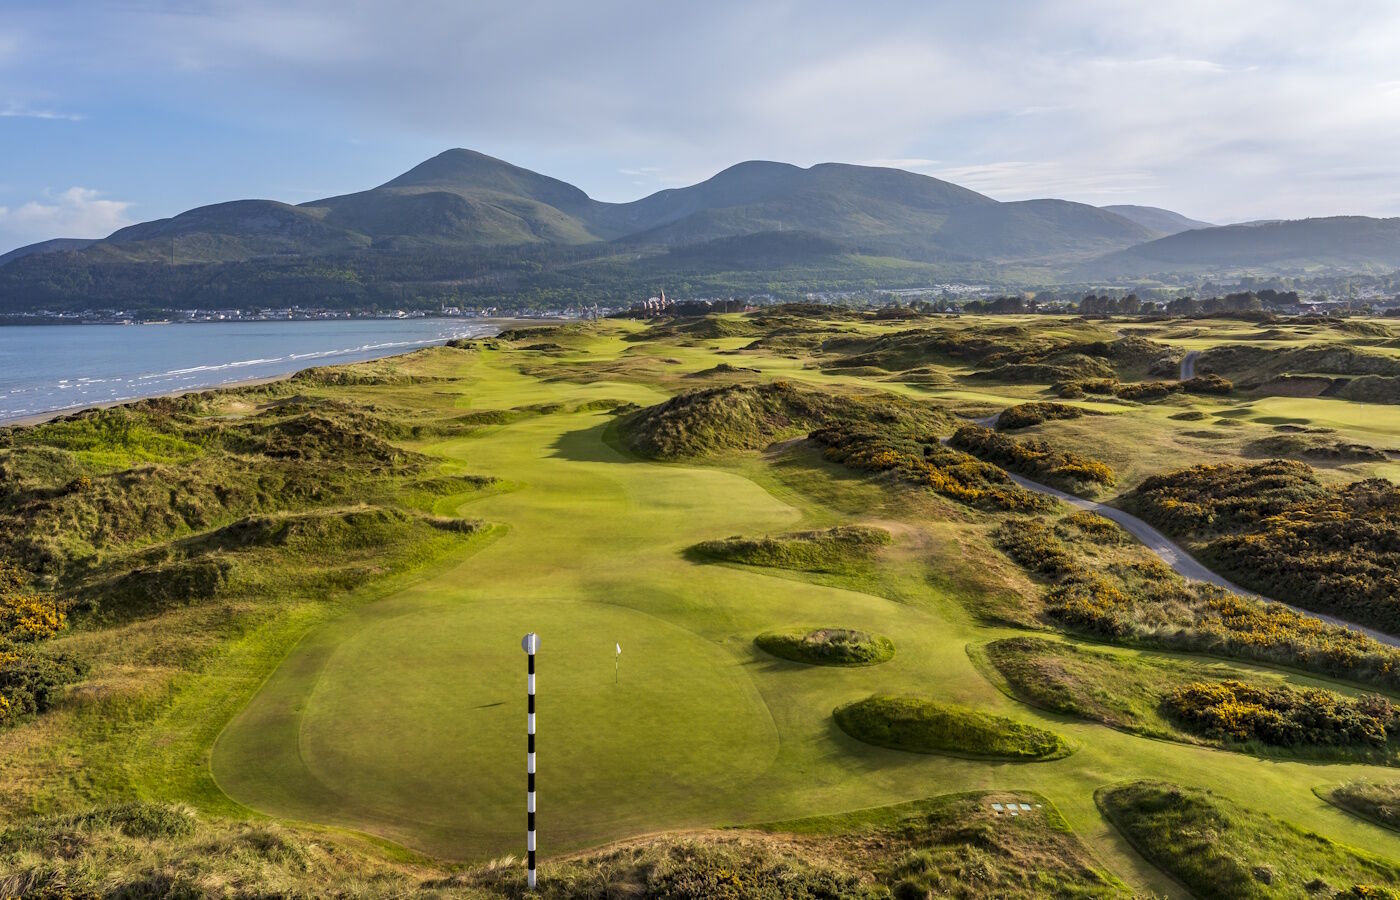
Hole 10
A short hole of great character, it asks for a shot of considerable accuracy, although there can sometimes be assistance from kindly kicks from both sides of the green. Large deep faced bunkers on right and left await mishit tee shots. The safe shot is to carry on to the left side of the green leaving a reasonable putt to any position on this large green.
Read More
- Gallery
- Flyover
- Layout

Hole 11
A blind tee shot over the marker stone leads to a sweeping dog-leg right, with the fairway running off to the left. The ideal tee shot is a fade, keeping the ball on the fairway and setting up your second shot. The majority of fairway bunkers do not come into play for the strong player, but great care must be taken in selecting the right club for the second shot. There is dead ground short of this green and the front is protected by two greenside bunkers as well as by two humps on the front quarter.
Read More
- Gallery
- Flyover
- Layout
Hole 12
Fortune favours the brave especially on the second shot at this par 5 12th hole. A potential birdie is on offer to the stronger player, but first the tee shot must find the generous but undulating fairway. The green can be reached by the longer hitters, but this demands a shot of great accuracy bypassing the two bunkers 33 yards short of a narrow long green which falls off in all directions. The green has a relatively flat putting surface with a slight rise from front to back.
Read More
- Gallery
- Flyover
- Layout
Hole 13
A very tough hole and yet one of the most beautiful in the world of golf, with high dunes on both sides of the fairway banked in heather. A tee shot long and left opens up the green, but anything short and right is blocked out by a large bunkered dune. The 13th green offers some of the most varied and difficult pin positions on the course, with more three putts witnessed here than on any other green. The green is set in its own amphitheatre and has a unique atmosphere.
Read More
- Gallery
- Flyover
- Layout

Hole 14
The final par 3 from an elevated tee. The front of the green is well bunkered on both sides. The best line is right centre of the green as everything falls to the left. The green slopes quite a lot from front to back and from right to left and therefore holds a full shot very well, but great care has to be taken when negotiating a putt from the back of this green.
Read More
- Gallery
- Flyover
- Layout
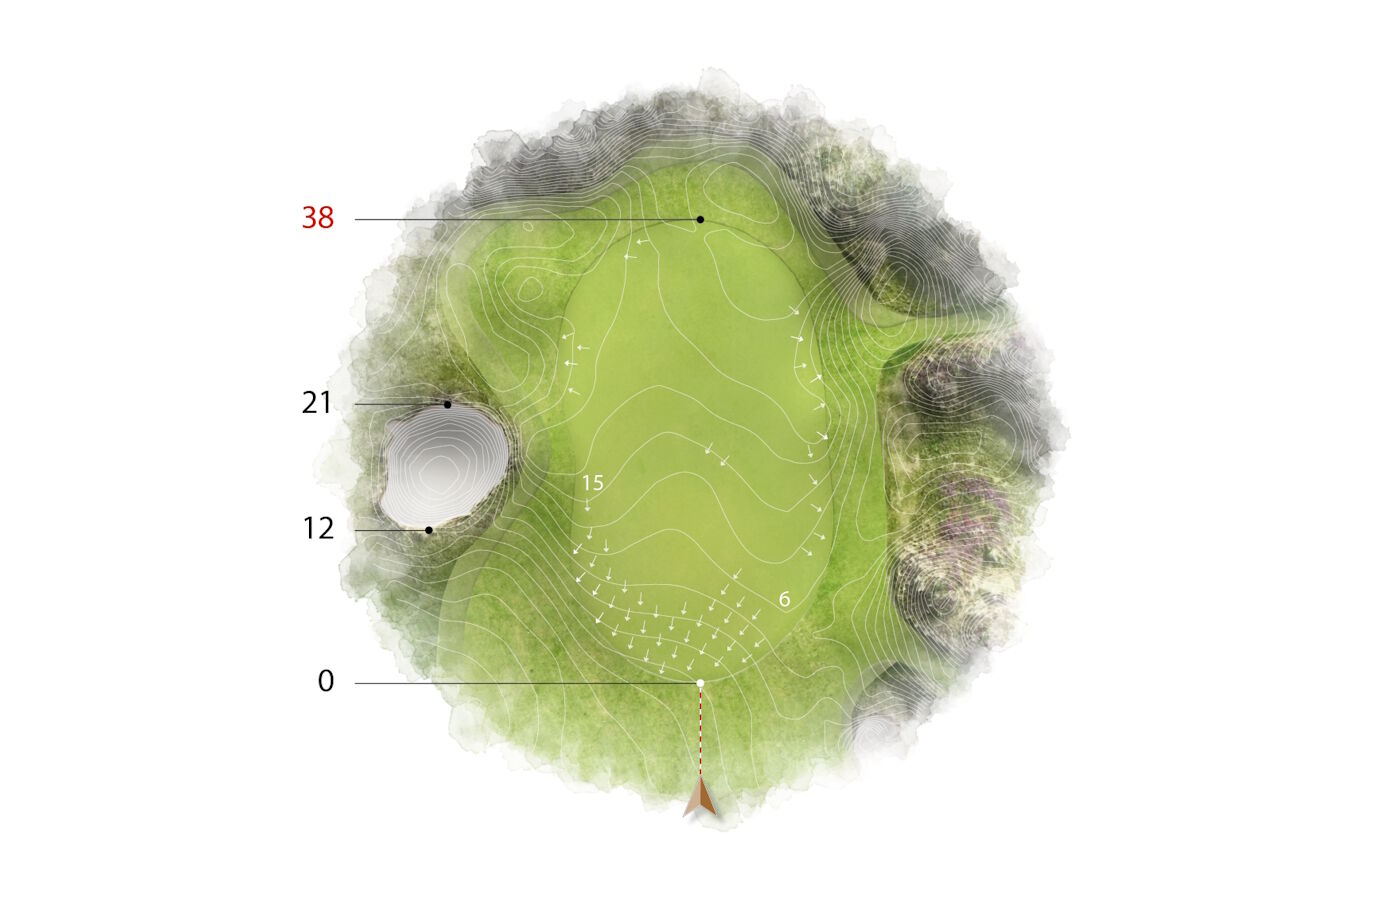
Hole 15
Certainly the most underrated par 4 on the course. An uphill tee shot to a wide fairway must carry out over the white marker stone, which is the target line to open up the second shot from short of the shoulder. This line should provide the best angle to the green. From the left-hand side of the fairway, you look directly down the throat of the green which resembles an upturned saucer falling away quickly on both sides of the green.
Read More
- Gallery
- Flyover
- Layout

Hole 16
The 16th is one of the great matchplay holes in golf. Long hitters may attempt to reach the well-protected green. A safer alternative is to lay up short of the large bunker facing you from the tee, as any tee shot bouncing right of centre will be gathered into the deep fairway bunkers protecting this hole. The approach shot demands great distance control to avoid overshooting a very fast green which slopes from front to back.
Read More
- Gallery
- Flyover
- Layout
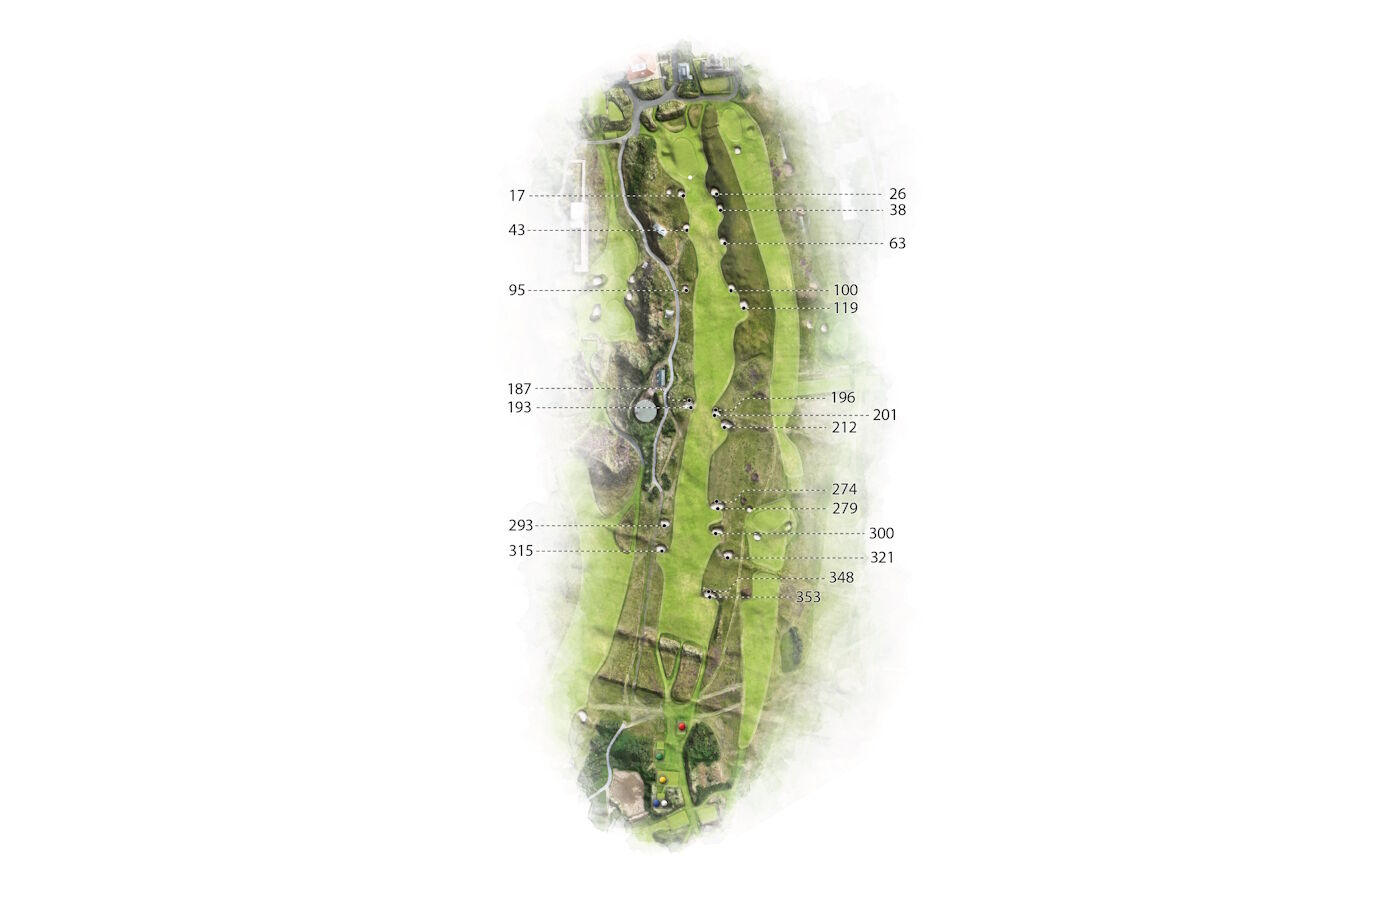
Hole 17
Playing back into the prevailing wind presents some new challenges. From the tee the line is the green in the distance, but unseen from the tee at a distance of 310 yards from the Championship tee lies a sand area which the longer hitter must take onto account. The second shot is to an elevated green in the form of a basin which gathers shots from left to right. Great care needs to be taken with club selection here as there is dead ground in front of a well-bunkered green.
Read More
- Gallery
- Flyover
- Layout


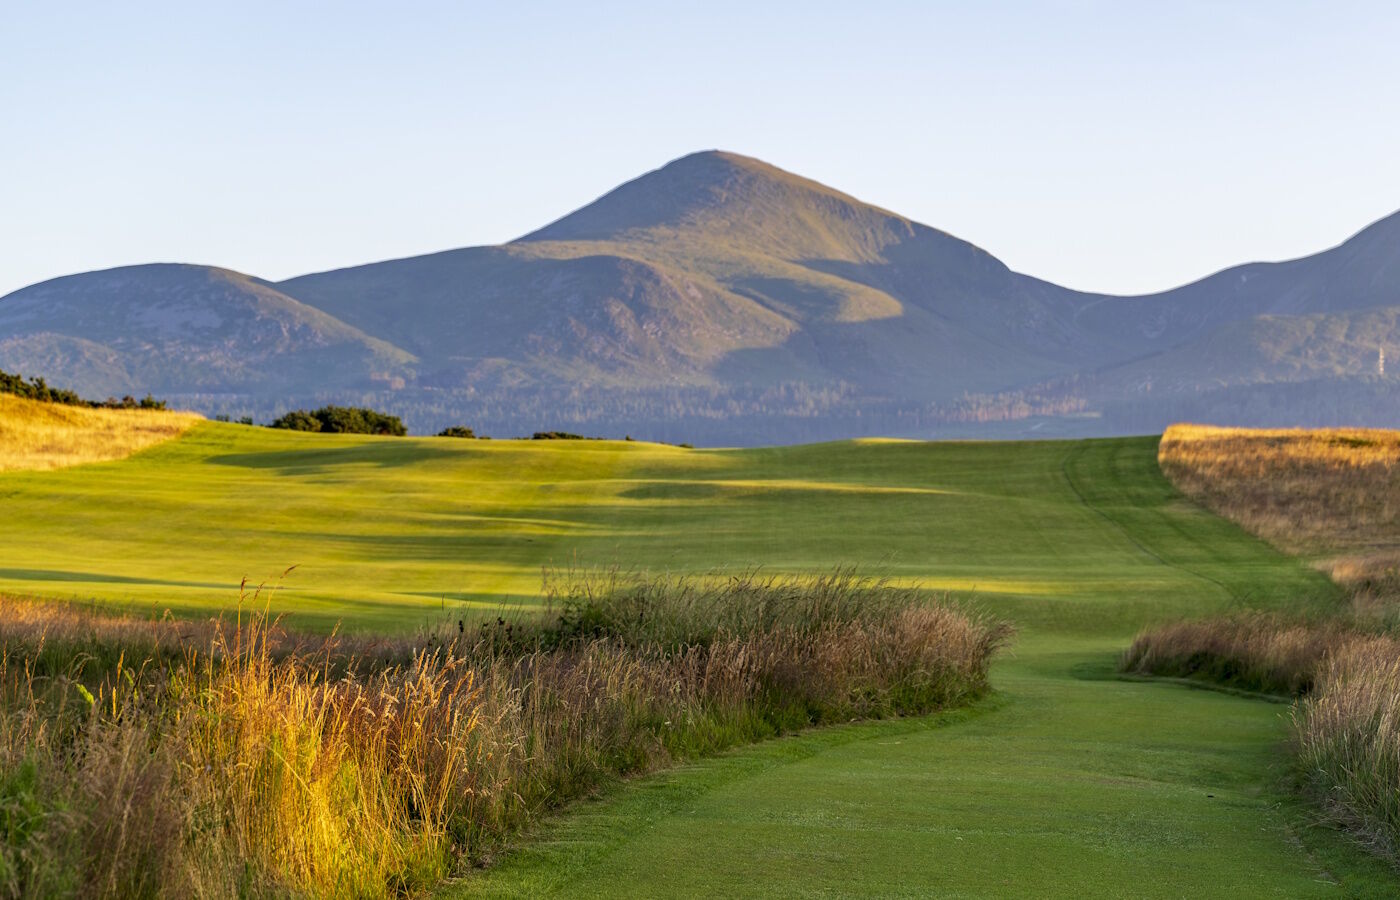
Hole 18
A truly wonderful and extremely testing finishing hole. Heading for the Mourne Mountains and the comfort of the clubhouse, the player must negotiate 18 bunkers, heather-lined fairways and one of the severest greens on the course. The tee shot is straightforward enough, but the fairway must be found to navigate the second part of this hole. The further you hit the second shot the narrower the fairway becomes. Try not to overshoot the very fast green which slopes from back to front. The safe shot is once again to the front edge, leaving an uphill putt.
